- [WJ-R]: 1980s object removal (Castlethorpe/Hanslope area)
- [XCS]: Pending
- [UkTrainSys]: v0.3.2.0 released
- [Object Library]: Preparing...
- [Website]: Fifth version of website launched
 My openBVE videos and other comments from users and
myself can also be found via my YouTube
channel.
My openBVE videos and other comments from users and
myself can also be found via my YouTube
channel.Blog and Progress Updates
November 20, 2010
New cross-platform .NET plugin for UK trains released, class 323 3D cab and Cross-City South v1.31.09 update, openBVE v1.2.9 development branch, .NET plugins and AI support
Posted by admin on November 20, 2010 at 7:30 amNew cross-platform .NET plugin for UK trains (EMUs currently), 323 3D cab / X-City South v1.31.09 updates, and openBVE v1.2.9 AI support
![]() After the latest development branch of openBVE (v1.2.9 series) was released last month, I started work on a new open source, cross-platform plugin written in C#, which I wanted to be a suitable alternative to the plugin currently used by the class 323 EMU. Simon Gathercole’s UKMUt.dll has served me well since BVE Trainsim 4 was released, but after the latest openBVE developments, I knew the time had come to create a new plugin which could be developed to take advantage of the new possibilities which openBVE now provides. I also wanted to create a plugin which could be updated as openBVE develops, either by myself, or with help from other programmers and developers, so that the community doesn’t need to experience plugin-related problems for too long.
After the latest development branch of openBVE (v1.2.9 series) was released last month, I started work on a new open source, cross-platform plugin written in C#, which I wanted to be a suitable alternative to the plugin currently used by the class 323 EMU. Simon Gathercole’s UKMUt.dll has served me well since BVE Trainsim 4 was released, but after the latest openBVE developments, I knew the time had come to create a new plugin which could be developed to take advantage of the new possibilities which openBVE now provides. I also wanted to create a plugin which could be updated as openBVE develops, either by myself, or with help from other programmers and developers, so that the community doesn’t need to experience plugin-related problems for too long.
This new plugin is called UkTrainSys (short for UK Train System of course); it is modular in design, and aims to simulate a variety of systems that trains which run on the UK’s rail network may be equipped with. Initially, I’m working to recreate as much of the functionality found in Simon Gathercole’s range of BVE 4 plugins as necessary, although some new features are included as well. So far, the plugin features the following:
- Automatic Warning System (AWS);
- Train Protection and Warning System (TPWS);
- Driver Reminder Appliance (DRA);
- Vigilance Device;
- Traction and brake interlocks;
- Battery which can be discharged, recharged and overloaded;
- Overhead supply;
- Pantograph and vacuum circuit breaker;
- Automatic Power Control;
- Power supply and electrical system circuit breakers (more for future use);
- In-cab blower;
- Head and tail lights;
- AI guard for station stop monitoring and buzzer codes;
- AI Support which assists openBVE’s AI human driver in handling systems simulated by the plugin automatically
(including support for visible in-cab driver’s hands and arms).
Note: Wipers, windscreen rain effects and diesel engine simulation are yet to be started. I’m also planning for various other systems to be inlcuded in future, such as TPWS+ (TPWS Plus), RETB, ERTMS, random failures, and a tap changer.
Users of trains which include plugins developed for BVE 4, will likely know that when openBVE’s AI human driver is enabled, the AI driver may not always be able to operate a plugin enabled train correctly, simply because openBVE has no way of knowing what systems are simulated by a plugin, and even if openBVE did know what systems were simulated, it still wouldn’t know what to do with them. Hence, the new UkTrainSys plugin uses openBVE v1.2.9’s AI Support feature, which lets the plugin assist openBVE’s AI human driver with operating the systems which are simulated by the plugin.
When you start a route, and enable openBVE’s AI human driver by pressing Ctrl+A, while using the latest release of the class 323’s 3D cab in combination with the UkTrainSys plugin (see below for the download), you will see the AI driver’s arms and hands reach out for the controls, and interact with them whenever necessary. The AI human driver will run through the startup and self-test procedure for you, pressing the AWS reset button, raising the pantograph if required, and setting the taillights and headlights. The plugin takes the time-of-day into account, so the correct headlight setting is chosen based upon the in-game time (and updated as the day goes on). The AI driver will deactivate the DRA before departure, respond to the guard’s buzzer signal with a buzzer response, cancel AWS warnings as they occur, respond to TPWS brake demands, re-raise the pantograph if it is lowered mid-journey, and so-on. The UkTrainSys plugin’s AI Support will also respond to a new beacon type, which instructs the AI driver to blow the horn at certain locations.
Issues with TPWS Isolation, and the driver’s arms remaining visible after turning off openBVE’s AI driver, are hopefully resolved…

I’ve updated the class 323’s 3D cab with new animations which require the UkTrainSys plugin (now included in the download), and I’ve also equipped Cross-City South v1.31 with the aforementioned new beacon type, so the AI driver can sound the horn automatically.
- The updated 323 3D cab and pre-configured UkTrainSys plugin can be downloaded here [2.3 MiB]
(The unrefurbished class 323 from Trainsimcentral is required first – the 3D cab and plugin update should OVERWRITE any existing files in the “Cl323 Unrefurb_openbve” folder). - If you are already using Cross-City South v1.31.071, you can download a small update to v1.31.09 link out of date [95 KiB]
If you don’t already have the route, aren’t sure which release of Cross-City South v1.31 you already have, or want to see details about the latest changes, please download the full version and visit the Cross-City South v1.31 project page instead.
The UkTrainSys plugin also has it’s own project homepage, where just the plugin, source code, current and planned feature list, changelog and documentation can be found. Train developers with an interest is using the UkTrainSys plugin, now or in future, may wish to visit the following page and read the documentation.
Note: If you have downloaded the updated class 323’s 3D cab with the pre-configured UkTrainSys plugin, remember that you should not overwrite the UkTrainSys.cfg file included with the class 323 3D cab update!
 UK Train System (UkTrainSys) Cross-platform .NET Plugin [Alpha release now available] |
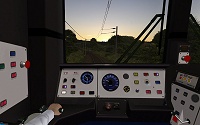
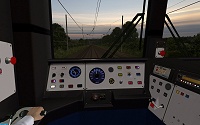
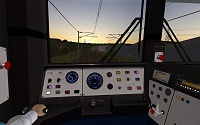
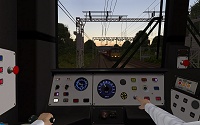
I’ve also been working on some new backdrops for both Cross-City South v2.0 and Watford Junction to Rugby. I was happy with the daytime backdrops which you’ve all seen already, but the sky portions of the last set of sunset and sunrise backdrops were entirely hand-made (replacing low resolution BVE4-era images), and I wanted to replace these with photographic textures of a similar quality to the daytime backdrops instead. Fortunately, there as been some favourable weather during the past few days, so I was able to take some nice photographs. Here are the new sunrise and sunset scenes, shown with the 323’s latest 3D cab update, and the openBVE v1.2.9 / UkTrainSys plugin enabled AI support feature in use:
    |
Recent openBVE v1.2.9 development branch updates
![]() Towards the beginning of the November, openBVE v1.2.9.11 was released (now up to v1.2.9.15), and Michelle introduced a new set of experimental preprocessing directives. These take the form of $if(), $else() and $endif(), and obviously, these allow for conditional parsing of blocks of code within a route file. This can be an alternative means of achieving what can be accomplished with the $Include directive, which is handy when only a small block of code needs to be conditional.
Towards the beginning of the November, openBVE v1.2.9.11 was released (now up to v1.2.9.15), and Michelle introduced a new set of experimental preprocessing directives. These take the form of $if(), $else() and $endif(), and obviously, these allow for conditional parsing of blocks of code within a route file. This can be an alternative means of achieving what can be accomplished with the $Include directive, which is handy when only a small block of code needs to be conditional.
Personally, I’m finding this very handy for such features as temporary speed restrictions (TSRs). In this scenario, I can randomly introduce TSRs at different locations, so routes can be rather more fun to drive. At the start of the file, we can declare a variable $Sub(0), which has a random number assigned from within a certain range, and then use the value stored in $Sub(0) as a condition which is used by $if() directives. If the value held by $Sub(0) is zero, then the code within any $if() block which depends upon this variable is not used, but if the value is greater than zero, then it is. By using the $else() directive, we can show something else if the TSR is not to be included, such as discarded sections of old rail, left there by the track workers after they made their repairs and removed the TSR. Spate indicators could be handled in a similar way.
For example:
$Sub(100) = $Rnd(0;1)
With Structure
.FreeObj(0) tsr_warn_20mph.csv
.FreeObj(1) tsr_20mph.csv
.FreeObj(2) tsr_terminate.csv
.FreeObj(3) discarded_rail_sections.csv
.FreeObj(4) track_workers.csv
.Beacon(0) portable_aws_magnet.csv
With Route
; Enclose the route commands related to a TSR within $if()/$else()/$endif() directives…
$if($Sub(100))
3000, .Beacon 44001;0, ; portable AWS magnet
$endif()
$if($Sub(100))
3183, .Freeobj 0;0, ; 20 mph TSR advanced warning board
$endif()
$if($Sub(100))
4200, .Freeobj 0;1, .Limit 33;0, ; commencement of 20 mph TSR
$else()
4305, .Freeobj 0;3;5, ; no TSR so show discarded old rails instead
$endif()
$if($Sub(100))
4400, .Freeobj 0;2, .Limit 97;0, ; termination of TSR
$endif()
It’s also possible to use these new preprocessing directives elsewhere in the route file. For example, a different object could be assigned to a free object index, depending upon a condition being true. You can also nest these new preprocessing directives; i.e. place $if/$else()/$endif() selection statements within other selection statements, for example:
$if($Sub(100))
4200, .Freeobj 0;1, .Limit 33;0, ; commencement of 20 mph TSR
$if($Sub(101))
4205, .Freeobj 0;4;-4, ; track workers shown based upon another $Sub variable but only if the TSR is shown
$endif()
$else()
4305, .Freeobj 0;3;5, ; no TSR so show discarded old rails instead
$endif()
Support for these new preprocessor directives is still experimental, and not guaranteed to be included in the next stable release of openBVE, however I’ve not encountered a problem with the feature thus far, at least with regard to the things I’d like to use the feature for, and it’s really very easy to use. Some more testing would be beneficial, but I hope the feature stays, and I’ll certainly be making use of it if it does.
Other news – Chashinai .NET plugin updated with AI support, new Network West Midlands video, and FEVF railway updates
![]() In case you weren’t aware, the new cross-platform .NET plugin which is used by the trains which run on the Chashinai Railway, was updated earlier this month to include AI support, which is a lot of fun, especially with the Chashinai 9000 series train complete with ATS-Sn, ATS-P, ATC and TASC. As with the new UkTrainSys plugin, the updated Chashinai Railway plugin’s AI support assists openBVE’s AI human driver in operating the safety systems, so you can enable the AI human driver and even watch the startup procedures handled by the AI driver. The plugin source code is available as well, of course.
In case you weren’t aware, the new cross-platform .NET plugin which is used by the trains which run on the Chashinai Railway, was updated earlier this month to include AI support, which is a lot of fun, especially with the Chashinai 9000 series train complete with ATS-Sn, ATS-P, ATC and TASC. As with the new UkTrainSys plugin, the updated Chashinai Railway plugin’s AI support assists openBVE’s AI human driver in operating the safety systems, so you can enable the AI human driver and even watch the startup procedures handled by the AI driver. The plugin source code is available as well, of course.
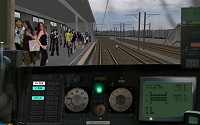 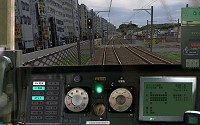 Chashinai Railway Takahagi Line (9000 series train, ATS-P, AI driver enabled) |
I also wanted to quickly mention that Steve Green has posted a short YouTube video of the upcoming Network West Midlands 2010 update, demonstrating animated level crossing barriers interlocked with the signalling, together with updated objects such as a new AWS magnet, which I thought looked really good:
Several other videos of the upcoming NWM release can also be found on Steve’s YouTube channel, and screenshots can be found on the Network West Midlands website.
Lastly, I wanted to show something a little bit different – Roberto Benini, developer of the FEVF (Ferrovia Elettrica Val di Fiemme) railway, has released an animated Mallet Henschel & Sohn 6036 steam loco for openBVE, which is well worth a look, and I noticed that the FEVF Railway itself now has some moving trains at Cavalese station too. The route and train can be downloaded here:
Roberto Benini has also posted a YouTube video of the new loco:
Tags: Animated Objects, Artwork, Cross-City South, Functions, openBVE, openBVE Community, Screenshots, Site News, Software, Watford Jn to Rugby
Posted in openBVE, Site News | 13 Comments »
July 11, 2010
openBVE v1.2.7.0 released, new Railsimroutes.net site design, Cross-City South v1.31.07 and miscellaneous project updates, Watford Junction to Rugby screenshot featured in the UK’s PC Gamer Magazine, Genova Brignole – Recco route (as far as Genova Nervi) released
Posted by admin on July 11, 2010 at 6:00 amopenBVE v1.2.7.0 released
![]() Today sees the release of openBVE v1.2.7.0, and some interesting changes have taken place. To begin with, the handling of key and joystick buttons has been revised, and key repeat is now possible. This means that you can hold a key down, and after a short delay, the keypress will be repeated continuously until the key is released again. I’m glad that openBVE now supports this functionality, and this is great for quickly moving a power handle to the limit of it’s travel without having to keep tapping the key, or for sounding the horn in a long and loud fashion, for example. The fly-by camera has also been improved, and now, the leading vehicle (of the nearest train) is tracked by the camera, which is great for loco-hauled trains in particular. 🙂
Today sees the release of openBVE v1.2.7.0, and some interesting changes have taken place. To begin with, the handling of key and joystick buttons has been revised, and key repeat is now possible. This means that you can hold a key down, and after a short delay, the keypress will be repeated continuously until the key is released again. I’m glad that openBVE now supports this functionality, and this is great for quickly moving a power handle to the limit of it’s travel without having to keep tapping the key, or for sounding the horn in a long and loud fashion, for example. The fly-by camera has also been improved, and now, the leading vehicle (of the nearest train) is tracked by the camera, which is great for loco-hauled trains in particular. 🙂
Superelevation is now simulated differently as well; in previous versions, when cant was applied, the train would simply rotate around it’s z-axis, but now, the outer wheel is raised instead. Cant is also interpolated better now, leading to smoother transitions between differing levels of cant. I’m currently rebuilding the canted track objects used by my routes to make better use of these openBVE improvements, such that the wheels will remain on the rails when passing along superelevated track, and the cant transitions at either end of such sections:
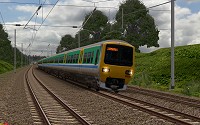 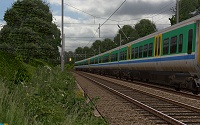 Screenshot showing superelevation in openBVE v1.2.7.0 and Cross-City South v2.0. Note the wheels touching the rails throughout the transition curve (scenery is not finished yet). |
Cant behaviour can also be adjusted now, via the new 'Options.CantBehavior' command. Previously, cant was always applied towards the curve centre, i.e. banking inwards, and this couldn’t be overidden. Also, it wasn’t possible to have cant on straight track. Now though, cant be in either direction, regardless of the direction of the curve, and cant can be applied on straight track too. How might this be useful for simulating a real railway? Well, on the 11th July last year (exactly a year ago as it happens), I was unexpectedly invited for a visit to the preserved Gloucestershire and Warwickshire Railway, and this line has a curve known as Chicken curve, and one peculiar feature was that the cant at this location leaned outward from the curve rather than inwards. So, openBVE can simulate this too, now. Class 20 “chopper” (20154) was our traction on the day, and here’s a photo for fans of the class 20, which I took before we departed from Toddington:
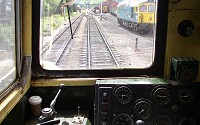 In the cab of a class 20 loco at Toddington, on the preserved Gloucestershire and Warwickshire Railway. |
The simulation of track inaccuracy has been overhauled, too. Previously, the familiar cab and vehicle sway was achieved with horizontal and vertical movement, but now, cant inaccuracy and bounce is also modelled, and cars rock from side to side as well as moving vertically and horizontally. While we were testing the new inaccuracy model, I found that this was an interesting way to represent the effect of travelling over more poorly maintained jointed rails. I’ve made some adjustments to the track accuracy in the newly udpated Cross-City South v1.31.07 (see below for download), and travelling over pointwork or on the jointed rail sections of the Cross-City South, should be a little more interesting now, especially when the class 323’s 3D cab is used. 🙂
Essentially, I think .Accuracy values of 0 to 2.0 are suitable for continuous welded rail, and values of 2.1 to 4 are suitable for jointed rails. I’m aware that not everyone may be sure about the new inaccuracy model, however I think it works well when used sensibly, and I would also point out that the development release has been publicly available for testing for at least three weeks, so if you don’t like it, you’ve missed your chance to give feedback prior to the latest stable release. Nevertheless, if you have any comments, please let us know. Personally I prefer the new algorithm and enjoy the representation it can give when accompanied by the sounds of jointed rails, but some may prefer the old; please give it a try with the updated Cross-City South v1.31.07 and class 323 3D cab though (see below), as this update shows what the new inaccuracy model can do. Also bear in mind that you may only prefer the old algorithm because you’re used to it, not because it was more realistic; the old algorithm had it’s limitations.
Also, BVE4 style timetable textures can now be displayed when 3D cabs are used, and not just with legacy 2D panels, although this is considered an experimental feature. The timetable texture can be shown as part of the in-game user interface overlay, or as part of a 3D cab (animated object); if the latter is not specifically catered for within the 3D cab, then the former is the default behaviour. Adding BVE4 style timetables to a 3D cab is easy to do; I would recommend simply creating an object with a four-vertex mesh and default texture applied (which is shown if there is no timetable image to display), and add this object to your panel.animated file. Then, make use of the new 'TextureOverride =' command:
CreateMeshBuilder
AddVertex,-0.35,2.9,11.52
AddVertex,-0.06,2.9,11.52
AddVertex,-0.06,2.6,11.52
AddVertex,-0.35,2.6,11.52
AddFace,0,1,2,3
LoadTexture,some_suitable_default_texture.png
SetTextureCoordinates,0, 0, 0
SetTextureCoordinates,1, 1, 0
SetTextureCoordinates,2, 1, 1
SetTextureCoordinates,3, 0, 1
[Object]
States = 3d_cab\timetable.csv
TextureOverride = timetable
I’ve added the aforementioned timetable functionality to the class 323’s 3D cab, but it’s commented out by default, as displaying the timetable images via openBVE’s UI overlay makes more sense where the Cross-City South and class 323 are concerned, plus the feature is still experimental.
You can download the update here, and if you want to experiment with the 'TextureOverride =' command, please see the included ‘Readme_3DCab.txt’ file:
→ 3D cab for unrefurbished class 323 – July 2010 [1.7 MiB]
For more detailed information about the new cant behaviour, and timetable support in .animated objects, please read the official openBVE documentation. For details of all the changes introduced with the v1.2.7.0 release of openBVE, including those not mentioned here, please see the changelog.
Cross-City South v1.31.07 update
![]() As openBVE v1.2.7.0 has been released, I’ve updated Cross-City South v1.31 to remove an obsolete timetable texture, changed some of the timetable images to make them suitable for both openBVE and BVE4, and made adjustments to track inaccuracy to take better advantage of openBVE v1.2.7.0’s new track inaccuracy model. I’ve renamed the route folders to more clearly indicate which sets of routes should be used with openBVE, BVE 4 or BVE 2, as well. I’ve also decided to finally split the openBVE routes away from the BVE 4 routes, as testing every openBVE improvement across numerous route files for 100% backwards compatibility with BVE 4 is somewhat inconvenient, and this also lets me get rid of all those pesky "detail levels" in the openBVE route folder, as these simply aren’t needed with openBVE. The new naming convention is as follows, and should be much clearer (the BVE 2 foldername is as it is, so it’ll fit within the size constraints of BVE 2’s small file selection list):
As openBVE v1.2.7.0 has been released, I’ve updated Cross-City South v1.31 to remove an obsolete timetable texture, changed some of the timetable images to make them suitable for both openBVE and BVE4, and made adjustments to track inaccuracy to take better advantage of openBVE v1.2.7.0’s new track inaccuracy model. I’ve renamed the route folders to more clearly indicate which sets of routes should be used with openBVE, BVE 4 or BVE 2, as well. I’ve also decided to finally split the openBVE routes away from the BVE 4 routes, as testing every openBVE improvement across numerous route files for 100% backwards compatibility with BVE 4 is somewhat inconvenient, and this also lets me get rid of all those pesky "detail levels" in the openBVE route folder, as these simply aren’t needed with openBVE. The new naming convention is as follows, and should be much clearer (the BVE 2 foldername is as it is, so it’ll fit within the size constraints of BVE 2’s small file selection list):
- <YourPath>\Railway\Route\Bham_XCitySouth_BVE2\
- <YourPath>\Railway\Route\Birmingham_Cross-City_South_BVE4\
- <YourPath>\Railway\Route\Birmingham_Cross-City_South_openBVE\
Cross-City South v1.31.05 users can download a smaller update here, which updates v1.31.05 to v1.31.07:
→ v1.31.07 update for existing Cross-City South v1.31.05 users [1.03 MiB]
If you have an earlier version of Cross-City South installed, or you’re not sure which version you already have, please download the full version instead.
Genova Brignole – Recco route (as far as Genova Nervi thus far) for openBVE released
![]() I wanted to mention that a fantastic new route has been released for openBVE, the Italian Genova Brignole – Recco route (as far as Genova Nervi thus far, and 8.1 Km in length). This is one of the most graphically excellent routes I’ve seen to date, with superb textures, and I’m impressed; the route is beautiful. There are some animated objects to enjoy, and staggered catenary as well, which is great to see; pedantic people like me will note that some registration arms pull in the wrong direction, though. 😉
I wanted to mention that a fantastic new route has been released for openBVE, the Italian Genova Brignole – Recco route (as far as Genova Nervi thus far, and 8.1 Km in length). This is one of the most graphically excellent routes I’ve seen to date, with superb textures, and I’m impressed; the route is beautiful. There are some animated objects to enjoy, and staggered catenary as well, which is great to see; pedantic people like me will note that some registration arms pull in the wrong direction, though. 😉
You’ll likely need to read the included PDF instructions before operating the newly released ALn501 – Minuetto v2 train, but it’s well worth the effort. Incidentally, the train comes with some very detailed exterior car objects. These look very nice, although they would benefit from the addition of custom normals to smoothly shade some of the surfaces. Please note that these exterior car objects may have quite an impact on your framerate; even on my Core 2 Quad Q9650 / GeForce GTX 260 system, I get around 30fps in the external view, which is down from anywhere between 80 – 300 fps in the cab view. If you have a slow PC, you may want to stay in the cab. I’m looking forward to seeing this route develop further. 🙂
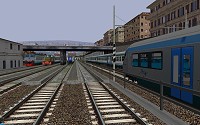 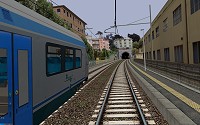 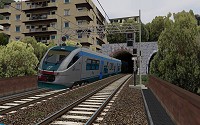 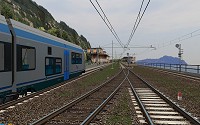 The Italian Genova Brignole – Recco route (as far as Genova Nervi thus far), available from BVEMania (Trenomania) (see the Download section) |
Miscellaneous news
![]() I’m officially announcing the Railsimroutes.net UK Railway Infrastructure Object Library today, which will contain all the objects and textures which are shared between my two upcoming openBVE route projects, Birmingham Cross-City South v2.0, and Watford Junction to Rugby v1.0. This library will be maintained by me, and all developers will be welcome to install and use this library with their own projects, without any conditions or requirement to seek permission.
I’m officially announcing the Railsimroutes.net UK Railway Infrastructure Object Library today, which will contain all the objects and textures which are shared between my two upcoming openBVE route projects, Birmingham Cross-City South v2.0, and Watford Junction to Rugby v1.0. This library will be maintained by me, and all developers will be welcome to install and use this library with their own projects, without any conditions or requirement to seek permission.
The library will contain all sorts of objects, including track, catenary, signals, lineside objects, some basic scenery, and so-on, which might help to make new routes easier to develop. It will also have the advantage, that whenever I update the library, perhaps with higher quality textures or better objects, any routes which call upon the library, will also get updated. I’ll plan it carefully, to ensure that changes remain backwards compatible. I anticipate that the library will be released along with Cross-City South v2.0 initially, and then it’ll receive it’s first update when Watford Junction to Rugby is ready.
 UK Railway Infrastructure Object Library [Now in development] |
Next, as you may have noticed, I’ve decided to increase the version number of my upcoming Cross-City South upgrade for openBVE, from version 1.4, to version 2.0. I think I’m making enough changes and enhancements to the route, to justify a version 2.0 release instead. 🙂
I’ve also updated the openBVE Help and Information section to cover the installation of openBVE in Ubuntu 10.04 (Lucid Lynx). It’s hard to imagine how installing openBVE via the Ubuntu Software Centre could be any easier, and installing openBVE via this method, also makes installing and running the latest official openBVE release with Mono, easier too. I’ve decided to remove the instructions explaining how to run openBVE with Wine, as I’m experiencing problems with the version of Wine available for install with Ubuntu 10.04, relating to GDI+ (and the problem isn’t just occurring with openBVE, either). Perhaps something to do with a Beta release of Wine being supplied rather than a stable release, I don’t know. Running with Mono is much easier though, if you can live without plugin DLLs.
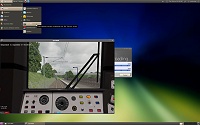 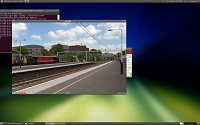 openBVE Help and Information updated for Ubuntu 10.04 users |
I was lucky enough to have one of my screenshots published in the July issue of the UK edition of PC Gamer magazine, where I also gave a brief overview of the work being undertaken on openBVE 2. I will admit that it was nice to handle such a press enquiry! Here’s the screenshot which was chosen for the article, shown amongst screenshots of various simulators, such as Railworks, X-Plane, Sail Simulator, Space Shuttle Mission Simulator, and others:
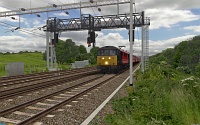 The Watford Junction to Rugby screenshot chosen to appear in simulation article “The Realists”, in the July 2010 issue of the UK edition of the best selling PC Gamer magazine. |
Incidentally, I also want to apologise for the lack of progress with my routes, and for posting so many screenshots and not delivering anything, which I feel that some of you are not impressed by. This is mainly due to me working on openBVE 2, which means that I don’t have much time to devote to the routes at the moment. openBVE 2 is a priority though, and a fantastic experience for me, so I hope fans of my routes will understand. Besides, both routes will run even better in openBVE 2, anyway. I know that the routes look more-or-less finished already, but they’re not – there are such issues as missing track in places, performance optimisations which still to be carried out, and an entire missing station to deal with at Rugby, to name but a few examples. I don’t make a habit of releasing junk and expecting people to be happy with it, so the projects won’t be released until I’m satisfied that a decent standard of quality has been achieved; that doesn’t mean they have to be perfect in every way, just not a disappointment.
New Railsimroutes.net site design
![]() As regular visitors will have hopefully noticed, I’ve redesigned the website, as I felt it needed an update, and I also wanted to put some updated website design skills into practice. The site was last redesigned in 2007 with a theme called “Modern”, characterised by a metallic grey colour scheme and smoothly shaded backgrounds, where Windows users would have been greeted with the Tahoma font throughout, and it was designed to be XHTML 1.0 and CSS Level 2 compliant. However, the content of the site wasn’t reorganised very much since the time of the previous “Retro Blue” design, and over time it became somewhat cluttered and untidy in my view.
As regular visitors will have hopefully noticed, I’ve redesigned the website, as I felt it needed an update, and I also wanted to put some updated website design skills into practice. The site was last redesigned in 2007 with a theme called “Modern”, characterised by a metallic grey colour scheme and smoothly shaded backgrounds, where Windows users would have been greeted with the Tahoma font throughout, and it was designed to be XHTML 1.0 and CSS Level 2 compliant. However, the content of the site wasn’t reorganised very much since the time of the previous “Retro Blue” design, and over time it became somewhat cluttered and untidy in my view.
This latest redesign is the fourth incarnation of the site, with a new theme called “Clarity” (hopefully it might live up to it’s name ;)). The new design is meant to be clearer, better organised, and easier to read. The site has been completely rebuilt from scratch; PHP is now used as well as HTML, and much of the site is XHTML 1.1 and CSS Level 3 compliant. I’ve tested the new site using Firefox 3, Internet Explorer 8, Opera 10, Chrome 5, and Safari 5, and everything works well. The site also works just fine in Internet Explorer 7 and earlier too (tested as far back as IE 5.5), but if you use one of those older Microsoft browsers, you might notice a minor rendering issue around the style selector dropdown box in the footer of each page. Essentially, I’m not happy having to devote much time to dealing with the quirks of browsers which aren’t properly compliant with more recent web standards, partly because it’s just annoying, but also because catering for them can lead to such browsers outliving their welcome (IE 6 springs to mind!). So, if you use Internet Explorer 7 or earlier and want perfect rendering, I would recommend upgrading to Internet Explorer 8 if possible, which is just fine.
I’ve also decided to reorganise the content of the site somewhat. The navigation bar has been expanded with the addition of Gallery and Help links, and the Projects and Downloads section has been overhauled to place emphasis on active projects, and non-help related information. Much more background information and history concerning my route projects is provided now, and information and downloads should be easier to find when they’re ready for release. You’ll also find a "What I’m currently working on" infobox at the top right of this page, which you can check to see what I’m up to, between blog posts. 🙂
I’ve taken the decision to remove some old sections of the site which never received much of my attention, and I’ve moved my old BVE 2 and 4 add-ons into their own de-emphasised legacy add-ons section, as they’re not really reflective of the quality of work I’m now producing; the emphasis is now placed on my upcoming openBVE projects instead. I’ve also introduced a sitemap, as a couple of people have indicated that some information was harder to find, previously.
I’ve also used a different selection of fonts this time:
- Windows 7 and Vista users will get the Segoe UI font throughout (along with the rather nice Consolas for code snippets), giving the best appearance.
- Windows XP users will also get the Segoe UI font, if Windows Live Essentials applications have been installed (for example, Messenger, Mail, Photo Gallery or Writer), or if Office 2007/2010 has been installed. XP users will also get the Consolas font with Office 2007/2010, or this can be downloaded free from Microsoft’s website. If neither Windows Live Essentials or Office 2007/2010 have been installed, but the free Microsoft Powerpoint Viewer 2007 is installed, then Candara (along with Consolas) will be seen instead. If none of these have been installed, then Trebuchet MS (along with Courier New for code snippets) will be seen, which are fonts included with Windows XP.
- Others will likely see generic sans serif and monospace fonts (although these look very nice in Ubuntu Linux, for example).
Incidentally, I experimented with CSS3’s @font-face declaration for embedding fonts, so that a consistent text style would be seen regardless of which fonts are installed locally on someone’s computer. This does indeed work fine, but I haven’t yet decided upon a set of fonts which I like, and which are also released with acceptable non-restrictive licencing terms, so that I can host the fonts on my own server without issues. I’ll explore this again in future, however.
More observant visitors will have noticed that I’ve also renamed the site slightly. I’ve dropped the “UK” part of “Rail Sim Routes UK”, and the site is now called “Railsimroutes.net” instead. The site is still available via two domain names, railsimroutes.net and railsimroutes.co.uk; I have no plans to retire the .co.uk domain, although you might want to update your bookmarks if you still use it.
Anyway, I hope you like the new Railsimroutes.net design. 🙂
Tags: Animated Objects, Artwork, Cross-City South, Functions, openBVE, openBVE 2, openBVE Community, Screenshots, Site News, Watford Jn to Rugby
Posted in openBVE, openBVE 2, Site News | 34 Comments »
May 14, 2010
Animated digital station clocks for openBVE, and 3D cab for 1992 stock released at BVE Routes & Trains
Posted by admin on May 14, 2010 at 6:50 amAnimated digital station clocks
![]()
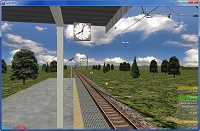 I’m not sure if any other openBVE developers have attempted this yet, but a feature I’ve been wanting to add to my routes for some time now, is animated digital station clocks which show the actual in-game time. Of course, we’ve seen a very nice working analogue station clock featured in » DemoRoute1 « (see right), but a digital clock would be useful, too.
I studied the functions in DemoRoute1’s analogue clock .animated file, along with openBVE 1’s source code to see how the display of in-game time is handled, and eventually opted to use multiplication rather than division in my functions as per the animated object in DemoRoute1. You can find some details of the finished set of files below.
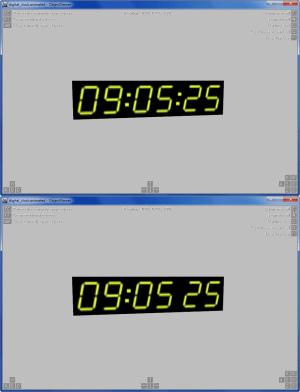 Animated 24-hour digital clock shown in the openBVE Object Viewer utility. Sample files can be downloaded here. |
Please feel free to download and use the above files if you’d like to adapt them for your own route, all you need to do is create an enclosure for the digits, and translate or resize the digits, to suit your own needs. The digital clock consists of an object which shows a single digit from a texture containing a strip of digits from 0-9, a separator, and a black background. The .animated file is as follows:
[Object]
States = back.csv
Position = 0, 0, 0
; Hours
[Object]
States = digit.csv
Position = -0.51, 0, 0
TextureShiftYFunction = 0.1 * floor[mod[time * 0.000277777777777778, 24] * 0.1]
[Object]
States = digit.csv
Position = -0.33, 0, 0
TextureShiftYFunction = 0.1 * floor[mod[time * 0.000277777777777778, 24]]
[Object]
States = digit_separator.csv
Position = -0.21, 0, 0
; Minutes
[Object]
States = digit.csv
Position = -0.09, 0, 0
TextureShiftYFunction = 0.1 * floor[mod[time * 0.0166666666666667, 60] * 0.1]
[Object]
States = digit.csv
Position = 0.09, 0, 0
TextureShiftYFunction = 0.1 * floor[time * 0.0166666666666667]
[Object]
States = digit_separator.csv
Position = 0.21, 0, 0
StateFunction = value == 0
RefreshRate = 0.5
; Seconds
[Object]
States = digit.csv
Position = 0.33, 0, 0
TextureShiftYFunction = 0.1 * floor[mod[time, 60] * 0.1]
[Object]
States = digit.csv
Position = 0.51, 0, 0
TextureShiftYFunction = 0.1 * floor[time]
Note: The purpose of the mod[] function used in displaying the hour digits, is to ensure that the displayed time wraps around back to 00 when passing midnight, rather than 24 or higher being displayed.
Here’s a screenshot of the above working digital clock, adapted for use in a prototypical structure at Kings Langley on the Watford Junction to Rugby route; note the displayed time on the clock, matching the in-game time shown at the bottom left of the screen:
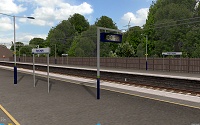 openBVE / Watford Junction to Rugby screenshot showing animated digital clock — click to enlarge Note: Station nameboard textures created using » Station Nameboard Generator v2 « |
3D cab for 1992 stock released
![]() I also just wanted to briefly mention that a new openBVE 3D cab has been released for the London Underground 1992 stock, with animated features including a traction/brake controller, speedometer, and working in-cab CCTV monitor. Night-illuminated cab indicators and screens are also included, and the overall effect created by the cab is very nice, despite a couple of initial teething problems. The 3D cab is an add-on for the BVE4 1992TS, which needs to be installed first; both downloads can be found at » http://bveroutes-trains.co.uk «. A note on installing the 3D cab — at the time of writing, I noticed that the 3D cab download contains an incorrect folder structure, i.e. there’s no “1992TS” subfolder included, and the files could easily end up accidentally being placed in your Train folder directly instead, which won’t work, of course. You will need to be careful as to where you choose to extract the files. For further information, you might like to monitor » this thread « on the BVE Exchange forum.
I also just wanted to briefly mention that a new openBVE 3D cab has been released for the London Underground 1992 stock, with animated features including a traction/brake controller, speedometer, and working in-cab CCTV monitor. Night-illuminated cab indicators and screens are also included, and the overall effect created by the cab is very nice, despite a couple of initial teething problems. The 3D cab is an add-on for the BVE4 1992TS, which needs to be installed first; both downloads can be found at » http://bveroutes-trains.co.uk «. A note on installing the 3D cab — at the time of writing, I noticed that the 3D cab download contains an incorrect folder structure, i.e. there’s no “1992TS” subfolder included, and the files could easily end up accidentally being placed in your Train folder directly instead, which won’t work, of course. You will need to be careful as to where you choose to extract the files. For further information, you might like to monitor » this thread « on the BVE Exchange forum.
![openBVE / 1992 Stock thumbnail image [Click to enlarge] Screenshot](/images/thumbnails/1992stock_openbve_1.jpg) openBVE / 1992 Stock screenshot » Download from http://bveroutes-trains.co.uk « |
Tags: Animated Objects, Functions, openBVE, openBVE Community, Screenshots, Watford Jn to Rugby
Posted in openBVE | 8 Comments »
September 28, 2009
openBVE v1.2.2, working ammeters, X-City South v1.31 bug fixes, minor 323 3D cab update, openBVE route updates
Posted by admin on September 28, 2009 at 6:34 pm
|
openBVE v1.2.2 Released
![]() openBVE v1.2.2 has been released, and this version includes some new variables for developers to use in animated objects or 3D cabs, including new variables for acceleration and motor acceleration; more variables can now be used to query specific cars as well. New subjects covering acceleration and motor acceleration which developers can use in the legacy panel2.cfg file are also provided, and some bug fixes are also included in this release. Please visit the » openBVE homepage « and read the » Changelog « for more details.
openBVE v1.2.2 has been released, and this version includes some new variables for developers to use in animated objects or 3D cabs, including new variables for acceleration and motor acceleration; more variables can now be used to query specific cars as well. New subjects covering acceleration and motor acceleration which developers can use in the legacy panel2.cfg file are also provided, and some bug fixes are also included in this release. Please visit the » openBVE homepage « and read the » Changelog « for more details.
Working Ammeters
One new variable is accelerationMotor. As mentioned on the openBVE forum, this can be used for creating working ammeters. The class 323’s cab doesn’t feature an ammeter, however, anyone wanting to experiment with this might like to consider the following panel.animated code as a *starting point*. You can copy and paste the code below into the 323’s panel.animated file to add a new ammeter needle to the cab and see it in action. Please bear in mind that I’ve not had time to test this in a variety of scenarios though:
| panel.animated code for a simple ammeter (including illuminated needle):
[object] states = 3d_cab\speedometer_needle.csv, 3d_cab\speedometer_needle_dark.csv statefunction = if[hasPlugin == 1, !pluginstate[30], 0] position = -0.43, 2.23, 11.45 rotatexdirection = -1, 0, 0 rotatexfunction = -2.4 + abs[accelerationMotor[0]] * 1.5 rotateyfunction = -1.11 rotatezfunction = -1.57 rotatexdamping = 2, 1 |
Notes: in the rotatexfunction line, -2.4 determines the needle rotation with no motor acceleration, and 1.5 determines the needle rotation with maximum motor acceleration. You can adjust these two values according to your ammeter gauge design. If you add an ammeter to your own 3D cab, remember that the statefunction line and multiple states (*.csv files in this case) may not be necessary depending on what plugin DLL, if any, you wish to use. When it comes to designing full 3D cabs for the class 86 and 87 electric locomotives for use with Watford Junction to Rugby, I’ll revisit ammeter design in more detail.
Cross-City South v1.31 Bug Fixes and 3D Cab Update
I’ve also fixed a few bugs in the Cross-City South route. There were a few objects (houses, warehouses etc.) which included some surface lighting issues, which have now been fixed. Some class 170 3D objects also contained incorrect ‘Color’ commands resulting in errors being reported when the routes were loaded; these have now been changed to ‘SetColor’, which is correct for CSV format objects. As some of you will know, the Cross-City South also uses some .Sta commands only for signalling approach control purposes, which aren’t meant to be stopped at. However, you would still be penalised if you passed such a station without stopping. Thanks to Paul Sladen, I’ve now corrected these .Sta commands so that you can pass them without being penalised, while preserving the approach controlled signalling functionality.
You can download the full v1.31.03 route package via the Cross-City South download page.
There aren’t any new features included, as all of those improvements are going into the Cross-City South v1.4 project instead, and I’d prefer to hold those improvements back until the v1.4 is ready for release, as the end result will be more enjoyable that way.
Incidentally, the changes to the .Sta commands are as follows (the ArrivalTime and PassAlarm arguments, which are underlined):
Old: .Sta ;;09.4300;;-1;1;;;1;0;;11 New: .Sta ;P;09.4300;0;-1;1;;;1;0;;11 |
Important Note: Those of you still using BVE 4, will find that the route files now call upon the openBVE version of the unrefurbished class 323 EMU by default (Train\Cl323 Unrefurb_openbve). BVE 4 users can either install the openBVE version of the train, or edit the route files to use the older BVE 4 class 323.
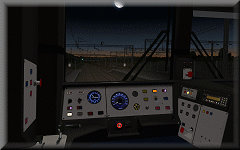 I’ve also updated the 323’s 3D cab so that it makes use of the new hasPlugin variable. If you’re using openBVE v1.2.2 with a non-Windows operating system, then this will allow the cab illumination to work in the absence of the Windows only plugin DLL, which wasn’t the case previously.
I’ve also made some adjustments to the placement of the brake gauge, as it wasn’t quite right before, and now when you pass through a neutral section, the cab lighting should remain unaffected as the UKMUt.dll’s ats30 (pantograph up) is used as well as ats31 (Line Volts) now. The carriage light dimming effect will be retained in the passenger area once the new 323 external objects are released however. I’ve also remembered to remove several superfluous GenerateNormals statements from some objects this time, as they serve no purpose in an openBVE add-on.
Someone also kindly informed me that there may be some further innaccuracies with the cab’s indicators; once I’ve investigated further I’ll address these issues at some point in future. It’s also nice to note that the 3D cab may have been downloaded perhaps as many as 1500 times since it’s release.
Download:
» 323_unrefurb_3d_cab_28-09-09.7z « [1.7 MiB — requires openBVE v1.2.2]
Important: Also requires » Cl323 Unrefurb_openbve_05.02.09.zip « to be installed first.
Other Things
I’m not making much progress with my projects at the moment, and I know that some of you may be disappointed that I’ve not yet finished Cross-City South v1.4 despite me saying that it’d be done before now (this is also why I’m usually reluctant to give release dates, and I shouldn’t have done so where this project is concerned). Rest assured, barring any disasters, it will be finished eventually and I’m still in the game, however, sometimes circumstances in the real world prove to be too much of a distraction, and it means that what one wishes to accomplish in the simulated world has to wait for a little while. This won’t last long however, and patience will be rewarded.
And Finally…
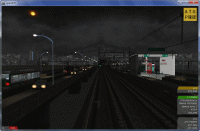
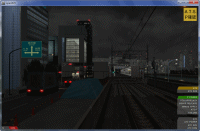
The Saijou Line for openBVE was released a few days ago (the author’s » blog « is linked to via my blogroll), and this is an openBVE exclusive route featuring some very nice atmosphere and night lighting. There are a few errors, however the route is well worth giving a try, as it’s a good example of how animated objects and lighting can be used to bring much more life to a route and make it that much more enjoyable. You’ll find a variety of blinking lights, such as car indicator lamps, and the aviation obstruction lights fitted to tall structures (I’ll be modelling the same feature on the cluster of 250m tall VLF radio towers at the Rugby Radio Station on the Watford Junction to Rugby route). Moving cars and buses can also be found on roads, as well as flashing level crossing lights, road based traffic lights which change when the train is approaching, animated water, and moving elevators. You can download the route here: » http://tozai.s77.xrea.com/BVE/Sjyou.html « (the author’s homepage is here: » http://tozai.s77.xrea.com «)
  |
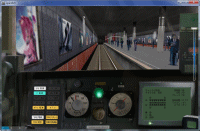
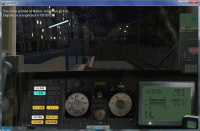
![]() Edit: Another openBVE route recently updated, was the Chashinai Railways network, along with the 9000 Series train; when this train is used with the Misaki Line in particular, in addition to ATC, you can now enjoy simulated TASC (Train Automatic Stopping Controller) and ATO (Atomatic Train Operation) systems which enable fully automated driving, thanks to a new plugin which enables sophisticated safety system simulation. The 9000 series’ panel also includes photorealistic dirt on the windscreen, increasing realism. Visit odakyufan’s website for the updates, and don’t forget to read the Train Operation Manuals before you start: » http://odakyufan.uuuq.com «
Edit: Another openBVE route recently updated, was the Chashinai Railways network, along with the 9000 Series train; when this train is used with the Misaki Line in particular, in addition to ATC, you can now enjoy simulated TASC (Train Automatic Stopping Controller) and ATO (Atomatic Train Operation) systems which enable fully automated driving, thanks to a new plugin which enables sophisticated safety system simulation. The 9000 series’ panel also includes photorealistic dirt on the windscreen, increasing realism. Visit odakyufan’s website for the updates, and don’t forget to read the Train Operation Manuals before you start: » http://odakyufan.uuuq.com «
  |
Tags: Animated Objects, Cross-City South, Functions, openBVE, Screenshots, Site News, Watford Jn to Rugby
Posted in openBVE, Site News | 8 Comments »
July 5, 2009
New Video Uploaded: 3D Cabs (openBVE v1.1 Development Branch), 323 Interior, Watford Junction to Rugby Hi-Res
Posted by admin on July 5, 2009 at 3:50 pmopenBVE v1.1.1.0 (Development Branch), 3D cabs, and other stuff…
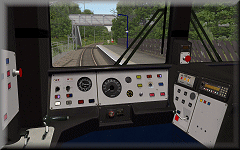 The first release (v1.1.0.0) in the development branch of openBVE was made available a few days ago, and now v1.1.1.0 has subsequently been released — the development branch includes support for full 3D cabs with animated objects, and mouse controlled camera rotation. v1.1.1.0 also introduces driver’s head motion, which responds to acceleration and deceleration, as well as inertia.
As many will no doubt have noticed, I’ve not shown much by way of screenshots or video of openBVE’s in-cab experience thus far, as personally, I’ve always viewed the existing 2D panel support as something of a legacy feature which didn’t really demonstrate openBVE’s true potential, so I’ve been waiting for this moment for a long time, and I have to say, it most certainly lives up to expectations and is quite simply fantastic! Applying emergency brakes has never been so much fun. 😉
Firstly, releases in the openBVE development branch are intended for developers who wish to expermiment with new features and offer feedback before these are eventually incorporated into the stable branch. Development releases may contain undetected issues, and features are subject to change, which means the development releases aren’t entirely suitable for regular users and the less technically minded, however I strongly recommend that developers and advanced users take a look at the development releases. If you’re interested in examining the new 3D cab support, you can head over to the » openBVE homepage « to download version 1.1.1.0, along with a demonstration 3D cab update for the 113-1000atccab train (look under Examples via the » Developing for openBVE « menu). Please also read the » Changelog « for a full list of alterations and new features.
Anyway, I’ve spent around a week working on a 3D cab for the new class 323 EMU and Cross-City South v1.4, and I’m really pleased with the results so far. I’ve uploaded a new YouTube video to briefly demonstrate the immersive nature of a 3D cab, the added realism, and some of the animated object possibilities — animated traction/brake controller, reverser and horn lever, working in-cab safety system indicators, simulated working headlights which give the effect of outside illumination (but see caveat below), along with working in-cab illumination. I think the potential of openBVE as a cab based simulator can now be truly realised, and speaking personally, this has forever changed the way I experience openBVE routes, and as long as photo-realism is maintained in new 3D cab environments, I’ll likely not want to go back to 2D cabs now.
This latest video was originally intended to show some other things I’ve been working on, so you’ll find many clips of the new 3D interior for the class 323, which includes seating, working television screens and lights, moving and streaking raindrop effects (inspired by the rain effects from Flight Unlimited 3), and ground illumination from the windows and pantograph sparking at night. The performance improvements which came with openBVE v1.0.7 also enabled me to capture some higher resolution video of Watford Junction to Rugby, of which many shots are included (and it has train sounds rather than my dreadful music this time 😉 ).
I’m also pleased to say that Cross-City South v1.4 now includes a full set of on-train conductor’s announcements, with enormous thanks to voice recording artist Pete Kingwell » http://www.petekingwell.com «. Pete has also recorded a set of alternative Birmingham New Street station announcements, and we agreed that all these sounds could be released into the public domain along with the rest of the Cross-City South v1.4 files once released. Thanks must also go to Paul Sladen (maintainer of the Ubuntu version of openBVE) for intiating this aspect of the project as well. I’m glad to be able to remove another set of copyright files from the route now, while being able to add something new which has been missing from the Cross-City South route for years as well, and an example on-train announcement is included in the video.
While viewing the 323’s cab, please note that I don’t actually know what the non-driver’s side of the cab looks like in any detail at all, so I’ve just had to use my imagination; if anyone can point out inaccuracies, feel free to tell me about them. Other than that, enjoy. 🙂
Video: Demonstration of class 323 3D cab, interior fittings, and Watford Junction to Rugby hi-res (work-in-progress) I strongly recommend viewing this video in full screen due to some night time shots, in which some details might be hard to make out otherwise. By the way, yes, I know 323 EMUs don’t run from Watford Junction — that part of the video is just a bit of fun. 🙂
» Link to YouTube page (HD – *Best Quality*) «
|
Here’s a 1280×1024 resolution screenshot of the new 3D cab. The framerate here is 25 fps, with 8x anti-aliasing and 16x anisotropic filtering enabled (on a Radeon HD 2600 Pro graphics card). Smooth transparency and anistropic filtering was also enabled in openBVE’s settings as well:
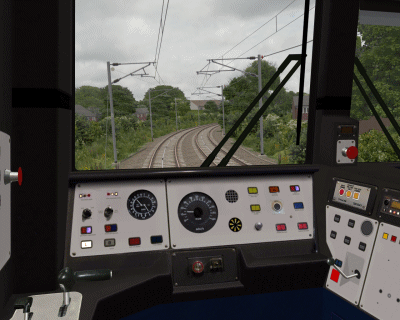 openBVE / 3D Cab / X-City South v1.4 screenshot–click to enlarge |
![]()
3D Cab Features and Animation
For the 323’s 3D cab, I’ve opted for a combination of moderately complex 3D geometry combined with photo-realistic textures, some of which were easily adapted from the existing 2D panel images. Developing the new cab wasn’t really more difficult than developing any other animated object, as that is exactly what the cab is — it just took longer as there are more animated parts. The most difficult tasks I found, were probably the gauges and needles, which needed quite a lot of experimentation before the results were right, partly because the 323’s panel is sloped backwards rather than being vertical, meaning that correctly tilting the axis around which the animated needles rotate took a little while.
As an additional starting point for other train developers, here are the functions I’m using in the panel.animated file for the speedometer, main reservoir and brake cylinder needles, amongst other features, which I’m using.
Note: Some examples include two states, where one specifies an object illuminated by in-cab lighting, and the other specifies a non-emissive version of the object, shown when the power is cut, based on state of the ats31 plugin variable defined in the 323’s panel2.cfg file (when used with Simon Gathercole’s UKMUt.dll).
The Base 3D Cab 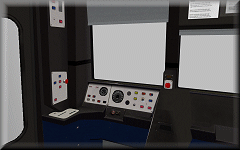 |
Base 3D Cab Objects:
[object]
states = 3dcab\class323_dmso_cab_interior_lights_on.csv, 3dcab\class323_dmso_cab_interior_lights_off.csv
statefunction = !pluginstate[31]
These two objects contain any non-animated portions of the cab, but one is a duplicate with emissive properties disabled, so in-cab lighting can be turned on and off according to the state of plugin variable ats31 in this case, which simulates the effect of the power being cut, or a cold and dark cab environment.
Speedometer and Brake Gauge 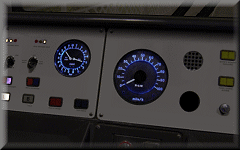 |
CreateMeshBuilder
AddVertex,-0.003,0.04,0
AddVertex,0.003,0.04,0
AddVertex,0.003,0.00,0
AddVertex,-0.003,0.00,0
AddFace,0,1,2,3
LoadTexture,speedometer_needle.bmp, speedometer_needle_n.bmp
SetTextureCoordinates,0, 0, 0
SetTextureCoordinates,1, 1, 0
SetTextureCoordinates,2, 1, 1
SetTextureCoordinates,3, 0, 1
SetDecalTransparentColor,0,0,0
SetEmissiveColor,200,200,200
RotateAll,0,1,0,90
![]()
[object]
states = 3dcab\gauges\speedometer_needle.csv, 3dcab\gauges\speedometer_needle_dark.csv
statefunction = !pluginstate[31]
position = -0.5505, 2.232, 11.452
rotatexdirection = -1, 0, 0
rotatexfunction = -3.678 + abs[speedometer] * 0.0945
rotateyfunction = -1.11
rotatezfunction = -1.57
The gauge background and cover are included as part of the base 3D geometry of the cab itself, not as seperate objects. The value -3.678 in rotatexfunction rotates the needle to 0 mph on this speedometer (adjust for your own gauge as required, using ObjectViewer to check the results). Where the last value (0.0945) is concerned, you can adjust this, initially, in 0.01 increments and test drive your train in openBVE until your speedometer is calibrated correctly (press Ctrl+V multiple times as required in-game, and compare the actual speed with the speed shown on the speedometer). Alternatively, you can temporarily replace the variable speedometer with a value in m/s (converted from the unit of measurement shown on your speedometer), check the calibration via ObjectViewer, and adjust the last value accordingly. The other rotation commands are there to tilt the axis around which the needle rotates, to match the sloped 323’s panel.
A similar approach applies to the following needles:
[object]
states = 3dcab\gauges\brake_needle.csv, 3dcab\gauges\brake_needle_dark.csv
statefunction = !pluginstate[31]
position = -0.741, 2.263, 11.462
rotatexdirection = -1, 0, 0
rotatexfunction = 1.12 + mainReservoir * 0.0000051
rotateyfunction = -1.11
rotatezfunction = -1.57
Brake Cylinder (range covers around 0-3.5 bar, as per the 2D panel)
[object]
states = 3dcab\controls\brake_needle.csv, 3dcab\controls\brake_needle_dark.csv
statefunction = !pluginstate[31]
position = -0.731, 2.263, 11.462
rotatexdirection = 1, 0, 0
rotatexfunction = -1.52 + brakeCylinder * 0.0000053
rotateyfunction = -1.11
rotatezfunction = -1.57
Combined Traction/Brake Controller 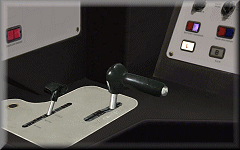 |
The reverser is pretty straightforward, however this is what I’m using for the combined power/brake handle:
[object]
states = 3dcab\controls\power_handle.csv, 3dcab\controls\power_handle_dark.csv
position = -0.952, 2.0, 11.173
statefunction = !pluginstate[31]
rotatexfunction = if[powerNotch >= 1, -0.125 * powerNotch, 0.10 * brakeNotchLinear]
rotatexdamping = 20, 0.8
rotatezfunction = if[powerNotch >= 1, 0.05, 0]
rotatezdamping = 20, 1
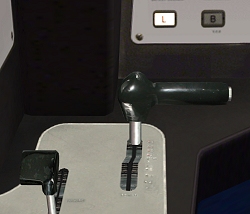 The rotatexfunction line allows both brake and power notches to be taken into account; adjust the -0.125 value to change the angle of the controller when position P1 or above is chosen, and similarly the value 0.10 for the brake steps. While determining what values to use, you can temporarily replace the above function in rotatexfunction with a simple function in the form of ROTATION_VALUE * x, where the former determines the degree of rotation, and x represents your chosen power/brake setting (for example, in the case of the class 323, a value of 1 to 4 for position P1-P4, and similarly 1 to 4 for position B1 to B3 and EMG as we’re using brakeNotchLinear here).
Also, the class 323’s combined traction/brake controller doesn’t just pivot back and forth; it’s also offset slightly to the left during the P1-P4 steps compared to the B1-B3 steps (you can see this in the screenshot on the left), which is what the rotatezfunction and rotatezdamping commands are for.
Incidentally, you might have noticed that the combined traction/brake handle appears to be a rather rounded, and smoothly sculpted object — this is achieved with a combination of 3D geometry and a good texture which captured some reflected light, further improved with custom normals (as another side note, the spherical object at the end of the horn lever shown in the next section is a pair of simple 2D surfaces arranged in a cruciform fashion; no detailed 3D geometry is needed there). How might one go about creating an object like this power/brake controller, without a 3D modelling tool? What I do, is apply the idea of the computed axial tomography medical imaging technique (CT scan) to object building; I first create a set of flat, 2D polygons or layers with temporary faces to build the basic framework of the mesh (you can draw this on paper first and number the vertices, if it helps — handy when it comes to defining faces and texture mapping later), then I adjust the vertices of the first layer until the shape looks about right, and then create the next layer and adjust and so-on, and then define final faces of the object and delete the temporary faces, followed by the addition of custom normals and texture mapping:
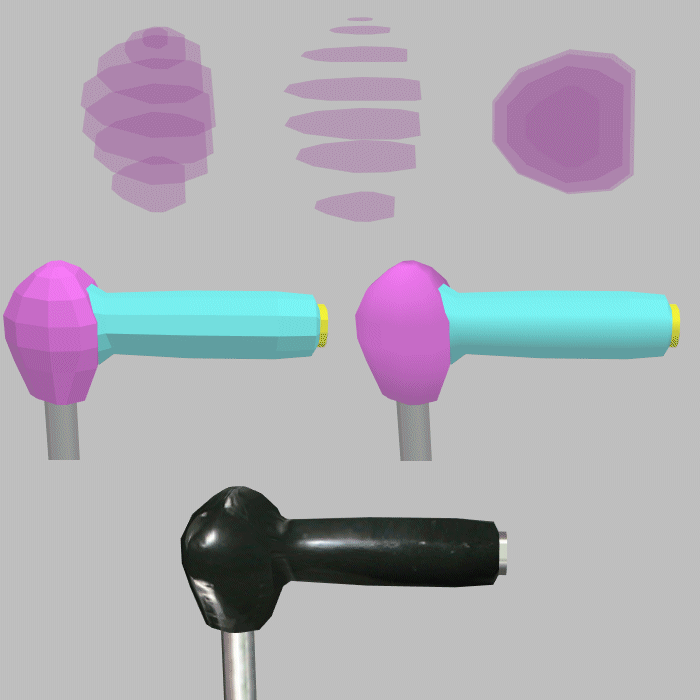
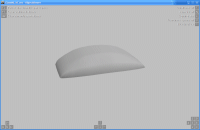
This is also the technique I used for creating the AC electric loco roof sections, by the way:
Horn Lever 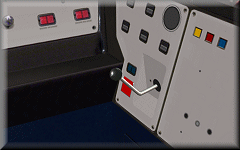 |
[object]
states = 3dcab\horn_lever.csv, 3dcab\horn_lever_dark.csv
position = -0.07, 2.06, 11.234
statefunction = !pluginstate[31]
rotatexfunction = pluginstate[24] * 0.5
rotatexdamping = 30, 0.8
rotateyfunction = -0.3
The horn lever was straightforward to implement; it’s rotation simply depends on the value of the ats24 plugin variable in this case. rotateyfunction = -0.3 simply rotates the object so it’s perpendicular to the desk panel it’s attached to.
Other indicators 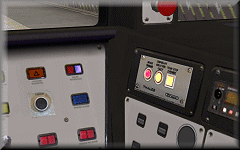 |
[object]
states = 3dcab\indicators\tpws_isol.csv
position = 0, 0, 0
statefunction = !pluginstate[10]
This is simple and works fine, and is also recommended. However, if on a state change, you notice that the newly loaded object appears momentarily untextured, and this bothers you, then you can use the following technique instead…
states = 3dcab\controls\dra.csv
position = 0, 0, 0
textureshiftyfunction = pluginstate[13] * 0.5
![]()
CreateMeshBuilder
AddVertex,-0.5905,2.0885,11.381
AddVertex,-0.5485,2.0885,11.381
AddVertex,-0.5485,2.0525,11.365
AddVertex,-0.5905,2.0525,11.365
AddFace,0,1,2,3
SetTextureCoordinates,0, 0, 0
SetTextureCoordinates,1, 1, 0
SetTextureCoordinates,2, 1, 0.5
SetTextureCoordinates,3, 0, 0.5
SetDecalTransparentColor,0,0,255
SetEmissiveColor,255,255,255
SetColor,130,130,130
SetBlendMode,Additive
Here, the illuminated DRA image is placed in the bottom half of the texture, while the top half of the image is transparent. By using a texture shifting function, no state change occurs, so you won’t notice any momentarily untextured surface appearing which can happen when a state is changed and the object hasn’t been loaded previously.
 |
If, for example, your ats subject had 4 states rather than 2 as in the above DRA example (with it’s bitmap split into 4 sections), you could use a value of 0.25 (i.e. 1 / 4) in your texture shifting function instead:
 |
Simulated Headlight Effects 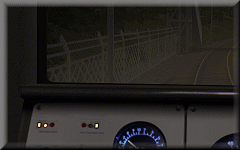 |
I’m still experimenting with the simulated in-cab headlight effects and some refinements are needed, but here’s what I’ve come up with so far:
[object]
states = 3dcab\ext_headlight_1.csv, 3dcab\ext_headlight_1a.csv, 3dcab\ext_headlight_1b.csv
position = 0, 0, 0
statefunction = if[pluginstate[20] > 0, pluginstate[20] – 1, -1]
The object code I’m using is like the following:
ext_headlight_1.csv
CreateMeshBuilder
AddVertex,-1.3, 3.0, 11.67
AddVertex,0.6, 3.0, 11.67
AddVertex,0.6, 1.5, 11.67
AddVertex,-1.3, 1.5, 11.67
AddFace,0,1,2,3
LoadTexture,transparent.png, headlight_interior.png
SetTextureCoordinates,0, 0, 0
SetTextureCoordinates,1, 1, 0
SetTextureCoordinates,2, 1, 1
SetTextureCoordinates,3, 0, 1
SetBlendMode,Additive
SetColor,150,130,100,120
The three objects are flat, vertical surfaces which load a simple texture with a sunburst gradient fill, representing a glow (similar to the light_xxxxx.png signal glow images included with openBVE’s compatibility signal objects, or the pantograph sparking effects I’ve shown previously). The glow colour in the texture is white, and the SetColor command is used to determine what colour headlight is depicted (a yellowish-white in the example above); this way, only one texture is needed. These objects are positioned just beyond the cab window, and the additive blending mode simulates the effect of illuminating whatever is behind the surface (the track and scenery, in this case). The height of the surface determines whether just the track, or the scenery, appears to be illuminated. The file “transparent.png” is a tiny, completely transparent PNG file loaded as the daytime texture, so the headlight effect is only visible in low light (as it’s loaded as a nighttime texture), or when the .Brightness command is used.
The states are linked to the proving lights in the cab (ats20), and each object has it’s surface repositioned to simulate headlights on the left or right, or centred in the case of the marker lights.
There is one caveat however; while this works well at night, or when in a tunnel during daytime, the effect doesn’t look so good when passing beneath a short overbridge (i.e. where a low .Brightness value is set over a distance of just a few metres), as the headlight glow becomes visible here, when in reality it wouldn’t. As a compromise, what I’ll probably do in the final release, is reserve the headlight effect for the nighttime headlight configuration only, not the daytime configuration (possible with the UKMUt.dll plugin). You’ll have to decide whether this minor issue is worth it or not.
![]()
Class 323 Interior
I thought I’d talk a little about the 323’s interior as well. The interior view features the expected things; i.e. seats and partitions, but I’ve also included working TV screens, working carriage lighting, raindrop effects which run down and streak across the windows at varying speeds (depending on the speed of the train), and ground illumination from the windows and sparking pantograph.
Working TV Screens 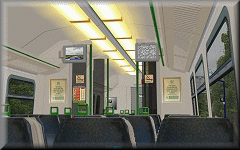 |
The working TV screens use simple texture shifting and translation functions — for the left screen with the car and rolling news ticker, there’s nothing I haven’t described before, apart from applying the functions to a very different set of meshes. Where the static effect is concerned, this is created by using two surfaces with a small texture containing a patchwork of black and white pixels; one of the objects has the texture reversed vertically and horizontally. One object is positioned slightly in front of the other, and both have alpha values set via the SetColor command to soften the appearance of the end result. These objects then have their textures shifted via the same function:
CreateMeshBuilder
AddVertex,0.46, 3.492, 3.597
AddVertex,0.765, 3.492, 3.597
AddVertex,0.765, 3.273, 3.597
AddVertex,0.46, 3.273, 3.597
AddFace,0,1,2,3
LoadTexture,Class323_TV_Texture_2.png
SetTextureCoordinates,0, 2, 0
SetTextureCoordinates,1, -0.001, 0
SetTextureCoordinates,2, -0.001, 2
SetTextureCoordinates,3, 2, 2
SetColor,0,0,0,180
SetEmissiveColor,255,255,255
![]()
AddVertex,0.46, 3.492, 3.595
AddVertex,0.765, 3.492, 3.595
AddVertex,0.765, 3.273, 3.595
AddVertex,0.46, 3.273, 3.595
AddFace,0,1,2,3
LoadTexture,Class323_TV_Texture_2.png
SetTextureCoordinates,0, 2, 0
SetTextureCoordinates,1, 2, 2
SetTextureCoordinates,2, -0.001, 2
SetTextureCoordinates,3, -0.001, 0
SetColor,0,0,0,180
SetEmissiveColor,255,255,255
![]()
[object]
states = ..\Class323_TV_2.csv, ..\Class323_TV_2a.csv
position = 0, 0, 0
statefunction = if[pluginstate[31] == 0 & pluginstate[33] == 0, -1, value == 0]
textureshiftxfunction = 2 * time
refreshrate = 0.01
The pluginstate[i] variables are there so that the TVs are only switched on when there’s power, and stay on when passing though a neutral section (ats31 is the Line Volts indicator, and ats33 the Vacuum Circuit Breaker indicator). The refreshrate = 0.01 line just adds a slight degree of flickering to the screen.
Window raindrop effects 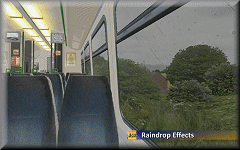 |
The raindrop effects also deserve a little more explanation. These are comprised of two surfaces, the first of which has ordinary raindrops similar to what you’ve seen in BVE 4 cabs, except here, the surface simply has one tiled, transparent texture containing multiple raindrops and the texture is slowly shifted. The second surface, loads a texture depicting several streaking rain drops, and the speed of the streaking is linked to the speed of the train, although they still move slowly down the window when the train is stationary. What I did differently, was to make the surface irregularly shaped, so the raindrops appear to change direction as they travel across the window due to turbulence or inteference:
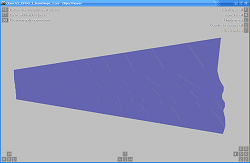 |
[Object]
position = 0, 0, 0
states = Class323_DMSO_1_RainDrops_1.csv
statefunction = !pluginstate[200]
textureshiftyfunction = -0.1 * time
textureshiftxdirection = 0, 1
textureshiftxfunction = value – delta * speed / 60
refreshrate = 0.01
ats200 is one of the raindrops you’re familiar with from the 2D BVE 4 cabs…
Pantograph spark and ground lighting effect 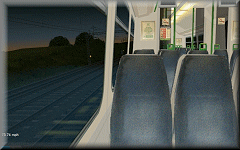 |
The pantograph sparking and ground illumination effect is a simple additively blended glow effect, which will appear mostly briefly at various times during a journey, but not continuously and not necessarily frequently. When seen for the first time, it might seem as though the effect appears at random, but actually the times at which you’ll see sparking are based on the speed of the train. This is acheived via the following function:
[Object]
states = Class323_Spark_1.csv
position = 0, 0, 0
statefunction = if[mod[speed, 3] > 2.9, value == 0, -1]
refreshrate = 0.03
Flashing Tail Light 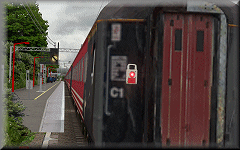 |
In terms of visual effect, the tail light is implemented just like the signal aspects. The animation code I’m using to achieve a short blink followed by a longer period of extinguishment is as follows:
[Object]
States = TailLamp_1a.csv
Position = 0, 0, 0
StateFunction = if[mod[time, 0.55] > 0.08, -1, 0]
Signal Ground Lighting 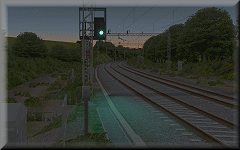 |
These effects are really easy — the objects are just like the headlight objects mentioned previously, except these extend out behind the signal and are animated objects loaded via .SigF commands instead. The simple animation function I’m now using is as follows:
[Object]
Position = 0, 0, 0
States = Sig_GroundLight_R.csv, Sig_GroundLight_Y.csv, Sig_GroundLight_Y.csv, Sig_GroundLight_G.csv
StateFunction = if[section > 0, section – 1, 0]
Incidentally, I’ve now adopted more or less the same technique developed by michelle for openBVE’s compatibility signal objects where my own signal aspect/lens and glow effects are concerned, as it’s obvious that a lot of care went into these effects, and they look superb when applied to my own signal objects with the lens hoods as well (see the video…).
![]()
Updated Pantograph Animation Functions
Lastly, I’ve updated my old Animated Exterior Car Objects blog entry to include some updated unctions which resolve a problem with the code which I hadn’t considered previously. Bascially, the code I used meant that the pantograph animation speed was dependent on the framerate on the user’s computer, which is obviously no good — if slow framerates were encountered, the animation would proceed very slowly, while if high framerates were experienced, the animation speed would be too high. By incorporating the delta variable and a factor into the functions, this problem is solved. Actually this should have occured to me, because I observed this behaviour when I was experimenting with the wheel rotation initially… D’oh. Thanks michelle !
Tags: Animated Objects, Artwork, Cross-City South, Functions, openBVE, Screenshots, Videos, Watford Jn to Rugby
Posted in openBVE | 25 Comments »
February 27, 2009
Updated Functions
Posted by admin on February 27, 2009 at 10:00 pmThanks to a certain mathematically adept someone, I’ve now updated some of the code examples in my last blog entry, namely the function used for wheelset rotation which is now better in terms of performance and ease of use, and also the code which “plugs” the doors into the bodyside when they’re closed, making the visual effect better as the doors don’t “jump” into position any more. The updated functions are now highlighted in yellow in my 26th February entry…
Tags: Animated Objects, Functions, openBVE
Posted in openBVE | No Comments »
February 26, 2009
Animated Exterior Car Objects
Posted by admin on February 26, 2009 at 10:00 pm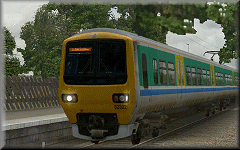 As most of you will likely know already, » openBVE « now enables developers to use animated exterior car objects. I was pleasantly surprised by all the positive feedback and comments regarding my last video which I uploaded to YouTube (thank you!), but one criticism which was pointed out several times was the disparity between the quality of the scenic visuals, and the rather simplistic objects used to represent the class 323 EMU–the objects were fine for BVE’s passing trains, but less so when you can move the camera up close and look at the details, or lack thereof. I didn’t think it was worth spending much time on this latter aspect until animation could be applied to the exterior car objects, but now this is possible, I’ve been working on some far better 3D models for the class 323. I had hoped to get this task finished sooner, but it’s taken longer than I originally expected unfortunately–the main difficulty was getting the rounded cab looking right, and texturing it correctly. However, I’m now happy with the appearance, and so I present the work-in-progress fully 3D exterior car objects for openBVE and Cross-City South v1.4. Incidentally, as with all my openBVE/BVE objects, these models are entirely hand coded, with no “help” from 3D modelling software.
Currently the objects are rather more complex than I originally intended (so far, the entire three coach EMU contains around 8200 vertices/4900 faces), and there is a performance penalty that comes with using them; on a fairly typical BVE route, framerates should be okay, but when paired with a very highly detailed and intensively animated route such as Cross-City South v1.4, a fast PC will likely be required to enjoy both extensively detailed animated scenery and detailed external car objects with reasonable framerates. What I intend to do, for those of you with slower hardware, is release alternative versions of the exterior car objects with lower polygon counts, and because of the way I’ve created the textures, the end result should still look good despite less complex geometry. Even these lower detail versions will be rather better than the previous objects though. ![]() So ultimately, if framerates are a problem, you can simply choose either richly detailed scenery, or richly detailed train objects, depending on which is more important to you.
So ultimately, if framerates are a problem, you can simply choose either richly detailed scenery, or richly detailed train objects, depending on which is more important to you.
Currently, the models include the following standard animated features:
- Rotating wheelsets including wheelslip effects (with provision for animated suspension, and bogie rotation should such functionality be possible in future)
- Bi-parting, sliding plug doors (some issues with door open/close sound synchronisation–see below)
- Moving window reflections (twin-layered with transparency, to create a parallax effect)
The models also include the following animated features linked to plugin (UKMUt.dll) variables:
- Windscreen wipers (left/right sweep, plus arc motion; the wipers aren’t perfect–see below)
- Head and tail lights (both ends of train)
- Interior lights (on or off via pantograph up/down button)
- LED destination display with flicker (on or off via pantograph up/down button)
- Working pantograph (all illuminated features also extinguish when pantograph is lowered)
I’ve also prepared another video to show these features. Please note, the 3D objects aren’t finished yet; some textures need updating, and I’ve yet to add interior fittings. Developers might want to continue reading on, as I’ll explain how some of these animations have been implemented, and share some sample code from the .ANIMATED objects.
Video: Demonstration of class 323 animated exterior car objects (work-in-progress) » Link to YouTube page (HD – best quality) «
|
I also thought you might like to see a high resolution image of Cross-City South v1.4 and the new high detail class 323; in this screenshot, I’m running openBVE fullscreen at a resolution of 1280×1024, with 8x anti-aliasing and 16x anisotropic filtering enabled (on a Radeon HD 2600 Pro graphics card). Bilinear interpolation was enabled in openBVE’s settings, with the Transparency mode set to Sharp. I was getting around 16-19 fps at the time; the framerates in the next version of openBVE will hopefully be a little higher due to performance optimisations where animated object normals are concerned, although this gain may be offset by the addition of more animated scenery objects to the route:
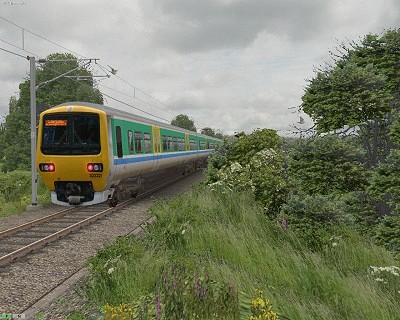 openBVE / Cross-City South v1.4 plus 323 screenshot–click to enlarge |
![]()
Rotating Wheelsets 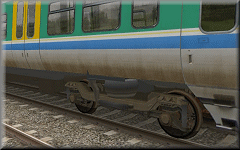 |
The first things I tried to animate were the wheelsets. Initially I had difficulty getting this to work as anticipated, and observed unexpected results while using the Speedometer variable, i.e. the resulting wheelset rotation appeared as though it were based upon acceleration rate rather than an actual velocity value (and » Ron « found the same when he first tried to animate wheelsets, it would seem). I usually like to try and figure out solutions to such problems myself, but sadly I’m not the reincarnation of Pierre de Fermat, and as such, my mathematical knowledge was insufficient. Fortunately, a way forward could be found over at the » openBVE Japanese « site, which includes some helpful material covering animated objects and functions. The following function can be used to rotate each wheelset:
Incidentally, 2.765 is the circumference of the wheel. The above formula works perfectly, but initially I wondered if it was more complicated than it needed to be, so I attempted to find a more simple alternative, and somehow arrived at the following formula, where the value 0.05949986086344 results from (pi / 0.88) / 60, where 0.88 is the diameter of the wheel:
Initially this seemed to work well, but on closer examination, the end result wasn’t as good as the more complex formula because the rate of rotation varies with the framerate, and I observed no difference in performance between the two anyway.
![]() Update
Update
Thanks to a certain mathematically adept someone, I now have a new formula which is better in terms of performance and ease of use:
|
|
Animated Doors 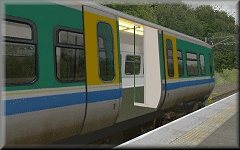 |
The bi-parting sliding plug doors are comprised of a pair of 3D door objects, which slide forwards and backwards via a translation along the Z axis, with values supplied via the left/rightdoors[i] variables, e.g:
[Object]
Position = 0.002, 0, -5.552
States = Class323_Door_2_R_Dark.csv, Class323_Door_2_R.csv
TranslateZFunction = rightdoors[0] + 0.864
TranslateXFunction = min[power[10 * (rightdoors[0] – 0.1), 3] + 1, 1] * 0.05
StateFunction = pluginstate[31]
[Object]
Position = 0.002, 0, -6.417
States = Class323_Door_2a_R_Dark.csv, Class323_Door_2a_R.csv
TranslateZFunction = -rightdoors[0] + 0.864
TranslateXFunction = min[power[10 * (rightdoors[0] – 0.1), 3] + 1, 1] * 0.05
StateFunction = pluginstate[31]
Left door animation:
[Object]
Position = -0.002, 0, -5.552
States = Class323_Door_2_L_Dark.csv, Class323_Door_2_L.csv
TranslateZFunction = leftdoors[0] + 0.864
TranslateXFunction = -min[power[10 * (leftdoors[0] – 0.1), 3] + 1, 1] * 0.05
StateFunction = pluginstate[31]
[Object]
Position = -0.002, 0, -6.417
States = Class323_Door_2a_L_Dark.csv, Class323_Door_2a_L.csv
TranslateZFunction = -leftdoors[0] + 0.864
TranslateXFunction = -min[power[10 * (leftdoors[0] – 0.1), 3] + 1, 1] * 0.05
StateFunction = pluginstate[31]
The StateFunction command is there to switch between illuminated and non-illuminated versions of the door objects, and pluginstate[31] is equivalent to the ats31 subject in the class 323’s panel2.cfg file (when used with Simon Gathercole’s UKMUt.dll), i.e. the Line Light indicator (so the lights appear to go out when the pantograph is lowered). The objects are also translated along the X axis so they “plug” into the bodyside when fully closed. Unfortunately the door open and close sounds aren’t fully synchronised with the door motion; with UK trains, warning beeps are heard before the doors actually start to close, but the beeps are contained within the door closing audio file, and of course the visible doors start to close as soon as the beeping starts. The duration of the door opening motion is also shorter than the duration of the door opening audio files. I haven’t tried having door animation controlled via plugin variables yet; when I have time I’ll look into this further.
Animated Window Reflections 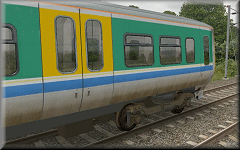 |
The window reflections are made from two semi-transparent surfaces, which have texture shifting functions applied, based upon the current speed of the train, e.g:
[Object]
Position = 0, 0, 0
States = ..\Class323_DMSO_1_WindowReflections.csv
TextureShiftXFunction = value + speed * 0.001
[Object]
Position = 0, 0, 0
States = ..\Class323_DMSO_1_WindowReflections_bg.csv
TextureShiftXFunction = value + speed * 0.0001
There’s a foreground reflection texture with transparency, showing near-track bushes, and there’s also a background reflection texture, showing a low resolution version of the backdrop (ground and sky) texture, and this surface’s texture is shifted more slowly than the foreground texture, creating a rather nice parallax effect when the train is in motion. The overall effect looks rather good in my opinion, but of course, if the reflection textures depict a Summer scene, but the train is used on a Winter route with snow, it looks a little silly…
Interior Illumination 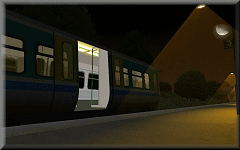 |
Interior lighting strips, along with interior fittings and additional semi-transparent yellow surfaces to lighten the windows when viewed from outside at night (allowing adequate night-lighting effects while still being able to have daytime window reflections), are displayed when the pantograph is raised, and swapped for non-emissive versions when the pan is lowered, so it’s possible to turn the carriage lights on and off. When the pantograph is lowered, all exterior lights are also state-changed or translated so they appear to extinguish, and won’t illuminate until the pantograph is raised again. This is achieved using if[pluginstate[31] ... ] commands, as demonstrated in the next section.
Animated Pantograph 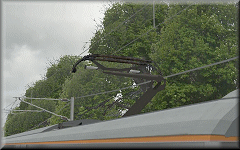 |
The pantograph itself can be visibly raised and lowered, with the head having a Y axis translation applied, and the upper and lower arms having X axis rotation, along with Y and Z axis translation applied. The pantograph animation is conditional upon the state of the value of plugin variable 31, or the ats31 subject in the class 323’s panel2.cfg. The code I’ve written which enables this is as follows (since updated on the 5th July 2009, thanks to a post by michelle herself):
[Object]
Position = 0, 4.24, 9.071
States = ..\Pantograph_BWHS_Head.csv
TranslateYFunction = if[pluginstate[31] == 0, if[value > -0.97, value – delta * 0.49, -0.97], if[value < 0, value + delta * 0.49, 0]]
[Object]
Position = 0, 4.24, 9.071
States = ..\Pantograph_BWHS_UpperArm.csv
TranslateYFunction = if[pluginstate[31] == 0, if[value > -0.45, value – delta * 0.225, -0.45], if[value < 0, value + delta * 0.225, 0]]
RotateXFunction = if[pluginstate[31] == 0, if[value > -0.29, value – delta * 0.145, -0.29], if[value < 0, value + delta * 0.145, 0]]
TranslateZFunction = if[pluginstate[31] == 0, if[value < 0.06, value + delta * 0.03, 0.06], if[value > 0, value – delta * 0.03, 0]]
[Object]
Position = 0, 4.24, 9.071
States = ..\Pantograph_BWHS_LowerArm.csv
TranslateYFunction = if[pluginstate[31] == 0, if[value > -0.45, value – delta * 0.225, -0.45], if[value < 0, value + delta * 0.225, 0]]
RotateXFunction = if[pluginstate[31] == 0, if[value < 0.27, value + delta * 0.135, 0.27], if[value > 0, value – delta * 0.135, 0]]
TranslateZFunction = if[pluginstate[31] == 0, if[value < 0.06, value + delta * 0.03, 0.06], if[value > 0, value – delta * 0.03, 0]]
Animated Wipers and Working Headlights 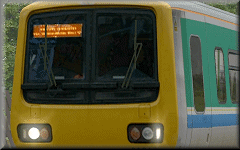 |
The windscreen wipers aren’t as good as I’d like them to be yet; when the if[pluginstate[i] ... ] conditions are satisfied and the truevalue formulae are executed, the wipers can jump to a position mid-sweep rather than starting to move from their currently held position. The same problem can happen when switching the wipers off as well, although the way I’ve implemented it, the wipers will stop in whatever position they are in when the wipers are turned off. More work needed here… Each wiper is comprised of two arms, and a wiper blade. The code so far, is as follows:
[Object]
States = ..\Class323_DMSO_Wiper_L_1.csv
Position = -0.56, 2.27, 0
RotateZFunction = if[pluginstate[198] > 0, power[1 – abs[cos[time]], 0.5] * 1.3, value]
[Object]
States = ..\Class323_DMSO_Wiper_L_1a.csv
Position = -0.5, 2.27, 0
RotateZFunction = if[pluginstate[198] > 0, power[1 – abs[cos[time]], 0.5] * 1.3, value]
[Object]
States = ..\Class323_DMSO_Wiper_L_1b.csv
Position = -0.55, 2.28, 0
TranslateXFunction = if[pluginstate[198] > 0, -power[1 – abs[cos[time]], 0.5] * 0.73, value]
TranslateYFunction = if[pluginstate[198] > 0, power[sin[time * 2], 2] * 0.13, value]
The last TranslateYFunction command moves the wiper blade up and down at the correct speed, which when combined with the X axis translation, creates the overall effect of an arc movement rather than a simple left-right motion.
The head (and tail) lights are linked to the proving lights in the cab (the ats20 and ats21 subjects in the class 323’s panel2.cfg). Each headlight configuration has it’s own csv object. The headlights will only be illuminated when the pantograph is also raised (dependent on the state of plugin variable 31, or the ats31 subject in panel2.cfg). When the tail lights at one end of the train are on, they automatically turn off at the other end of the train. For the rear of the train, the headlights can only illuminate if the tail lights are also off. The code which enables all of this is as follows (please note, I’m presenting two alternative ways of implementing the lights on the leading vehicle, the reason why can be found below):
Class323_DMSO_1.animated (lead vehicle) OPTION 1
[Object]
States = ..\null.csv, ..\Class323_Headlights_0.csv, ..\Class323_Headlights_1.csv, ..\Class323_Headlights_2.csv
Position = 0, 0, 0
RotateYFunction = 3.1416
StateFunction = if[pluginstate[31] == 1, pluginstate[20], 0]
[Object]
States = ..\null.csv, ..\Class323_Taillights_1.csv
Position = 0, 0, 0
RotateYFunction = 3.1416
StateFunction = if[pluginstate[31] == 1, pluginstate[21], 0]
Class323_DMSO_1.animated (lead vehicle) OPTION 2
[Object]
States = ..\Class323_Headlights_0.csv
Position = 0, 0, 0
RotateYFunction = 3.1416
TranslateYFunction = if[pluginstate[31] == 1, if[pluginstate[20] == 1, 0, -600], -600]
[Object]
States = ..\Class323_Headlights_1.csv
Position = 0, 0, 0
RotateYFunction = 3.1416
TranslateYFunction = if[pluginstate[31] == 1, if[pluginstate[20] == 2, 0, -600], -600]
[Object]
States = ..\Class323_Headlights_2.csv
Position = 0, 0, 0
RotateYFunction = 3.1416
TranslateYFunction = if[pluginstate[31] == 1, if[pluginstate[20] == 3, 0, -600], -600]
[Object] States = ..\Class323_Taillights_1.csv
Position = 0, 0, 0
RotateYFunction = 3.1416
TranslateYFunction = if[pluginstate[31] == 1, if[pluginstate[21] == 1, 0, -600], -600]
Class323_DMSO_3.animated (rear vehicle)
[Object]
States = ..\null.csv, ..\Class323_Headlights_0.csv, ..\Class323_Headlights_1.csv, ..\Class323_Headlights_2.csv
Position = 0, 0, 0
StateFunction = if[pluginstate[31] == 1, if[pluginstate[21] == 1, pluginstate[20], 0], 0]
[Object]
States = ..\Class323_Taillights_1.csv, ..\null.csv
Position = 0, 0, 0
StateFunction = if[pluginstate[31] == 1, if[pluginstate[31] == 1, pluginstate[21], 0], 1]
In Option 1 above, the lead vehicle’s headlights are changed using StateFunction commands alone. This method works fine, but the first time each state is changed to, you’ll see the object’s texture isn’t loaded until a fraction of a second after the object is displayed, leading to a flash of colour which is a little distracting. Using Option 2 gets around this issue however, because the headlight objects and textures are always loaded upon swtiching to an external view, and are displayed by translating the relevant object along the Y axis instead, conditional upon the value read via the pluginstate[i] variable. As these textures are always loaded in an external view, StateFunction commands alone can be used in the rear vehicle.
Incidentally, the RotateYFunction = 3.1416 lines simply rotate the relevant objects 180° around the Y axis (the value is in radians, rather than degrees).
What I need to do next, is add interior fittings such as seats, luggage racks, LCD TV screens, and so-on. I might make some more progress with the route itself instead though, as to be honest I could do with a break from modelling the minutiae of train objects for a while. ![]()
Tags: Animated Objects, Artwork, Cross-City South, Functions, openBVE, Screenshots, Videos
Posted in openBVE | 58 Comments »
