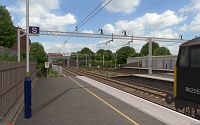
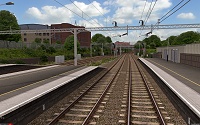
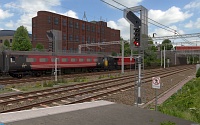
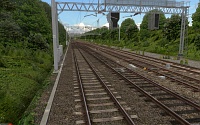
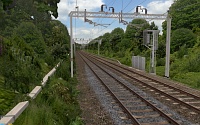
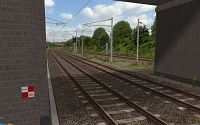
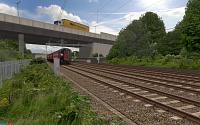
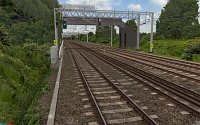
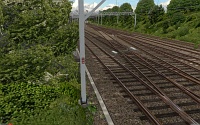
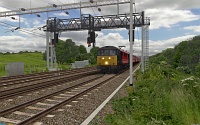
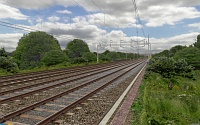
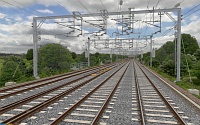
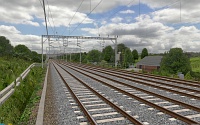
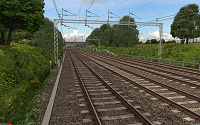
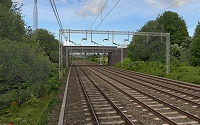
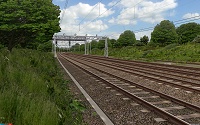
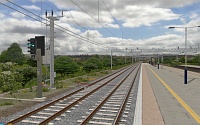
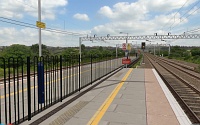
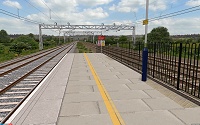
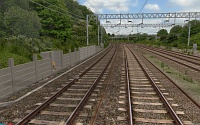
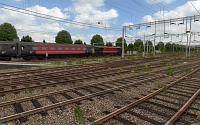
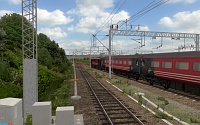
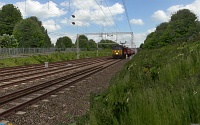
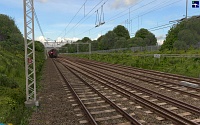
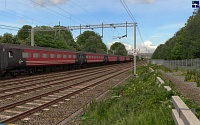
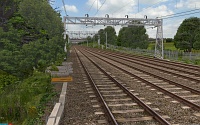
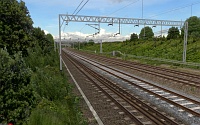
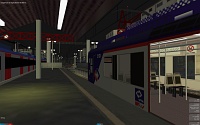
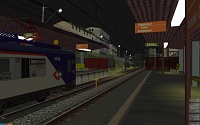
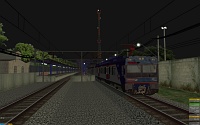
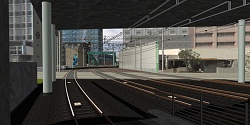
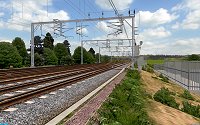
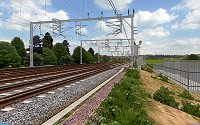
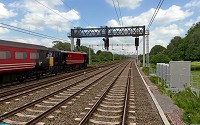
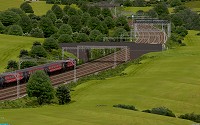
- [WJ-R]: 1980s object removal (Castlethorpe/Hanslope area)
- [XCS]: Pending
- [UkTrainSys]: v0.3.2.0 released
- [Object Library]: Preparing...
- [Website]: Fifth version of website launched
 My openBVE videos and other comments from users and
myself can also be found via my YouTube
channel.
My openBVE videos and other comments from users and
myself can also be found via my YouTube
channel.Blog and Progress Updates
March 12, 2014
Watford Junction to Rugby update, and collaborative project development
Posted by admin on March 12, 2014 at 11:41 pmUpdate on Watford Junction to Rugby project
![]() I’m pleased to say that I resumed development of the Watford Junction to Rugby project recently. Currently I’m working on implementing new .Beacon commands which support the UkTrainSys plugin’s advanced safety system functionality.
I’m pleased to say that I resumed development of the Watford Junction to Rugby project recently. Currently I’m working on implementing new .Beacon commands which support the UkTrainSys plugin’s advanced safety system functionality.
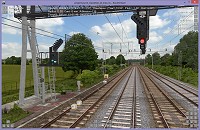
Signalling along the entire 66.5 mile / 107.1 km route has been updated, with all aspects now comprised of animated objects with ground night lighting.
All Automatic Warning System (AWS) magnets are now comprised of beacons simulating the permanent magnets and electro-magnets of the real life system, and sections are now aligned with track circuit breaks and axle counter head locations.
All Train Protection and Warning System (TPWS) induction loops are now simulated with beacons emulating the real life system in terms of induction loop spacing and frequencies.
There are four OHLE neutral sections modelled on the route, and all of these are now updated with UkTrainSys compatible beacons for the Automatic Power Control (APC) permanent magnets both before and after the neutral section, as well as denoting the start and end of the dead section of contact wire itself.
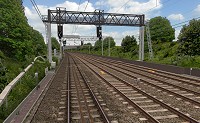 New signals awaiting commissioning (note the out-of-use covers), and modular AWS magnet objects [Click to enlarge] |
Collaborative development
The other significant development, is that the project is now open to third party contributions, to speed up development and bring the release date closer. Ben Leahy is the first developer to contribute to the project by building objects, and I’d be more than happy to hear from you, if you think you’d be able to contribute some more high quality, efficiently coded 3D models for the route, leaving me free to concentrate on the systems and permanent way infrastructure.
Currently there’s a list of objects which need to be created and added to the route. These include:
- Station buildings from Kings Langley through to Rugby inclusive;
- A few lineside buildings, such as houses, warehouses and the like, to be positioned at various locations along the route, but especially at Roade, Weedon, and Rugby;
- A few road overbridges for the Weedon Line, as well as retaining walls at Weedon;
- Road vehicles for road bridges, and the section of M1 motorway at Watford Gap;
- Passing train objects.
If you think you can contribute any of the above, please get in touch and we can discuss options, and I’ll draw up an effective collaboration plan. Thanks 🙂
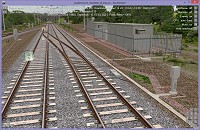 Blisworth pointwork and REBs – can you help by creating a new overbridge object for the site? [Click to enlarge] |
![]() For more information about these ongoing projects:
For more information about these ongoing projects:
 Watford Junction to Rugby Project |
 UK Train System (UkTrainSys) Cross-platform .NET Plugin |
Tags: Animated Objects, Artwork, openBVE, openBVE 2, openBVE Community, Screenshots, Site News, Trackwork, Watford Jn to Rugby
Posted in openBVE, openBVE 2, Site News, Uncategorized | 12 Comments »
December 25, 2010
openBVE v1.2.10 released, Cross-City South v1.31.11 update, and UkTrainSys v0.3.1.9 now available, with enhanced AWS and TPWS simulation, diesel multiple unit support, and various improvements
Posted by admin on December 25, 2010 at 11:15 pmopenBVE v1.2.10 released
![]() openBVE has now reached v1.2.10, which marks the first stable release to feature cross-platform .NET support. This is great news for non-Windows users, who can benefit from the extended functionality, system simulation, and the AI support feature which new .NET plugins can provide. Please head over to the official openBVE homepage to download the latest stable release, as well as to read about the latest developments. Also, don’t forget to read the changelog, for a summary of various other changes which have taken place since v1.2.8.2.
openBVE has now reached v1.2.10, which marks the first stable release to feature cross-platform .NET support. This is great news for non-Windows users, who can benefit from the extended functionality, system simulation, and the AI support feature which new .NET plugins can provide. Please head over to the official openBVE homepage to download the latest stable release, as well as to read about the latest developments. Also, don’t forget to read the changelog, for a summary of various other changes which have taken place since v1.2.8.2.
openBVE users who also use my Cross-City South v1.31 route, should also note that the route is now updated for the new version of openBVE, and it also requires the latest version of the new UkTrainSys plugin for full simulation the class 323’s safety systems to be available, because I’ve now altered the route’s .Beacon commands to take full advantage of the enhanced realism of the new UkTrainSys AWS and TPWS implementation. More details can be found below…
UkTrainSys v0.3.1.9 now available, with enhanced TPWS and AWS simulation, diesel multiple unit support, and a few other enhancements
![]() I’ve just released the next version of the UkTrainSys cross-platform plugin, which is now up to version 0.3.1.9. This latest release includes initial support for diesel multiple units. Other new features include the Vigilance Device reduced cycle time, far more realistic AWS and TPWS simulation, and several other improvements. Here follows some more information about the various features:
I’ve just released the next version of the UkTrainSys cross-platform plugin, which is now up to version 0.3.1.9. This latest release includes initial support for diesel multiple units. Other new features include the Vigilance Device reduced cycle time, far more realistic AWS and TPWS simulation, and several other improvements. Here follows some more information about the various features:
Diesel engine support:
UkTrainSys now has diesel engine support, which means that the plugin can be used with trains which rely on Simon Gathercole’s UKSpt.dll, such as Sprinters or the class 170 (although diesel locomotives are supported too, apart from ammeters and wheelslip protection – I’ll add these later). I’ve decided to recreate much of Simon’s complex diesel engine model, rather than the simple model. This means that UkTrainSys includes the requirement to hold the engine starter button down until the engines are running, as well as simulating the starter motor, and a percentage likelihood that the engine will stall on starting. I’ve also adapted the AI Support feature, so that the AI driver can start the diesel engine, even if it stalls, as well as restart the engine if it is shut down at any point.
Vigilance device with reduced cycle time:
It’s now possible to set an option within the UkTrainSys.cfg file, which enables the Vigilance Device reduced cycle time of 45 seconds, when the power notch is 6 or 7.
Miscellaneous changes:
Firstly, I’ve now implemented a solution for the infamous anomalous multiple-arm phenomenon, which a few people have commented on, when openBVE’s AI driver is enabled for the first time in a driving session. You shouldn’t see any weird, freaky stuff going on in the cab any more, provided that you don’t look over your shoulder, at least. 😉
Secondly, when traction power is not meant to be available, openBVE’s internal reverser position is now set to neutral, whereas previously, only the power handle was set to zero. This means that regenerative braking is disabled when passing through a neutral section, for example.
Thirdly, I’ve also expanded the range of optional Data values which can be recognised via .Beacon 50 commands. UkTrainSys can now be informed of an upcoming terminal station, and this instructs the UkTrainSys AI Support implementation to leave the reverser alone after stopping, so that UkTrainSys and openBVE aren’t continually squabbling over their respective desires where the reverser handle position is concerned. .Beacon 50 can now also be used to instruct the AI Support to lower the pantograph or stop the diesel engine upon the next station stop, after the doors have opened. .Beacon 50 can also be used to inform UkTrainSys of an upcoming neutral section, now. As UkTrainSys will implement a tap changer in future, and a tap changer can take over 30 seconds to run down to notch 0, this beacon can be placed quite some distance ahead of a neutral section. When this neutral section beacon instruction is encountered, UkTrainSys begins monitoring the train’s speed, along with the distance to the neutral section, and decides when exactly to return the power handle to notch 0. UkTrainSys also checks to see if the tap changer is enabled or not, and if it is, the time taken to run down the tap changer is taken into account.
Lastly, the AI guard and related beacons, have been expanded to accommodate multiple stopping points at a station, and UkTrainSys selects which beacon to act upon, depending upon how many cars the player’s train has.
Train Protection and Warning System (TPWS):
For this release, I’ve also significantly increased the realism of the Train Protection and Warning System (TPWS) implementation. With Simon’s previous generation of plugins written for BVE 4, the TPWS simulation seemed to be realistic to the end user, but it didn’t always work in a way which truly reflects how the real TPWS works. Thanks to openBVE, as well as openBVE’s API and documentation, I’ve been able to create a TPWS simulation which works just like the real thing, while also being backwards compatible with routes which were written with Simon’s BVE 4 plugins in mind.
For example, the implementation of the Overspeed Sensor System in Simon’s plugin, was a simplification of how the real OSS works. Simon’s plugin recognises the optional Data parameter of a single .Beacon 44002 or .Beacon 44003 command, as a maximum permissible speed. If the train’s speed exceeds the set speed which is encoded in the .Beacon command’s Data parameter, then the TPWS issues an OSS brake demand. This simplified system works well enough, however it doesn’t take acceleration or deceleration curves into account, for example, and it’s not how the real system works. My OSS implementation, works exactly like the real system.
UkTrainSys recognises a track mounted OSS as comprised of a pair of induction loops (beacons) – the arming loop, and the trigger loop. Where Simon’s plugin expects to read a set speed from only the trigger beacon, UkTrainSys can read a unique frequency from each beacon’s optional Data parameter instead. The permissible OSS set speed, is now determined by the distance between the induction loops, just like in reality. Furthermore, UkTrainSys implements a pair of on-board OSS timers, and the OSS timeout period can be set in the UkTrainSys.cfg file, to suit a passenger or freight train – there is no need to edit a route file to accommodate both types of train. Each timer acts independently of the other, being armed by different arming frequencies, and this allows for realistic nesting and interleaving of induction loops, as well as realistic system behaviour when travelling backwards over induction loops.
The Trainstop Sensor System (TSS) implementation has also been made more realistic. With Simon’s plugins, a single beacon acts as the TSS installation, but with the real system, a pair of induction loops form the TSS – as with the OSS, there is an arming and trigger loop. UkTrainSys recognises TSS arming and trigger induction loops based upon frequencies specified via the optional Data parameter of the .Beacon commands. When the plugin encounters a TSS arming beacon, one of two TSS detection states is activated, and only if a TSS trigger beacon with a suitable frequency is encountered while the arming beacon is still within “detection range”, will the TSS be functional. If a TSS trigger beacon is encountered without an arming beacon having activated the system, then the trigger beacon is ignored, as with the real system. Again, this means that induction loops can be nested and interleaved, and prototypical reverse direction behaviour can be simulated.
Automatic Warning System (AWS):
I’ve not only improved the realism of the TPWS simulation, but I’ve also implemented a more realistic implementation of the Automatic Warning System (AWS), as well. With Simon’s previous generation of BVE4 plugins, and the routes designed for use with them, a single beacon command is used to represent an AWS magnet. The new UkTrainSys AWS simulation also supports this legacy behaviour, but UkTrainSys can also now respond to an AWS permanent magnet, together with an AWS electromagnet. Both are defined via separate .Beacon commands, with a distinction between the magnetic polarity of the magnets defined via the optional Data parameter. This allows for a fully realistic AWS simulation, using only one beacon type, whether associated with a signal or a speed restriction.
When UkTrainSys encounters an AWS permanent magnet, the AWS is primed, the AWS sunflower instrument goes black, and a timeout period is started. If an energised AWS electromagnet is detected within this timeout period, then an AWS clear is issued (i.e. the bell/bing sound, and the sunflower instrument stays black). If no electromagnet is detected within the timeout period, then an AWS warning is issued when the timeout period expires, just like with the real AWS. This also allows for a slightly more realistic simulation of the AWS when travelling at very low speed over an AWS magnet associated with a signal showing a green aspect. At very low speeds, the AWS can be primed by the detection of the permanent magnet, but the timeout period can expire before the electromagnet is detected, which leads to an AWS warning being issued, even though the signal is green (Simon’s plugins also simulate this). However, with UkTrainSys, if you don’t cancel the AWS warning, it will actually clear itself when the electromagnet is detected, with the overall effect being an AWS warning horn followed by the bell/bing sound (assuming the electromagnet is detected before a brake demand is issued).
UkTrainSys also supports AWS suppression magnets, which are used on bi-directionally signalled lines. By inserting a suppression beacon before or after a permanent magnet beacon, an AWS inductor can be made to work in either a forward only direction, or backwards only direction. Should openBVE support networked tracks and bi-directionally signalled lines in future, this can far more easily allow for a fully realistic simulation of AWS under those circumstances.
A summary of the advantages of the new UkTrainSys TPWS and AWS implementation:
- Acceleration and deceleration curves are taken into account when traversing a TPWS OSS;
- TPWS induction loops can be nested or interleaved;
- Passenger and freight trains can have their own OSS timeout periods set, with no need to edit a route file to accommodate either train type;
- A single beacon type can be used to represent all kinds of track-mounted AWS installations;
- By defining the AWS permanent and electromagnets separately, a fully realistic AWS simulation can be achieved;
- AWS suppression is supported;
- The above features allow for fully realistic behaviour while travelling forwards or backwards over AWS inductors and TPWS loops;
- It’s more fun when the simulated systems work in the same way as the real systems, with the same advantages and disadvantages of the real systems;
- Lastly, it’s more future proof. Should openBVE support networked tracks or bi-directional signalling in future, I think the best way to ensure compatibility or ease of code maintenance, is to make the simulated systems work with the same principles, trigger events, inputs, outputs, and variables, as the real-world systems.
Disadvantages:
- Placing the TPWS related beacons is a little more difficult, but it’s really no big deal if the documentation is read, and you have a calculator, as well as the ability to type in a few numbers (which any openBVE developer has to be able to do anyway). 😉
- UkTrainSys can interpret the new frequency-based beacons in new routes, and it can interpret old speed-based beacons in existing routes (UkTrainSys is fully backwards compatible with legacy beacon commands in these routes), but Simon’s BVE 4 plugins won’t recognise the induction loop frequencies (or magnetic polarities) when encountered in new routes designed for openBVE and UkTrainSys.
- Two beacons now make up an AWS magnet associated with a signal, but it’s only slightly more trouble than using one beacon.
UkTrainSys configuration files for openBVE trains
I’ve also released a set of configuration files which can be used with a variety of DMUs and EMUs available from trainsimcentral. If you are a Linux or Mac user, and want to enjoy some UK diesel traction in openBVE, then you can simply extract the latest UkTrainSys.dll into any of the supported TSC train folders, and then extract the appropriate configuration files into each folder. If you are a Windows user, then you might like to experiment with the new fully realistic AWS and TPWS implementation within the UkTrainSys plugin (on existing routes to test the backwards compatible legacy behaviour, and on either Cross-City South v1.31.11 or the AWS/TPWS test route available below, to test the new simulation). I would certainly appreciate any feedback. Please bear in mind that the guard’s buzzer sounds might play more times than they should – UkTrainSys expects the buzzer sound file to contain only one buzz sound, whereas these trains may contain two buzzes in the relevant sound file.
For more information and the latest downloads, plus complete documentation and example code snippets, please visit the UkTrainSys project page:
 UK Train System (UkTrainSys) Cross-platform .NET Plugin [v0.3.1.9 now available] |
AWS and TPWS test route for use with UkTrainSys (or any supported train class), and Cross-City South v1.31.11 update
![]() As with the enhanced neutral section and Automatic Power Control feature included in the last UkTrainSys release, for this latest version, I’ve prepared a test route so that the new AWS and TPWS implementation can be tested. I’ve also updated Cross-City South to v1.31.11, and the openBVE route files now utilise the realistic AWS and TPWS simulation features of the UkTrainSys plugin.
As with the enhanced neutral section and Automatic Power Control feature included in the last UkTrainSys release, for this latest version, I’ve prepared a test route so that the new AWS and TPWS implementation can be tested. I’ve also updated Cross-City South to v1.31.11, and the openBVE route files now utilise the realistic AWS and TPWS simulation features of the UkTrainSys plugin.
The AWS and TPWS test route is around 7 km in length, and demonstrates a variety of AWS and TPWS installations. Each signal is held at red until a preset time, and you can either drive safely or commit SPADs to test that AWS and TPWS are working correctly. There is also a signal and a permanent speed restriction located near to each other, which requires the co-location of a TPWS OSS associated with the signal, plus another OSS associated with the permanent speed restriction. The OSS induction loops at this location are interleaved, and you can test how this works when the signal is red or otherwise. You can also practice driving at normal and extremely slow speeds over AWS magnets, to see how the dual magnet detection works, especially when a signal aspect is green. There is also a single track section, which is equipped with AWS suppression magnets, and you can drive forwards and backwards along the route to test this feature, as well.
Download: AWS and TPWS test route [86 KiB – also includes updated neutral section test route]
Once extracted, the route file can be found here: Railway\Route\rsr_uktrainsys_test\
Also remember that you need openBVE v1.2.10 in order to use this latest UkTrainSys .NET plugin, and also remember that this is an alpha release of the plugin, so it may have some issues, but they’ll be addressed as development progresses.
Updated AWS inductor screenshots – Cross-City South v2.0 and Watford Junction to Rugby
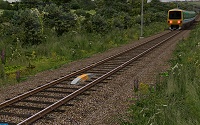
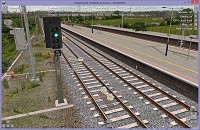
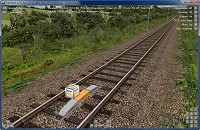
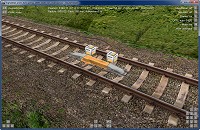
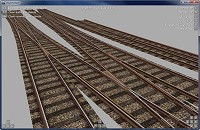
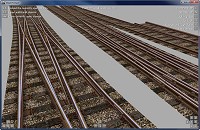
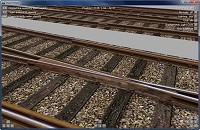
While coding the latest UkTrainSys updates, I updated the AWS magnet objects which I’m using in my work-in-progress routes. As UkTrainSys now recognises both AWS permanent magnets and electromagnets separately, I thought I’d separate out these parts of the existing AWS magnet into their own respective object files, so they can be easily assigned to beacon or freeobj structure indices, as appropriate. Here are some examples…
In the first screenshot, is an AWS permanent magnet associated with a fixed distant signal, which has a protection ramp on both sides, as this is a stretch of bi-directional line. In the second, the same applies, except an AWS electromagnet beacon is also in place. In the remaining screenshots, are permanent magnets associated with permanent speed restriction advance warning boards, which have only one ramp, as these tracks are uni-directional. These objects will be included in the UK Railway Infrastructure Object Library, however you can actually download and use them now, as they are included with the AWS and TPWS test route (see above).
 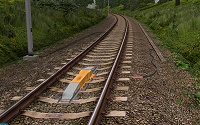 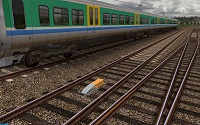 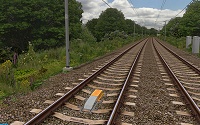 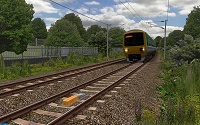 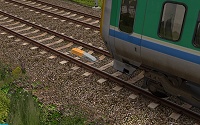 |
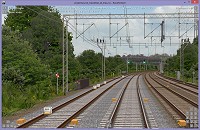
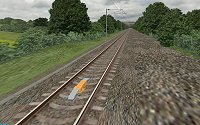
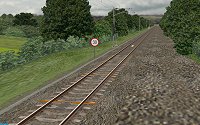
Also, here are some examples of full AWS permanent and electromagnet installations on the Watford Junction to Rugby route:
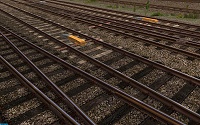 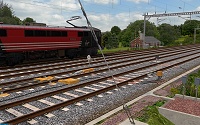 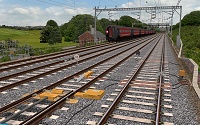 |
West Coast Main Line Video
![]() Lastly, anyone with an interest in the real West Coast Main Line, might like to take a look at a video which I uploaded to YouTube recently, which features the Old Linslade and Leighton Buzzard areas – two locations I’m modelling in my representation of the Watford Junction to Rugby section of the WCML. Those of you who noticed or commented on the Train Operated Warning System I demonstrated in my last openBVE video (the rotating orange lights with audible warnings), can now watch the real system in action.
Lastly, anyone with an interest in the real West Coast Main Line, might like to take a look at a video which I uploaded to YouTube recently, which features the Old Linslade and Leighton Buzzard areas – two locations I’m modelling in my representation of the Watford Junction to Rugby section of the WCML. Those of you who noticed or commented on the Train Operated Warning System I demonstrated in my last openBVE video (the rotating orange lights with audible warnings), can now watch the real system in action.
This footage was filmed in October 2004 to assist me with developing this part of the route (only in standard definition unfortunately), but you’ll see a couple of class 87s which were still in service at the time. Also featured, are ubiquitous Pendolinos, class 321 EMUs, as well as classes 58, 60 and 66 diesels, and class 90 and 92 25kV AC electric locos. Don’t forget to change to 480p resolution for the best image quality.
And finally…
Lastly, I’d just like to wish visitors a happy and peaceful Christmas, and say thanks for all the interest shown in my work so far. 🙂
Tags: Cross-City South, openBVE, Screenshots, Site News, Software, Trackwork, Watford Jn to Rugby
Posted in openBVE, Site News | 28 Comments »
November 26, 2010
UkTrainSys plugin update; enhanced simulation of neutral sections and Automatic Power Control, neutral section test route released, and new screenshots showing improved Brecknell Willis Highspeed pantograph models and new sunset backdrops
Posted by admin on November 26, 2010 at 9:25 pm![]() Firstly, I just wanted to say thank you for the positive reception with which the UkTrainSys cross-platform .NET plugin has been received; this was very nice to see! Based on feedback, I’ve now updated the UkTrainSys plugin, so that the AI driver will operate the Driver Reminder Appliance en-route. I’ve also implemented an enhanced neutral section and Automatic Power Control simulation, but first, a little background information might be in order…
Firstly, I just wanted to say thank you for the positive reception with which the UkTrainSys cross-platform .NET plugin has been received; this was very nice to see! Based on feedback, I’ve now updated the UkTrainSys plugin, so that the AI driver will operate the Driver Reminder Appliance en-route. I’ve also implemented an enhanced neutral section and Automatic Power Control simulation, but first, a little background information might be in order…
Neutral section (phase break) installations
For those who don’t know, a neutral section (or phase break), isolates different phases of the power supply being fed to the overhead electrification system from each other. This is accomplished by inserting a short length of insulated material into the contact wire, which the pantograph head can still slide across at speed. In the UK, I gather these insulated sections are typically comprised of glass-fibre rods with ceramic collars threaded on to them, with the total length of the neutral section itself, being only around 4 metres.
At either side of the neutral section, are a pair of track mounted magnets, called APC (Automatic Power Control) magnets. Whenever an APC receiver on an electric train detects these magnets, the APC system flips the state of the air-blast/vacuum circuit breaker (ACB/VCB) between the pantograph and the on-train traction equipment, interrupting or connecting the supply from the pantograph and overhead line.
Thus, when a train approaches the first pair of magnets prior to a neutral section, the ACB/VCB is commanded open, such that there is no power being drawn from the overhead line when passing through the neutral section (this prevents the pantograph from drawing an arc and accidentally connecting one of the power supply phases to earth – the neutral section cantilever/support tubes are earthed so that the two separated phases aren’t connected in the event of an arc). When the train passes the second pair of APC magnets after the neutral section, the ACB/VCB is commanded closed again, and power from the overhead line can be taken.
See the illustration to the left, for an overview of the installation. The yellow arrow indicates the direction of travel; the red line indicates which parts of the contact wire are still live, even if the Automatic Power Control system has opened the train’s air-blast/vacuum circuit breaker, and finally, the blue line shows the location of the neutral section itself.
Updated UkTrainSys cross-platform .NET plugin (v0.3.1.3), with enhanced neutral section and APC simulation
![]() Anyway, an updated version of the UkTrainSys plugin is now available together with the class 323’s 3D cab (version 0.3.1.3 – downloads can be found further down), and I’ve made some improvements to the simulation of electric trains. Firstly, I’ve modified the pantograph behaviour – when the pantograph is rising or lowering, pressing the Up/Reset or Down button has no effect until either operation is completed. Pressing the Up/Reset button when the pantograph is already raised, will just re-close the air-blast/vacuum circuit breaker (ACB/VCB) if it’s open.
Anyway, an updated version of the UkTrainSys plugin is now available together with the class 323’s 3D cab (version 0.3.1.3 – downloads can be found further down), and I’ve made some improvements to the simulation of electric trains. Firstly, I’ve modified the pantograph behaviour – when the pantograph is rising or lowering, pressing the Up/Reset or Down button has no effect until either operation is completed. Pressing the Up/Reset button when the pantograph is already raised, will just re-close the air-blast/vacuum circuit breaker (ACB/VCB) if it’s open.
Secondly, and more importantly, I’ve significantly improved the simulation of neutral sections, and Automatic Power Control. Now, the APC magnets and the actual neutral section itself can be declared separately. This means that every time the correctly defined APC magnet beacon is passed, it will flip the current state of the train’s ACB/VCB. This however, does not affect the actual availability of line voltage from the contact wire.
What this means, is that if the ACB/VCB is tripped open by an APC magnet, but your train stalls because you weren’t travelling fast enough, you can now manually re-close the ACB/VCB by pressing the pantograph up/reset button. If the train’s pantograph is not within the separately defined 4 metre long neutral section, you can take power from the overhead supply once again, and move the train backwards or forwards as appropriate, so you can try to build up enough speed in order to coast through the neutral section without stalling, this time. If the train’s pantograph does stop within the neutral section, then line voltage is not available, even if you try to re-close the ACB/VCB. In this case, you have to hope that your train is on a gradient, such that if the brakes are released, the train will roll out of the neutral section due to gravity. If this isn’t possible, then you have some explaining to do!
There is a more interesting aspect to this, though – with UkTrainSys, you can now drive backwards through a neutral section, not just forwards, and still have the full simulation experience. On a unit like the 323, (I think) the APC receiver is located on the bogie beneath the pantograph, on the second coach. The beacon receiver on an openBVE train is located at the front of the train, however – where the driver is (thereabouts). If travelling forwards, then when the front of the train passes an APC magnet beacon, this triggers a point-based event, and a check can then be performed, which will only carry out the ACB/VCB operation when the train is so many metres beyond the beacon; i.e the distance between the front of the train, and the location of where the APC receiver is supposed to be. But what happens if the train is travelling backwards? The location where the APC receiver is supposed to be, will pass the APC beacon before what is now the rear of the train (where the driver and openBVE’s beacon receiver are located), will pass the beacon, and hence trigger a beacon related event. This obviously won’t work properly, as the action triggered by the beacon, won’t happen until it’s beneath the driver’s position, which is too late when travelling backwards.
So, the UkTrainSys plugin now includes what I’m calling the “Offset Beacon Receiver Manager” (OBRM). Whenever the UkTrainSys plugin passes an APC magnet beacon while travelling forwards, the plugin stores information about the beacon in an array. The stored information includes the beacon type, it’s location, it’s optional data, and an offset distance which equates to the distance between the front of the train, and the location of where the APC receiver is supposed to be. The OBRM continually checks whether the train is currently travelling forwards or backwards, and whether the APC receiver location has passed the actual beacon location, taking direction of travel into account. When the trigger point occurs, the OBRM issues a command to the APC system, rather than doing this via the SetBeacon() method. The only other thing to mention, is that jumping to a station clears the encountered beacon history, so you actually have to drive forwards over a beacon for it to be stored by the OBRM.
This means that you can drive an EMU like the 323 through a neutral section backwards, but it also means that a Driving Van Trailer (DVT) with an electric loco pushing a rake of coaches from behind, can respond to the APC magnets at the correct time and location, whether travelling forwards or backwards, too.
- Class 323 3D cab with pre-configured UkTrainSys plugin [v0.3.1.3 – 2.3 MiB]
(The unrefurbished class 323 from Trainsimcentral is required first – the 3D cab and plugin update should OVERWRITE any existing files in the “Cl323 Unrefurb_openbve” folder).
Also, the UkTrainSys changelog can be found here: UkTrainSys project page.
Short neutral section test route, for use with UkTrainSys and the class 323 with 3D cab
![]() I’ve prepared a short test route so that you can try this new feature. The route includes two neutral sections; the first on level track, and the second on an incline. Using the class 323 with the latest version of the 3D cab update and UkTrainSys plugin, you can drive through the neutral sections and play with the new behaviour.
I’ve prepared a short test route so that you can try this new feature. The route includes two neutral sections; the first on level track, and the second on an incline. Using the class 323 with the latest version of the 3D cab update and UkTrainSys plugin, you can drive through the neutral sections and play with the new behaviour.
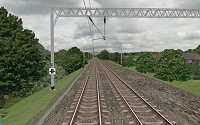 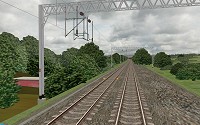 The neutral section test route (the white board gives notice of the neutral section)
|
On the first run, just pass through a neutral section as normal – it should seem pretty much identical to the neutral section experience in Network West Midlands, using Simon Gathercole’s BVE 4 UKMUt plugin.
On the second run, you can do things differently though – approach a neutral section slowly, and let your pantograph (where the APC receiver is located) pass the first pair of APC magnets, such that the VCB is tripped open, and then apply the brakes and come to a halt. You’ll note that the Line Volts indicator extinguishes, the VCB indicator light illuminates, and that you can’t take traction power – your train appears stuck. However, when the 323 has stopped, you can now reset the VCB by placing the reverser to Neutral and pressing the ‘2’ key – you should hear the VCB closing with a thud. Provided your pantograph is in contact with a live section of overhead line, the Line Volts indicator will illuminate again, and the VCB indicator will extinguish. Now you can take traction power. But what happens if your train is so close to the dead section of overhead line, that you can’t accelerate enough to coast through the neutral section, without stalling? You have to go to the external view by pressing ‘F2’, so you can see what side of the neutral section your pantograph is on, and choose whether to move the train forwards or backwards, such that you can take a “run up” at the neutral section, next time.
If you do stop with your pantograph in contact with the neutral section itself, then there is no line voltage, and resetting the VCB or lowering and raising the pantograph won’t change this. If you are on level track, your train is stuck there (you can cheat, and jump to another station, though). If however, you are on a gradient (the second neutral section is on an incline), then you can move the reverser to Neutral, and move the power handle to Off, and then release the brakes. Your train will now begin to roll backwards due to gravity (in reality, you would need permission from the signaller to do this). When your pantograph makes contact with a live section of overhead line again, the Line Volts indicator will light up, and you can take traction power again. If you continue rolling backwards, you’ll pass the APC magnet prior to the neutral section – this will trip open your VCB, despite heading away from the neutral section, and you’ll have to apply the brakes, stop the train, move the reverser to Neutral, and press the ‘2’ key to reset the VCB. Once done, you can take power, and go back as far enough as is required, to build enough speed in the forward direction to successfully coast through the neutral section.
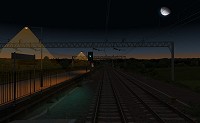
Screenshots showing new sunset backdrops, and improved Brecknell Willis Highspeed pantograph models
![]() Finally, I’ve been busy taking photos of sunsets again this week, and I just wanted to post a few more screenshots of the latest enhancement to the Cross-City South v2.0 and Watford Junction to Rugby routes. I’ve also, finally, got around to improving the Brecknell Willis Highspeed pantograph model, which now includes a full 3D pantograph head, with textures used throughout:
Finally, I’ve been busy taking photos of sunsets again this week, and I just wanted to post a few more screenshots of the latest enhancement to the Cross-City South v2.0 and Watford Junction to Rugby routes. I’ve also, finally, got around to improving the Brecknell Willis Highspeed pantograph model, which now includes a full 3D pantograph head, with textures used throughout:
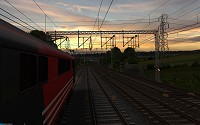 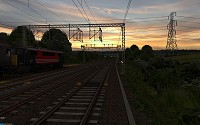 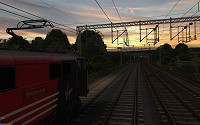 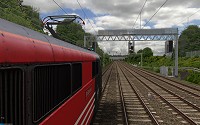 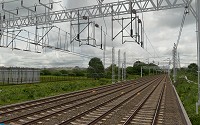 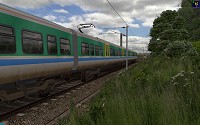 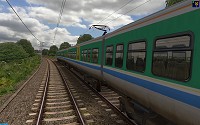 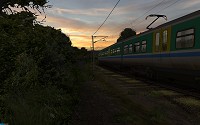 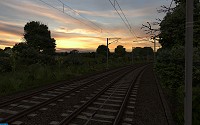 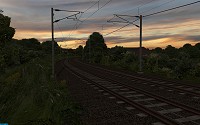 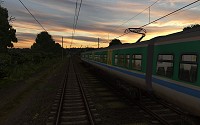 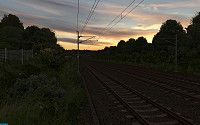 |
I hope you like the latest developments. 🙂
Tags: Artwork, Cross-City South, openBVE, Screenshots, Site News, Software, Trackwork, Watford Jn to Rugby
Posted in openBVE, Site News | 8 Comments »
October 14, 2010
September 5, 2010
April 14, 2010
Chashinai Railway April updates
Posted by admin on April 14, 2010 at 12:30 am![]() What I would consider to be one of the flagship routes for openBVE due to it’s innovation, and one of the most varied and enjoyable, namely » odakyufan’s Chashinai Railway «, has been updated. The Misaki Line from Tawaramoto to Hitachiomiya can now be driven back and forth in both directions (via seperate route files), which is fun. The ATC system has also been redesigned, such that a gradual, smooth brake curve is now implemented, along with a Rapid Mode which removes the smoothening for use in the rush hour where trains are more frequent and adhering to the timetable is harder. Driving the Chashinai 9000 Series train with ATC, TASC and ATO activated is one of the most enjoyable things which can be done with openBVE, so I’d strongly recommend that you give this a try — it’s well worth it. Instructions can be found » here «. Please also note that the source code for the plugins used by the Chashinai Railway’s trains is included within the train download, and I’d recommend that anyone considering plugin development in future, study the cleanly written, concise source code as well, of course bearing in mind that a move to cross-platform .NET plugins will occur in future. Incidentally, publishing the source code for plugins is something I would like to see more train developers doing in future, and certainly something I will be doing in future (I’ll be writing a new cross-platform .NET plugin for the new class 323 of course), once » openBVE 2 « is in a more advanced stage of development.
What I would consider to be one of the flagship routes for openBVE due to it’s innovation, and one of the most varied and enjoyable, namely » odakyufan’s Chashinai Railway «, has been updated. The Misaki Line from Tawaramoto to Hitachiomiya can now be driven back and forth in both directions (via seperate route files), which is fun. The ATC system has also been redesigned, such that a gradual, smooth brake curve is now implemented, along with a Rapid Mode which removes the smoothening for use in the rush hour where trains are more frequent and adhering to the timetable is harder. Driving the Chashinai 9000 Series train with ATC, TASC and ATO activated is one of the most enjoyable things which can be done with openBVE, so I’d strongly recommend that you give this a try — it’s well worth it. Instructions can be found » here «. Please also note that the source code for the plugins used by the Chashinai Railway’s trains is included within the train download, and I’d recommend that anyone considering plugin development in future, study the cleanly written, concise source code as well, of course bearing in mind that a move to cross-platform .NET plugins will occur in future. Incidentally, publishing the source code for plugins is something I would like to see more train developers doing in future, and certainly something I will be doing in future (I’ll be writing a new cross-platform .NET plugin for the new class 323 of course), once » openBVE 2 « is in a more advanced stage of development.
Moving road vehicles have also been added together with traffic sounds, shown to best visual effect on overbridges, I think particularly on the Koriyama Line (also bi-directional), Takahagi and Ishinden Lines, and vehicles can be seen travelling parallel to the railway between Shirosato and Motegi on the Misaki Line as well. The use of texture shifting functions here, enables vehicles to appear as though they’re travelling along the road, despite it’s apparent gradient and directional changes. I’ll be doing something similar at Watford Gap and other locations on the Watford Junction to Rugby route, using a technique developed for 3D vehicles by odakyufan, » details of which can be found here «. Other details, such as beacons correctly aligned with sleepers and track are taken care of too, as I’ve tried to do with AWS magnets in my routes. You’ll also find far more variation in the numbers of passengers waiting to board your train, which makes stations pleasing and fun to approach as there’s far more to see now; the recent changes to openBVE regarding the weight of the train increasing with passenger load and the effect this has on performance, can be used to good effect here (don’t forget to download the most recent version 1.2.6.1 of » openBVE « for this to work). Watch out for wheelslip depending on location, environmental or meteorological conditions too!
Developers might also be interested in taking a look at how the Chashinai Railway’s route files have been prepared. openBVE’s $Include directive has been used extensively, with much greater efficiency and flexibility now possible.
Please visit » The Web Presence of Odakyufan « to download the latest release of Chashinai Railway, and also » this thread on the openBVE forum «, where additional screenshots, information, details and benefts of $Include can be found. This is sophisticated, high quality and beautiful work, and I look forward to seeing more in future.
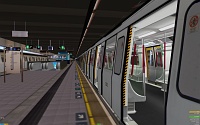
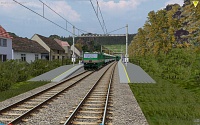
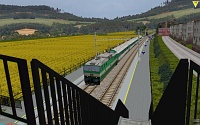
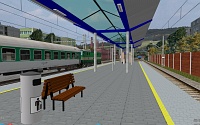
| Images captured at 1680×1050, with smooth transparency and 16xQ anti-aliasing and 16x anisotropic filtering (Please hover over any thumbnail image for a description) ![About to pick up additional passengers waiting to join the train at Izumozaki North on the Misaki Line, with ATC indicating a clear line ahead. [Click to enlarge] About to pick up additional passengers waiting to join the train at Izumozaki North on the Misaki Line, with ATC indicating a clear line ahead. [Click to enlarge]](/images/thumbnails/openbve_chashinai_17.jpg) ![Animated road vehicles crossing the overbridge at Kawarada station where the Ishinden and Uchiike Lines join together, as the warmth of the rising sun adds ambience to the scene. [Click to enlarge] Animated road vehicles crossing the overbridge at Kawarada station where the Ishinden and Uchiike Lines join together, as the warmth of the rising sun adds ambience the scene. [Click to enlarge]](/images/thumbnails/openbve_chashinai_18.jpg) openBVE / Chashinai Railway screenshots Download from » The Web Presence of Odakyufan « |
Railsimroutes Projects
![]() I know haven’t posted any updates regarding my own projects for some time, about which I can only apologise. I have a couple of features which I want to be working on for » openBVE 2 « first, however when I have time spare I’m also working on implementing another feature for both of my routes, and I’ll post some screenshots of this once I’m happy with how it all looks. More to follow fairly soon…
I know haven’t posted any updates regarding my own projects for some time, about which I can only apologise. I have a couple of features which I want to be working on for » openBVE 2 « first, however when I have time spare I’m also working on implementing another feature for both of my routes, and I’ll post some screenshots of this once I’m happy with how it all looks. More to follow fairly soon…
Tags: Animated Objects, Artwork, openBVE, openBVE Community, Screenshots, Site News, Trackwork, Watford Jn to Rugby
Posted in openBVE, Site News | 1 Comment »
March 15, 2010
openBVE 2 Renderer Demo released, a new direction for me, some views on openBVE 2, and the release of openBVE v1.2.6.0
Posted by admin on March 15, 2010 at 8:00 amopenBVE 2 Renderer Demo released, and a new direction for me
![]() Before I talk about the new openBVE 2 Renderer Demo, I just want to announce that aside from developing my routes, I’m also now working with Michelle as a C# programmer, and I’m actively participating in the development of openBVE 2. So far, apart from various discussions, I’ve worked on adapting openBVE 1’s .X object parser as a loading-stage plugin for the new program. So, while you’re using the program, if you have any problems regarding X format objects created via the BVE Structure Viewer (the output from this tool is what openBVE effectively supports), then you can probably point the finger of blame at me. 😉 Just to remind and reassure readers, I am still developing my routes, and I haven’t abandoned them!
Before I talk about the new openBVE 2 Renderer Demo, I just want to announce that aside from developing my routes, I’m also now working with Michelle as a C# programmer, and I’m actively participating in the development of openBVE 2. So far, apart from various discussions, I’ve worked on adapting openBVE 1’s .X object parser as a loading-stage plugin for the new program. So, while you’re using the program, if you have any problems regarding X format objects created via the BVE Structure Viewer (the output from this tool is what openBVE effectively supports), then you can probably point the finger of blame at me. 😉 Just to remind and reassure readers, I am still developing my routes, and I haven’t abandoned them!
The openBVE 2 Renderer Demo
![]() As many of you will know, openBVE 2 has been in development for some time, and I’m pleased to say that a demo of openBVE 2’s new renderer is now available for download. Unlike it’s predecessor, openBVE 2 is modular — many of the functions which were previously carried out within the program, such as loading and parsing routes or objects, or brake system simulation, is now carried out by plugins instead. This means that openBVE 2 is extensible in a way which openBVE 1 is not. For example, with openBVE 1, adding support for a new 3D object format, would require modification of the core program itself, and a new release. But with openBVE 2’s extensible architecture, support can simply be added via a new plugin, which means the core program need not be modified or recompiled. Clearly, this is a much better design in the long term.
As many of you will know, openBVE 2 has been in development for some time, and I’m pleased to say that a demo of openBVE 2’s new renderer is now available for download. Unlike it’s predecessor, openBVE 2 is modular — many of the functions which were previously carried out within the program, such as loading and parsing routes or objects, or brake system simulation, is now carried out by plugins instead. This means that openBVE 2 is extensible in a way which openBVE 1 is not. For example, with openBVE 1, adding support for a new 3D object format, would require modification of the core program itself, and a new release. But with openBVE 2’s extensible architecture, support can simply be added via a new plugin, which means the core program need not be modified or recompiled. Clearly, this is a much better design in the long term.
The new renderer demo is intended for advanced users and developers only, and the main purpose of the demo is to test the performance of openBVE 2’s new renderer in comparison with openBVE 1’s, on a variety of computer systems. Indeed, no train simulation features are actually included at this stage, and not all visible features of routes, such as backdrops or animated objects, are accomodated yet.
It would be greatly appreciated if you could download and test the new renderer, and report your experiences; for example, what framerates you see, what viewing distance you find yourself liking to use, and what performance you achieve when equivalent settings are used in both the openBVE 2 Renderer Demo and openBVE 1. Hopefully you’ll find that framerates using openBVE 2’s renderer are far higher.
You can visit the openBVE Renderer Demo page for the download, and please read the information presented there carefully: » http://openbve.trainsimcentral.co.uk/openbve2.html «
Please also consider posting your feedback in » this thread on the openBVE forum «, or send some feedback via e-mail to Michelle. Alternatively, you can leave some feedback in a comment on this blog entry or e-mail me, and I’ll pass your feedback on to Michelle. It would be helpful if you could include certain information, such as the following:
- Your processor model and/or speed (e.g. Intel Core 2 Duo E8400 @ 3GHz, AMD Phenom II X2 545 @ 3.0GHz, etc…)
- Your graphics card model (e.g. NVIDIA GeForce GTS 250, ATI Radeon HD 5670, etc…)
- The amount of RAM you have (e.g. 2GB)
- What operating system you’re using (e.g. Windows 7 64-bit, Ubuntu 9.10 32-bit, etc…)
- The settings within in your settings.cfg file (found in the Binaries subfolder of the openBVE 2 Renderer Demo)
- Your video card driver’s image quality settings (e.g. 16xQ anti-aliasing, 16x anisotropic filtering)
- The framerates you encounter while running the openBVE 2 Renderer Demo, and openBVE 1, with equivalent settings
- Lastly, don’t forget to take into account, the information on the openBVE 2 Renderer Demo download page…
You can find some help regarding identifying your graphics card model on » this page «. Where video driver settings are concerned, you can read » this page «. Windows users can often just press Windows Key + Break to find out CPU model and speed, amount of RAM, and operating system. Michelle is very busy, but if you would like to send some feedback and find yourself unsure as to what to do, then I’d be happy to help you. 🙂
I’m delighted to say that all the routes I’ve tried, benefit greatly from openBVE 2’s new renderer. Not only are framerates higher, but the viewing distance can be increased significantly as well. 🙂 This is also good news for those of you waiting for Watford Junction to Rugby. For example, take the highly detailed Bourne End Junction area, which contains nearly a kilometre of 60mph crossovers between the fast and slow lines, lots of complex overhead line equipment, and plenty of track and lineside detail. With a viewing distance of 3000m (yes, 3 kilometres :)), in openBVE 1, the framerate here is dragged down to a measly » 19 fps « . But with openBVE 2’s renderer, I get an impressive » 155 fps « instead.
Here are some other examples of framerate improvements. For detailed specifications of the computers used in these tests, please » see here «.
Settings in openBVE 1:
Viewing Distance: [3000m]
Resolution: [1920×1200 fullscreen]
Image Quality: [Anti-aliasing: 16xQ, anisotropic filtering: 16x]
vSync: [Off]
Interpolation: [Anisotropic Filtering]
Transparency: [Sharp]
Settings in openBVE 2 Renderer Demo:
Viewing Distance: [3000m]
Resolution: [1920×1200 fullscreen]
Image Quality: [Anti-aliasing: 16xQ, anisotropic filtering: 16x]
vSync: [False]
Interpolation: [5]
objectOptimization: [2]
blockClipping: [true]
All other settings: [Default]
Please note that all framerates were taken with the camera left at it’s initial position and orientation, to produce reliable and consistant results. In openBVE 1, the F3 external camera key was pressed once and left remaining at the start of the route, and the train moved to the end of the route via the Jump to Station menu, to ensure that no external car objects were lowering framerates.
Core 2 Quad Q9650 / GeForce GTX 260 based system:
|
Athlon64 X2 4200+ / Radeon 2600 Pro based system:
|
As you can see, on my systems, openBVE 2’s renderer is far superior to openBVE 1’s. Of course over time, more features will be added, and these will use some more of the newly available CPU and GPU resources and reduce peformance a bit. However, for those of you with slow computers, these extra performance reserves could mean that more detailed routes and trains could be usable than would be the case with openBVE 1.
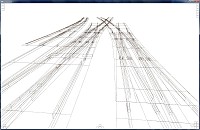
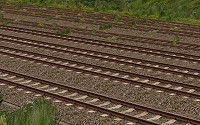
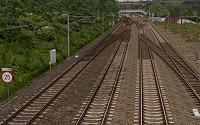
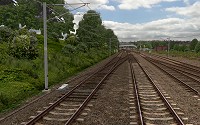
Some more framerate comparisons… openBVE v1.2.5.1 on the left, openBVE 2 Renderer Demo on the right. Remember that we’re interested in the framerate, not the graphical quality, at this early stage! Support for backdrops and smooth transparency will be added to openBVE 2’s renderer in due course. Also note that the viewing distance likely used by many openBVE users is the default 600 metres, but here, the viewing distance is 3000 metres instead.
|
Community concerns regarding “openBVE 2”
![]() I want to mention briefly the concerns regarding the name “openBVE 2” being changed soon, as architecturally, the new program is entirely different to openBVE 1, let alone BVE Trainsim, and I’ve noted some fears being expressed regarding the name change and widening scope of the project, particularly where add-on compatibility is concerned. However, I think these fears are being blown out of proportion. All openBVE content will still be compatible with the new program, so there’s no need to panic — add-ons aren’t going to suddenly become defunct. If any developers have concerns about this, please feel free to discuss them with either myself or Michelle.
I want to mention briefly the concerns regarding the name “openBVE 2” being changed soon, as architecturally, the new program is entirely different to openBVE 1, let alone BVE Trainsim, and I’ve noted some fears being expressed regarding the name change and widening scope of the project, particularly where add-on compatibility is concerned. However, I think these fears are being blown out of proportion. All openBVE content will still be compatible with the new program, so there’s no need to panic — add-ons aren’t going to suddenly become defunct. If any developers have concerns about this, please feel free to discuss them with either myself or Michelle.
I’ve also noticed people express concerns that openBVE 2 is going to be far more difficult to use and develop add-ons for. From the end-user’s point of view, and with cooperation from add-on developers (like me), it could actually be far easier, because it will be possible to install and uninstall add-ons from within the program itself, via it’s graphical user interface, rather than dealing with archiving utilities, self-extracting archives, different directory structures contained within them depending on which developer packaged them, and so-on. This kind of stuff is not easy for everyone, especially beginners, and it has to be repeated with every add-on. Where add-on creation is concerned, one of the benefits of the modular, plugin-based architecture, is that adding support for new file formats, such as file formats created by 3D modelling applications, becomes easier, not harder. It also means that route building tools, should they be made, can more easily interface with the host program via the new API. Those of us who prefer hand-coding methods, myself included, can still do what we’ve always done as well — it’s all a choice. Of course, with a program capable of rendering a vast world, it does become harder to make add-ons which fully exploit this new potential. Even I’m not exploiting this potential with my add-ons currently, but in future this may be highly desirable (just as I’ve upgraded my routes incrementally in the past), and the ability will be there for anyone who wants it, or who can envisage a use which even we haven’t even thought of yet. Anyway, the modular architecture makes it easier to build content creation tools, or provide support for existing tools and their file formats, which will make the growing possibilities easier to take advantage of. This does however, require some good programmers willing to devote some time to creating such tools, or writing plugins to support existing tools or formats; I recognise this, and I’m sure Michelle does as well. Lets try to be a little more positive about the future.
openBVE v1.2.6.0 released
![]() Lastly, openBVE v1.2.6.0 has also been released. Now is a good time remind ourselves that openBVE is a train simulator first and foremost, and with this latest release, the mass of the train is now affected by boarding passengers, which can slightly affect the performance of the train. A bug has also been fixed in the Jump to Station menu, and the Interior (Look Ahead) camera is now selected by default for 3D cabs (like the » class 323’s 3D cab « for example, or » Roberto Benini’s EM A1 3D cab «). There are various other changes too; please visit the » openBVE homepage « for more. 🙂
Lastly, openBVE v1.2.6.0 has also been released. Now is a good time remind ourselves that openBVE is a train simulator first and foremost, and with this latest release, the mass of the train is now affected by boarding passengers, which can slightly affect the performance of the train. A bug has also been fixed in the Jump to Station menu, and the Interior (Look Ahead) camera is now selected by default for 3D cabs (like the » class 323’s 3D cab « for example, or » Roberto Benini’s EM A1 3D cab «). There are various other changes too; please visit the » openBVE homepage « for more. 🙂
Tags: Cross-City South, Hardware, openBVE, openBVE 2, openBVE Community, Screenshots, Site News, Trackwork, Watford Jn to Rugby
Posted in openBVE, openBVE 2, Site News | 4 Comments »
January 31, 2010
June 1, 2009
The innovative Chashinai Railway, RSR-UK route randomisation, hi-res Watford Junction to Rugby screenshots, and server upgrades
Posted by admin on June 1, 2009 at 11:40 pmThe innovtive Chashinai Railway, randomisation and new development techniques for openBVE
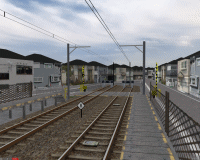
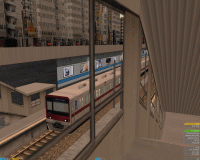
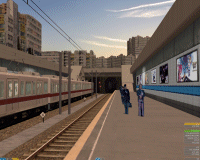
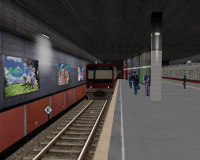
Some of you may remember the Chashinai Railway network which was released way back in 2004, but soon after publication it was withdrawn, after controversy surrounding permissions where certain files were concerned. The fictional Japanese route network has now been significantly updated and is available again, and is now designed exclusively for » openBVE «. The route’s developer, Jens (Odakyufan), has devised some innovative new techniques which take advantage of openBVE’s capabilities, and together they introduce some exciting new possiblities for developers and users, including for example — even within a single route file — randomised time of day selection, randomly selected choice of train and service to drive, determining the probability of certain end results occuring, and more. Using if conditions and casing, it’s possible, for example, to choose which platform or siding is departed from or entered at random, provided code for each of these routing options has been written, specially prepared and added within the route file.
This is clever stuff, which presents all kinds of new possibilities for openBVE developers. Visit » Odakyufan’s website « to download the Chashinai Railway network which includes all the required trains (you need the latest openBVE v1.0.6 release), and take a look at the » development techniques and tips section « to see how randomisation and conditional pre-processing can be applied by developers creating routes for openBVE, along with ideas for improving the handling of tunnel object lighting, cab brightness and time of day. Incidentally, Jens also hopes to model a section of the well known Odakyu Odawara Line starting from Tokyo’s busy Shinjuku station, which should be fascinating due to the railway infrastructure, proximity between the line and the surrounding city and it’s roads and numerous buildings, and the object density to be depicted in such scenes.
Some atmospheric » Chashinai Railway « screenshots:
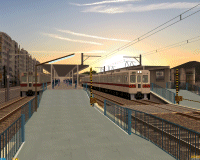 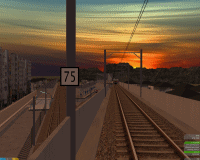     |
Incidentally, the situation surrounding the Chashinai Railway presents some issues to consider. It’s a route that was built using a large number of other author’s objects, and was originally made just for personal use — publishing the route wasn’t originally intended, so it’s author didn’t keep track of where each file came from. However, over time, the project evolved into something which was worth publishing, and this creative endeavour was shared with the community. The route was also notable as being one of very few Japanese styled lines developed by a European author (the only other I can recall right now, being Viktor’s fictional » BVE Garden Line «). Unfortunately, because Jens hadn’t kept track of the origin of the many files used, determining the authors of all these files at a later stage became problematic, so some work was uncredited, and not all permissions saught. Upon it’s release, some developers objected to this. Back then, the Western (English speaking) BVE community as it seems to me, was more like a microcosm of the worst aspects of international relations and ideological conflict than an ideal community at times, and soon after it’s release, despite conflicts with developers being resolved, the Chashinai Railway was withdrawn, presumably because of all the controversy it caused, and I guess Jens was put off from releasing anything into the community again for several years. Having seen the innovation, intelligence and artistic excellence which he’s now shared with us some years later–as a community–I think we’re rather lucky that he wasn’t driven away permanently by the awful, polarised atmosphere which used to dominate the community in the past (and I’m certainly not blameless where this state of affairs was concerned either); if he had left for good, then people in another field might be enjoying the fruits of his creativity instead of us, or indeed nobody else at all would be enjoying the results, and we would all be the poorer for it.
![]() Edit: I was going to discuss the community, my own changed attitudes towards copyright, and the role the BVE Developer Guidelines play as a part of this blog entry, and talk about whether for the good of the community in the future, they should be revised or whether they’re even needed any more. However, this entry is primarily about innovation and development techniques, so I’ll save the extended discussion until later.
Edit: I was going to discuss the community, my own changed attitudes towards copyright, and the role the BVE Developer Guidelines play as a part of this blog entry, and talk about whether for the good of the community in the future, they should be revised or whether they’re even needed any more. However, this entry is primarily about innovation and development techniques, so I’ll save the extended discussion until later.
Randomisation in RSR-UK Routes
Having seen what Jens has achieved, I’m experimenting with these new innovations on my own routes as well. With Watford Junction to Rugby for example, I’m able to use the random pathing feature of » BRR « to create short alternative paths between, for example, Watford Junction and the crossovers to the north of the station, or between Hemel Hempstead and Bourne End Junction. This is the tricky part as it involves carefully setting up the .Rail related commands (or even inserting temporary crossovers) to ensure alternative paths can be selected and generated, followed by replacing .Turn commands with .Curve commands in BRR’s temporary route file output. Then, by referring to the casing technique example which Jens has provided, I can easily add all the $Sub() preprocessing commands to these code fragments via a couple of simple search and replace operations, and then copy and paste these sections into the WJ-R route file making any tweaks necessary, and add the condition and randomisation code, to allow openBVE to randomly choose whether the player starts on the fast or slow lines, or switches between them for short sections en-route. Currently this isn’t practical for longer sections of the Watford Junction to Rugby route; not really because it’s too difficult, but rather because it increases loading times too much due to the sheer number of commands I’ve used in the WJ-R route file, which takes too long to be parsed. I can also randomise the time of day chosen, along with the service and traction, and the optional display of a multitude of objects within the route. The location and types of passing trains shown can all be randomised, along with appropriate sounds, and so-on. All within a single route file and program. 🙂 The » example code « for achieving some of these things may appear complex at first, but actually it’s not so bad once you’ve tried it–naturally something like Watford to Rugby is much harder to work with as it’s so complex, so if you try it with your own route, it shouldn’t be as difficult. I’ll continue to experiment with this as my projects develop… More to come in future.
In the meantime, it occurs to me that I don’t think I’ve ever uploaded many, if any, high resolution images of Watford Junction to Rugby before, so here are a selection showing the aforementioned junctions, and a couple of others (please forgive the mixture of pre 1990s and post 2000 infrastructure at Watford…). This is still very much a work in progress, and neither the lighting or shading is refined yet. The scenery quality has fallen behind that of X-City South v1.4 in some respects now, and 2D trees are still in use at the moment as so much detailed 3D geometry has been applied to the railway infrastructure itself; with openBVE 2’s graphics engine, perhaps more will be possible though…
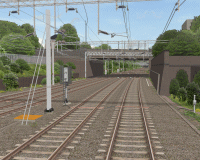 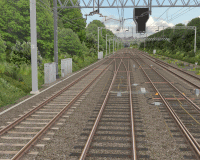 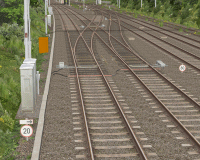 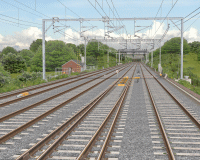 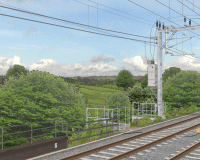 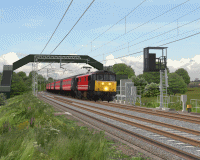 |
Server Upgrades
Lastly, apologies if some of you were unable to access the site for a little while yesterday; my webhost was performing a scheduled hardware upgrade of the server where Rail Sim Routes UK is hosted. I’ve been very happy with the performance and speed of the server since I moved the site to the new host last November, with no problems reported to me, as far as I’m aware. However, it should perform even better and with greater reliability now after this upgrade, which I gather consists of a step up from a single to a dual Quad-Core Intel Xeon processor configuration along with a doubling of the quantity of RAM to 8GB. In the unlikely event that anyone tried to e-mail me while the server was briefly offline (sometime between 23:00 and midnight on 31st May), any messages should have still reached me, however if you think there might have been a problem, please try again just in case.
Tags: Artwork, Hardware, openBVE, openBVE Community, Screenshots, Site News, Trackwork, Watford Jn to Rugby
Posted in openBVE, Site News | 1 Comment »
May 24, 2009
openBVE v1.0.6.0, Cross-City South v1.4 Updates
Posted by admin on May 24, 2009 at 11:50 pmNew openBVE release–v1.0.6.0
A new version of openBVE is now available, version 1.0.6.0; head over to the » openBVE homepage « to download the latest stable release. One of the three most noticeable improvements in this version (the other two being time acceleration and the ability to mute sound, more below) concerns the Smooth Transparency feature, which has been dramatically improved. If you’ve enabled this option in openBVE previously, you might have noticed that while the quality of the rendered scenes was much better with Smooth transparency enabled, occasionally, unsightly fringes appeared around some transparent textures, where translucent pixels were rendered. This was problem was also more pronounced on Cross-City South v1.4 due to the frequency with which texture transparency is used in the new scenery. This issue concerning texture transparency and the z-buffer is a complex topic which I gather not all OpenGL developers adequately address, however Michelle has found a way of solving the problem, and while the performance is a little lower than with the previous implementation (especially on routes where a very high number of polygons use texture colour transparency), the visual quality is far better, as the following comparison screenshots demonstrate (along with the new X-City South v1.4 screenshots below).
On the left, we have the » ATS-Sn/P Test route « in openBVE v1.0.5.0; click the thumbnail and note the fringes around the catenary gantry texture. On the right, we have v1.0.6.0–no such issue can be observed, and the end result is superb:
|
Similarly, here we have the » Chashinai Railway «:
|
For a detailed explanation about this solution, please see michelle’s » Developer’s Blog «
Other welcome enhancements and changes in v1.0.6.0 include:
- A time acceleration feature (Ctrl+J, switches between x1 and x5 speed);
- The ability to mute the sound (Ctrl+M — now you can listen to music via your media player while in-game, which is quite a lot of fun when used with the time acceleration feature! 🙂 );
- A consistent look is now achieved where fog and background images are concerned, regardless of viewing distance;
- And more… Please see the » changelog « on the openBVE site for details.
If you’re still using openBVE v1.0.3 or 1.0.4, then after updating to the latest release, you’ll also benefit from changes which were introduced with v1.0.5, including amongst other things, a bug fix relating to odd behaviour where unwanted roll was initially applied to the external camera view, enhanced AI driver behaviour where cruising is concerned, and additions to the Doors parameter of the .Sta command.
Cross-City South v1.4 scenery improvements
Firstly, apologies for the lack of project updates recently… Unfortunately I’ve not done quite as much as I’d hoped to in the past month. Nevertheless, I’ve been working on updating the scenery objects for Cross-City South v1.4, and this is proceeding quite well now. It’s proving to be quite time consuming, and the bulk of the work involves replacing a fair number of the previously 2D trees and bushes with more realistic partially 3D versions, allowing the scenery to look good even when the camera is panned to the side, such as when looking out of the windows, while also enabling the camera to be moved a little further away from the train in the external view without the scenery looking unrealistic. Hedgerows have also been improved, not just the trees.
I’m currently adding pretty highly detailed vegetation just to test performance and visual quality, but once I’m finished I’ll likely perform a batch search and replace operation on all the scenery files to reduce the number of surfaces to improve framerates a little. I’m relatively happy with how the scenery is turning out, but I have to say, it’s just a little tedious; I’ll be glad when this task is over and I can get back to the animated objects!
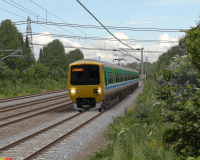
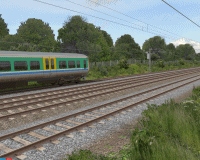
Here are some screenshots to show the progress so far; the scenery, lighting and shading isn’t finalised yet, but the images give a general impression of the end result I want to achieve. The trees and hedges still look a little too repetetive to me–I’ll try and improve upon this if I have time… All screenshots depict the route at 1280×1024 resolution with 8x antialiasing, 16x anisotropic filtering, and with openBVE v1.0.6.0’s smooth transparency enabled. A fast graphics card will likely be needed for higher framerates with the latter feature in use, at least with openBVE 1’s renderer:
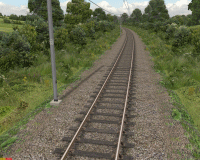
 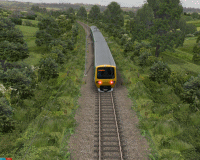 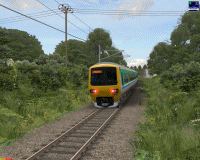 |
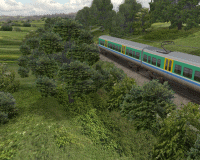
I’m also experimenting with mixing both 2D and 3D trees to achieve a balance between visual quality and performance; 3D trees are placed near to the lineside, while 2D trees are placed behind these, and the overall effect looks reasonable to me; I hope you agree. It should work well, provided the player doesn’t move the camera beyond the effective scenery edge boundary which the 2D tree surfaces create–openBVE is still primarily a cab view simulator, after all. Here are some examples of the scenery testing location at Longbridge:
  |
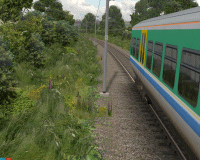
I’ve also added shadows beneath the trees and OHLE masts (another feature brought in from Watford Junction to Rugby), as well as beneath hedgerows to improve the appearance of the scenery. The shadows are simply very low resolution textures, which in the interests of performance, don’t use alpha channels, just ordinary texture transparency. The low resolution of the textures provides the necessary blurring:
 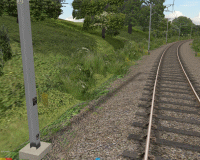   |
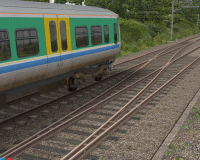
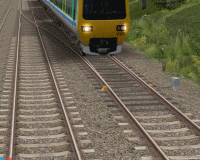
Lastly, I’m also updating the pointwork so it’ll be up to the standard of Watford Junction to Rugby:
  |
openBVE Help Guide updated
Just in case anyone hasn’t read through the comments on my last blog entry or otherwise noticed, I updated my openBVE Help and Information Guide recently, to include instructions explaining how openBVE can be installed and used by Ubuntu Linux users, either via the Add/Remove option, or by installing and running the program via Wine (which allows BVE 4 plugin DLL equipped trains to be used in Linux). I update the guide regularly as well, so if you need any assistance with openBVE which isn’t covered elsewhere, please visit the updated guide for more information: openBVE Help and Information.
Incidentally, since I replaced the X-City South executable installer with the .7z archive, downloads have been just as frequent as before, and I’ve had no more requests for help with installing the route than usual (and I don’t get many requests for help usually); indeed someone who was a newcomer to train simulation kindly informed me that they’d managed to install openBVE, BVE4, and Cross-City South with help from the guides I’ve prepared. So I’m assuming that most of you are managing fine with the installation process. 🙂
Tags: Artwork, Cross-City South, openBVE, Screenshots, Site News, Trackwork
Posted in openBVE | 8 Comments »



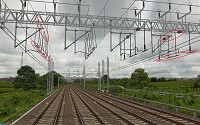
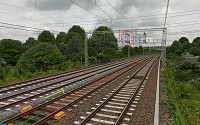

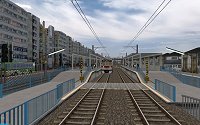
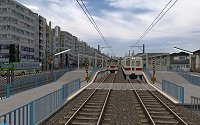
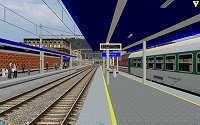
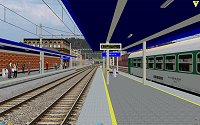
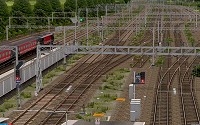
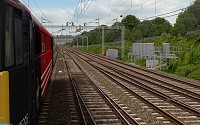
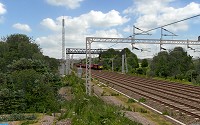
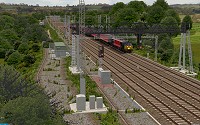
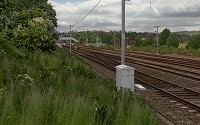
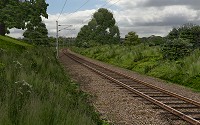
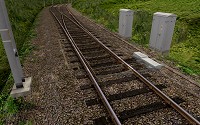
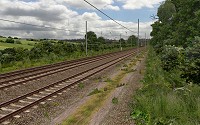
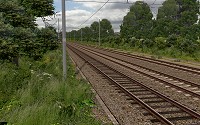
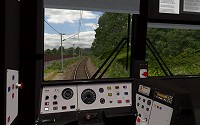
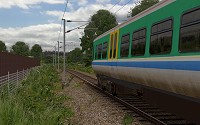
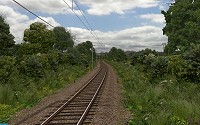
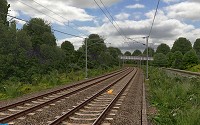
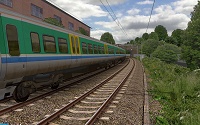
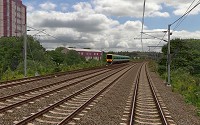
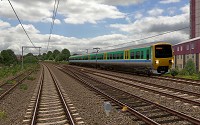
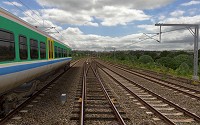
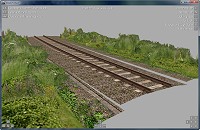
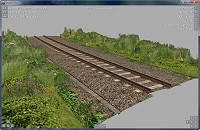
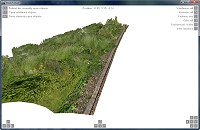
![openBVE v1.2.5.1, Watford Junction to Rugby with a 3000m viewing distance [Click to enlarge] Screenshot](/images/thumbnails/wj-r_openbve_53.jpg)
![openBVE 2 Renderer Demo, Watford Junction to Rugby, with a 3000m viewing distance [Click to enlarge] Screenshot](/images/thumbnails/wj-r_openbve2_53a.jpg)
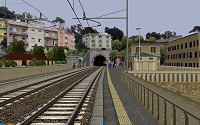
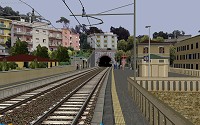
![openBVE v1.2.5.1, Cross-City South v1.4, with a 3000m viewing distance [Click to enlarge] Screenshot](/images/thumbnails/xcs_14_openbve_26.jpg)
![openBVE 2 Renderer Demo, Cross-City South v1.4, with a 3000m viewing distance [Click to enlarge] Screenshot](/images/thumbnails/xcs_14_openbve2_26.jpg)
![openBVE v1.2.5.1, ATS-Sn/P Test Route, with a 3000m viewing distance [Click to enlarge] Screenshot](/images/thumbnails/openbve1_ats-snp_1.jpg)
![openBVE 2 Renderer Demo, ATS-Sn/P Test Route, with a 3000m viewing distance [Click to enlarge] Screenshot](/images/thumbnails/openbve2_ats-snp_1.jpg)
![openBVE v1.2.5.1, Joetsu South Route, with a 3000m viewing distance [Click to enlarge] Screenshot](/images/thumbnails/openbve1_joetsu_south_1.jpg)
![openBVE 2 Renderer Demo, Joetsu South Route, with a 3000m viewing distance [Click to enlarge] Screenshot](/images/thumbnails/openbve2_joetsu_south_1.jpg)
![openBVE v1.2.5.1, Chashinai Railway Ishinden Line, with a 3000m viewing distance [Click to enlarge] Screenshot](/images/thumbnails/openbve_chashinai_16.jpg)
![openBVE 2 Renderer Demo, Chashinai Railway Ishinden Line, with a 3000m viewing distance [Click to enlarge] Screenshot](/images/thumbnails/openbve2_chashinai_17.jpg)
