
- [WJ-R]: 1980s object removal (Castlethorpe/Hanslope area)
- [XCS]: Pending
- [UkTrainSys]: v0.3.2.0 released
- [Object Library]: Preparing...
- [Website]: Fifth version of website launched
 My openBVE videos and other comments from users and
myself can also be found via my YouTube
channel.
My openBVE videos and other comments from users and
myself can also be found via my YouTube
channel.Blog and Progress Updates
April 18, 2019
Watford Junction to Rugby – current progress on 1980s object removal
Posted by admin on April 18, 2019 at 5:23 pmWatford Junction to Rugby – current progress
![]() Firstly, I’d just like to say thank you to everyone whose offered me a warm welcome back to the openBVE scene, it is much appreciated and it’s great to be back! Having looked at some of the newly updated openBVE documentation, I’m looking forward to having a play with some of the new features. Let’s see where we can take openBVE in 2019 🙂
Firstly, I’d just like to say thank you to everyone whose offered me a warm welcome back to the openBVE scene, it is much appreciated and it’s great to be back! Having looked at some of the newly updated openBVE documentation, I’m looking forward to having a play with some of the new features. Let’s see where we can take openBVE in 2019 🙂
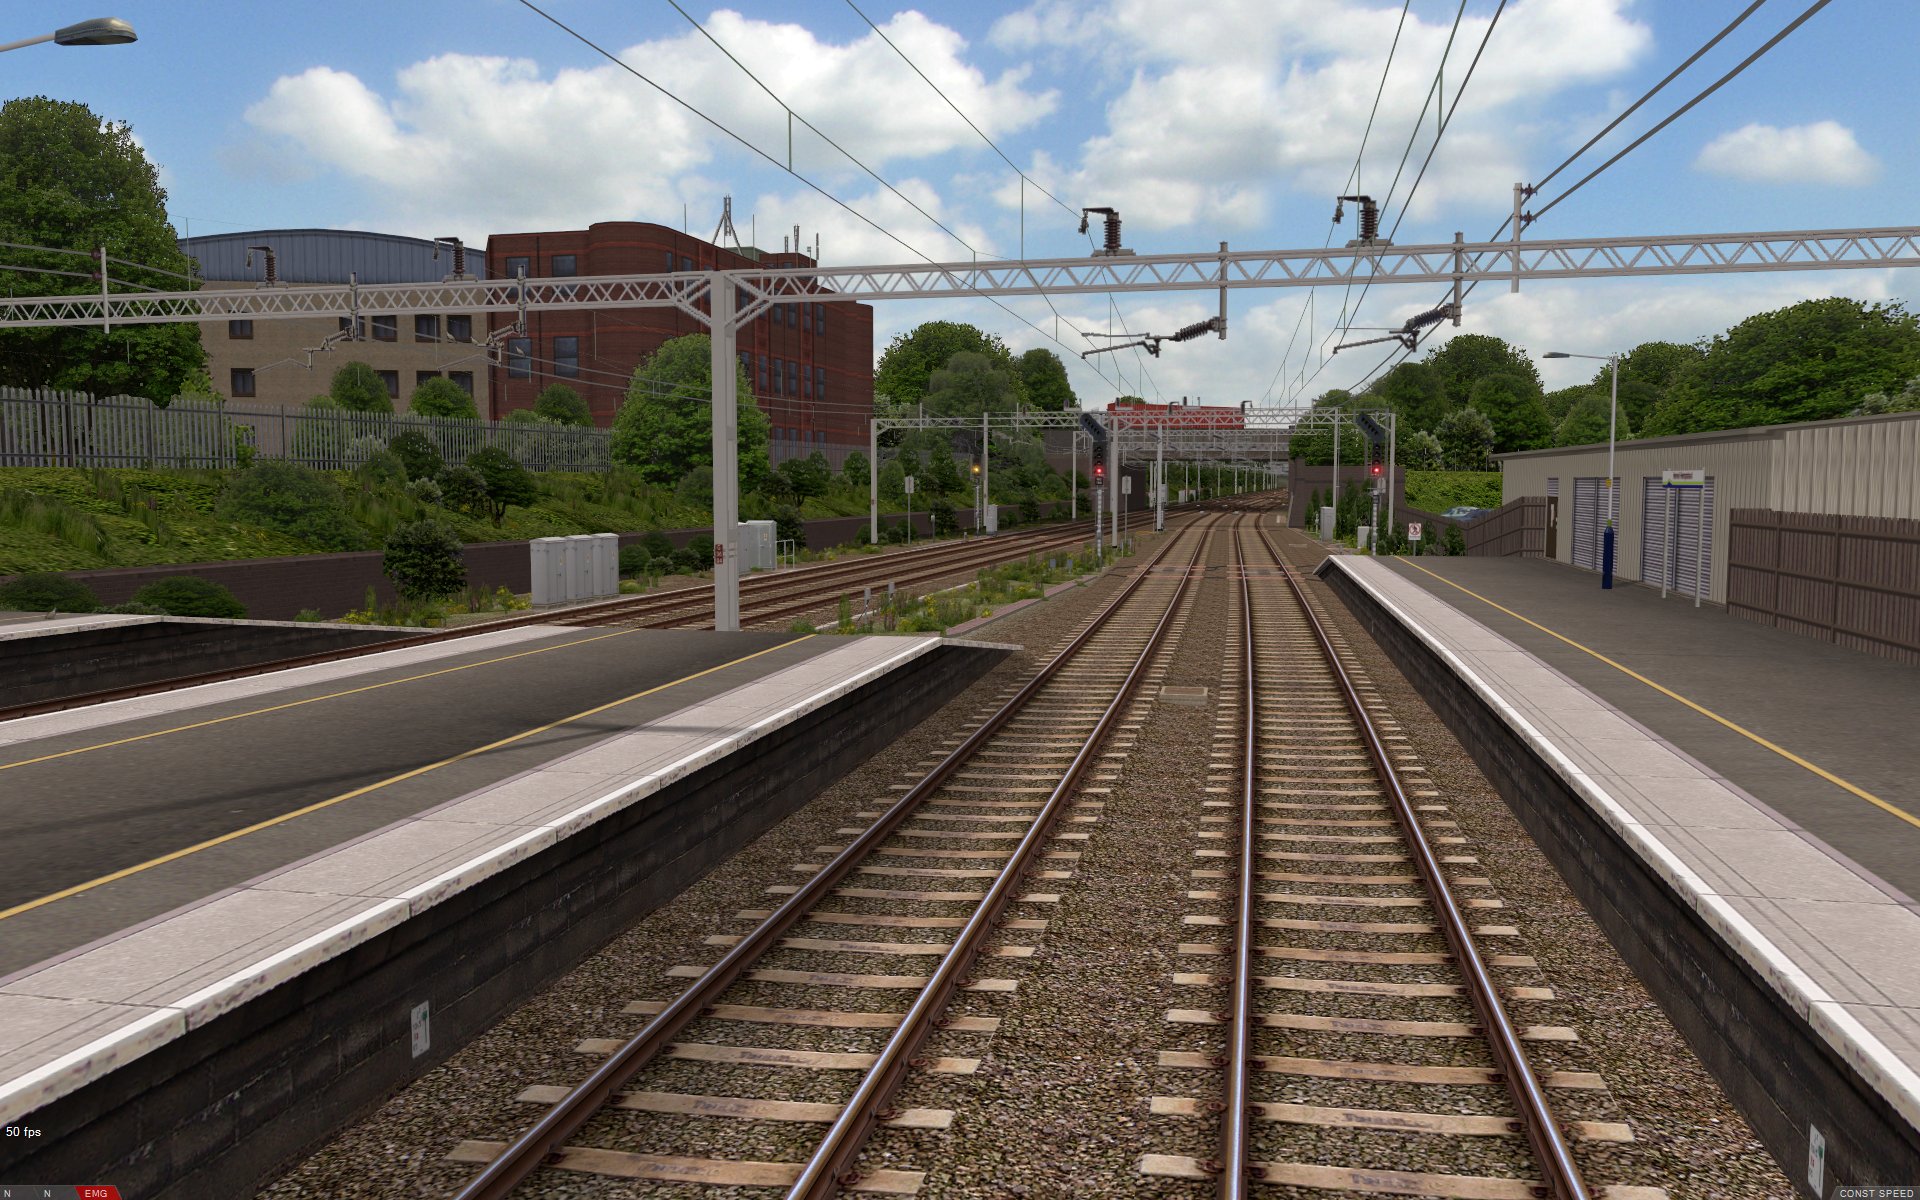
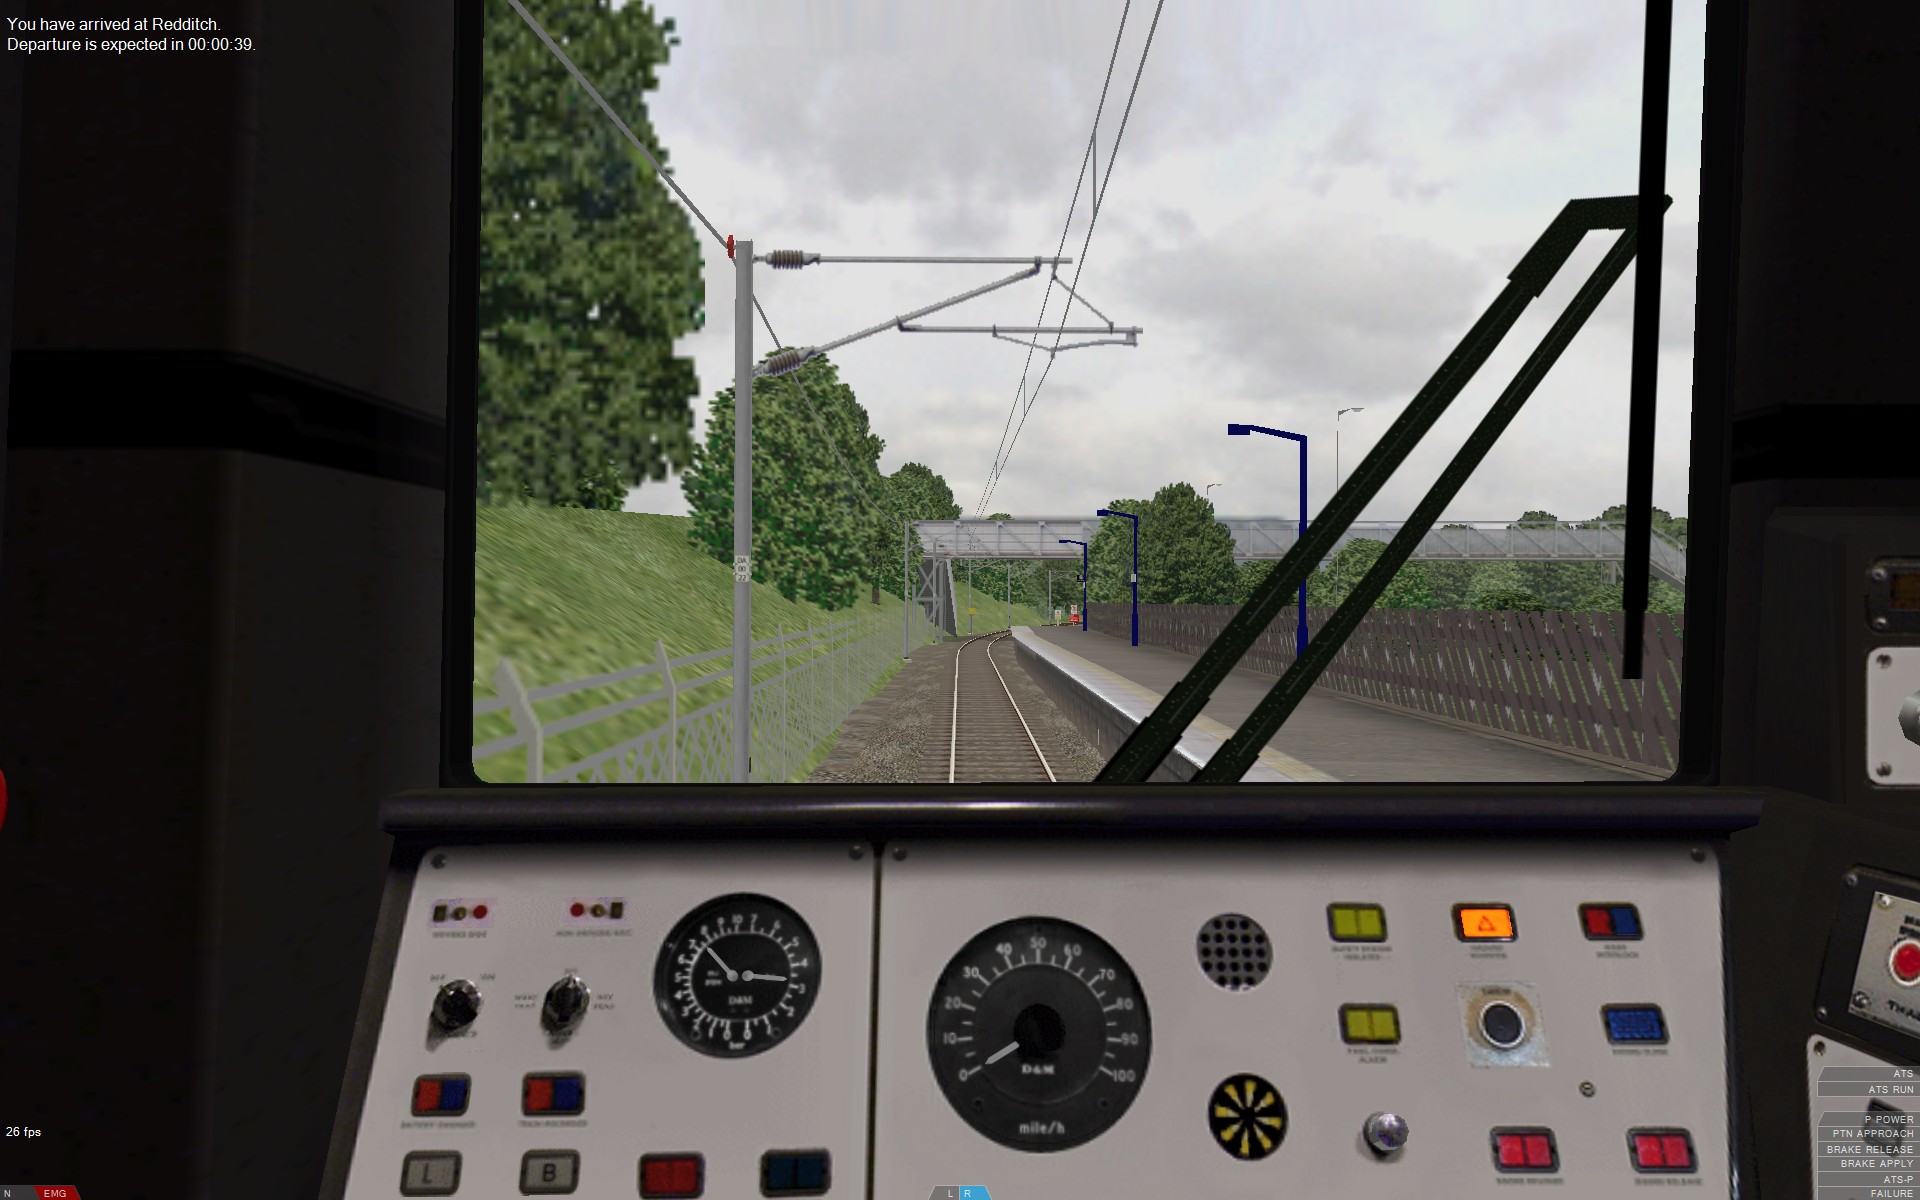
Just a quick update on what I’m working on at the moment… As the Watford Junction to Rugby project has developed, I’ve modelled the route with features which occur in two different eras – the 1980s and the 2000s. Such features include signals, gantries, lineside location cases, insulated block joints (IBJs), axle counters, Mk1 and UK1 overhead line equipment, and so-on. The project consists of a “main” routefile at the moment, which includes all of these different-era objects. My current task towards getting the route closer to a release is to hide the 1980s-only objects from the route, leaving just the 2000s objects visible. Here’s a before and after screenshot showing an example of the changes:


The location is between Linslade and Soulbury (south of Bletchley), so I’m making good progress. I have finished inserting the commands and beacons for the UkTrainSys simulation of the Automatic Warning System (AWS) and Train Protection and Warning System (TPWS), as well as added beacons for the neutral section Automatic Power Control (APC) magnets. .Section commands have also been added to the corresponding axle counter locations too.
More updates to follow! Take care all 🙂
Tags: openBVE, openBVE Community, Screenshots, Site News, Watford Jn to Rugby
Posted in openBVE, Site News, Uncategorized | 3 Comments »
April 10, 2019
Railsimroutes returns – work resuming on projects, new website design, content updates including updated openBVE help guide and computing section, new UKTrainSys bugfix release
Posted by admin on April 10, 2019 at 11:58 pmRailsimroutes returns – new site design, work resuming on projects
![]() Well it’s been an incredibly long time since the last update here at Railsimroutes… In the intervening years I’ve been very busy, and many things have changed with real life taking precedence. I studied for a Foundatation Degree in Railway Engineering and embarked on a career with the real railway, which as you can imagine didn’t leave much spare time to devote to the simulated world of openBVE.
Well it’s been an incredibly long time since the last update here at Railsimroutes… In the intervening years I’ve been very busy, and many things have changed with real life taking precedence. I studied for a Foundatation Degree in Railway Engineering and embarked on a career with the real railway, which as you can imagine didn’t leave much spare time to devote to the simulated world of openBVE.
However I now feel able to return to the hobby and I would really like to get my projects released. I intend to finish off some of the tasks I started working on back in 2014, make the add-ons usable, and aim to get at least something released. These releases won’t be as polished as previous versions, but given that all material will be released as open source and placed into the public domain, it can always be improved upon further down the line (pun intended!).
Given how openBVE has developed lately, I also want to release the UK Railway Infrastructure Object Library soon to give the project a boost and provide a nice graphical upgrade for developers or users who wish to use its objects and textures.

UkTrainSys plugin update – bugfix release v0.3.2.0
![]() Thanks to Chris Lees, I was notified (a long time ago!) of a bug in the Train Protection and Warning System (TPWS) simulation where an incorrect variable in the
Thanks to Chris Lees, I was notified (a long time ago!) of a bug in the Train Protection and Warning System (TPWS) simulation where an incorrect variable in the ArmTss() method was reset upon passing an opposite-direction TSS f5 frequency. This was caused by a typo which Chris spotted in my code! Please head over to the UkTrainSys Plugin page for the updated version. I have also updated the Class 323 3D Cab Add-on with the updated UKTrainSys.
New website design and content updates
![]() I wanted to learn HTML5 and revamp the design of Railsimroutes with a more modern format, using the latest web standards with a focus on current standards compliant browsers. So today sees the launch of the fifth incarnation of Railsimroutes, with a theme known as “Glass”. I hope you like the new design. It is aimed primarily at desktop PC and tablet users, but does employ responsive design for use on smartphones, which may be further enhanced in future.
I wanted to learn HTML5 and revamp the design of Railsimroutes with a more modern format, using the latest web standards with a focus on current standards compliant browsers. So today sees the launch of the fifth incarnation of Railsimroutes, with a theme known as “Glass”. I hope you like the new design. It is aimed primarily at desktop PC and tablet users, but does employ responsive design for use on smartphones, which may be further enhanced in future.
- The new site design has been hand coded from the ground up to be fully HTML5 and CSS Level 3 compliant, and now fills a greater width of the browser window. Both a Light and a Dark theme variation are provided to suit your taste, with the Dark theme being the default.
- I have updated the openBVE Help and Installation Guides to reflect Chris Lees’ ongoing developments with openBVE. The new guide gives step-by-step instructions for installing openBVE 1.4.5.x in Windows 10 “Creator’s Update”, and now also includes a guide for macOS Mojave users (I am now a Mac user as well as die-hard PC enthusiast!).
- The About the Site and History section has been updated, and the previous “Clarity” theme can be seen in the Railsimoutes.net Archive.
- The Links page has been updated although this is still a work in progress. There are also many more non-railsim related links included near the bottom of the page.
- The PC Specs section of the site has now been significantly expanded, and renamed Development PC(s) and Network with a new URL. This section covers my long standing interest in computing, from my earliest PCs to my present day machines, including my office/development studio and networking setup, software choices, and so-on.
- Railsimroutes now has an SSL certificate installed, so the site can also be accessed via https://railsimroutes.net.
- I have also set up a mirror of the Railsimroutes website, which is also SSL enabled, at https://railsimroutes.com. This is hosted on my own server; feel free to use whichever you find more responsive.
 and Network")
Lastly…
![]() More updates shall follow soon! I am working on the AWS/TPWS implementation in Watford Junction to Rugby next, and also the UK Railway Infrastructure Object Library. I’m working on these projects as and when I get the odd hour spare between my day job and other real-life stuff which has to come first, but I shall try and do more regular updates even if they’re not all that exciting!
More updates shall follow soon! I am working on the AWS/TPWS implementation in Watford Junction to Rugby next, and also the UK Railway Infrastructure Object Library. I’m working on these projects as and when I get the odd hour spare between my day job and other real-life stuff which has to come first, but I shall try and do more regular updates even if they’re not all that exciting!
Tags: Cross-City South, Hardware, openBVE, openBVE Community, Operating Systems, Screenshots, Site News, Software, Watford Jn to Rugby
Posted in openBVE, Site News | No Comments »
March 12, 2014
Watford Junction to Rugby update, and collaborative project development
Posted by admin on March 12, 2014 at 11:41 pmUpdate on Watford Junction to Rugby project
![]() I’m pleased to say that I resumed development of the Watford Junction to Rugby project recently. Currently I’m working on implementing new .Beacon commands which support the UkTrainSys plugin’s advanced safety system functionality.
I’m pleased to say that I resumed development of the Watford Junction to Rugby project recently. Currently I’m working on implementing new .Beacon commands which support the UkTrainSys plugin’s advanced safety system functionality.
")
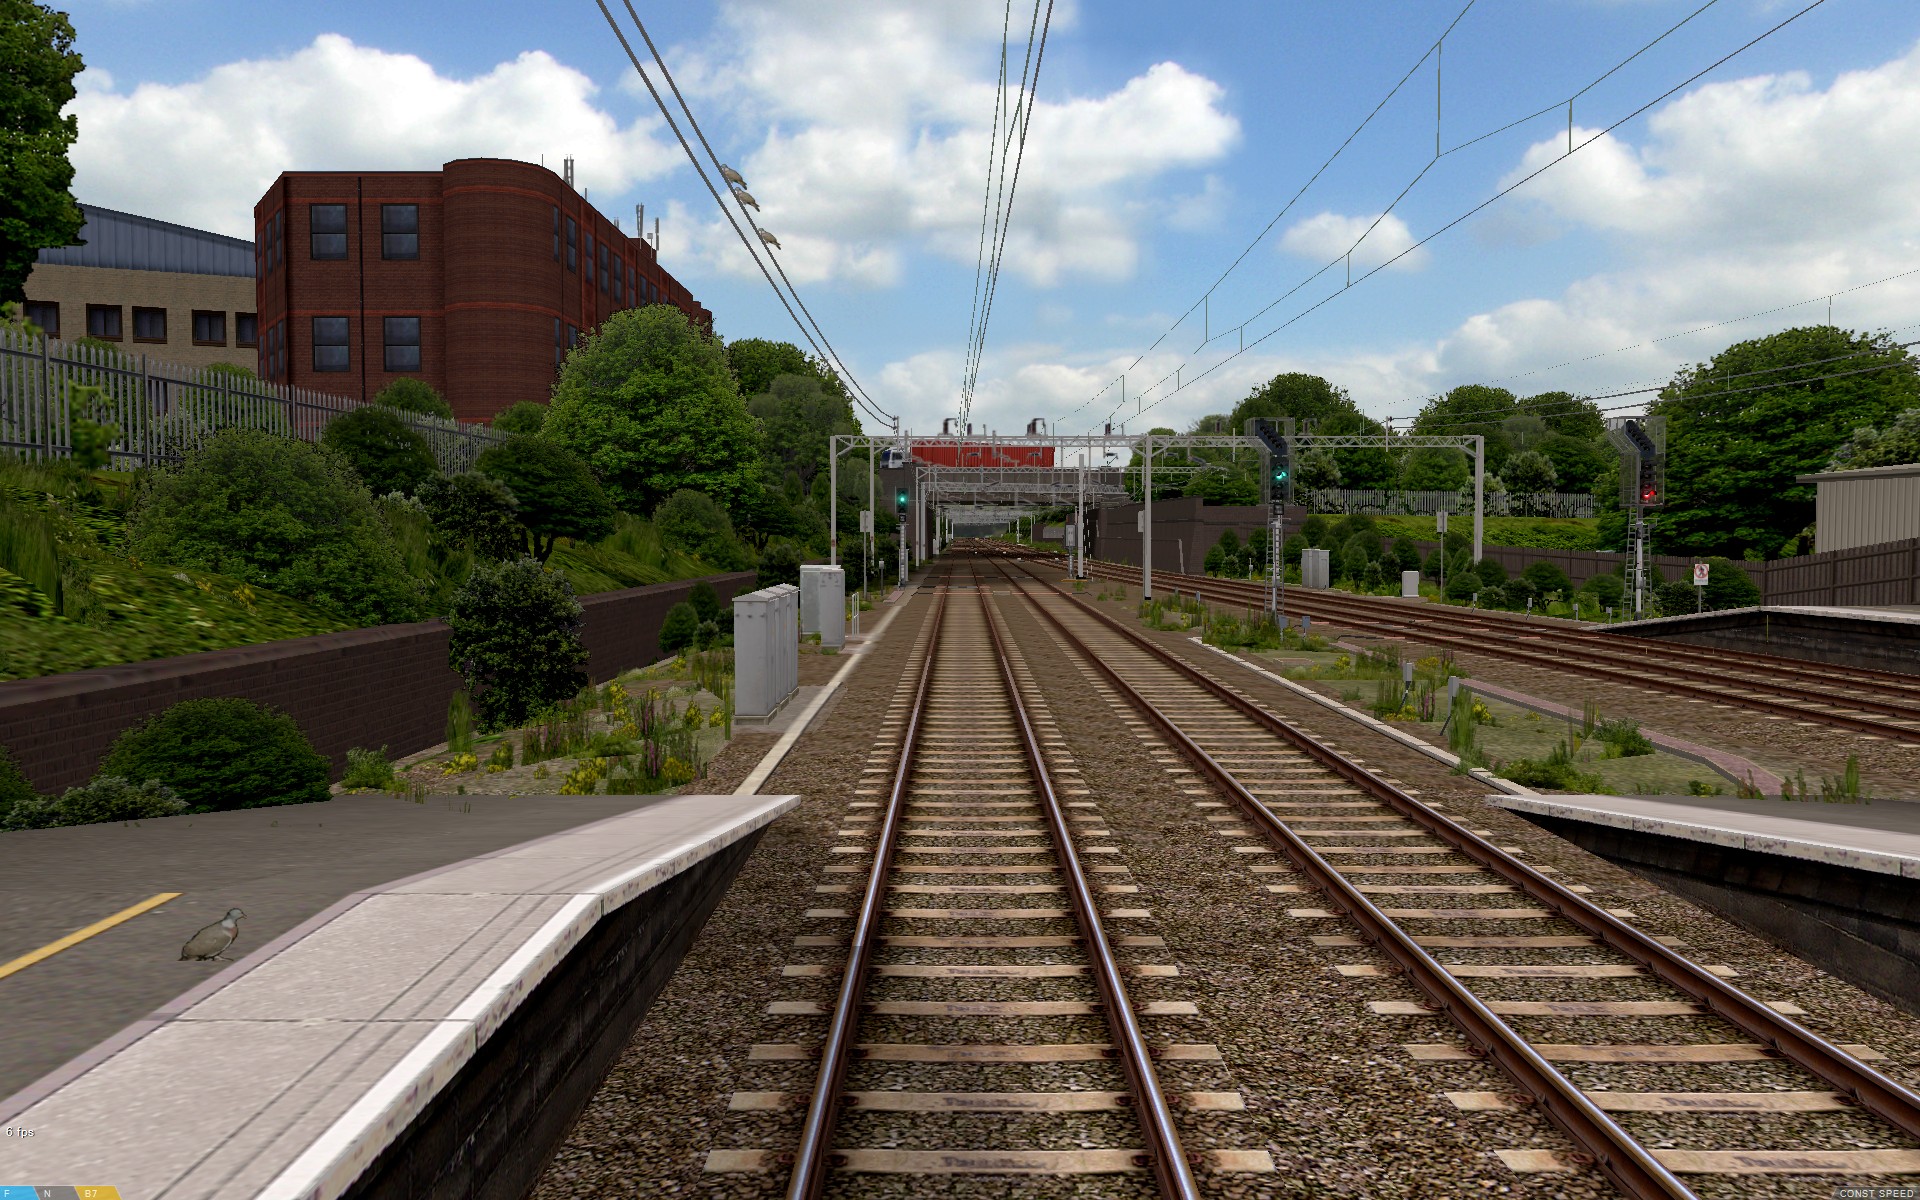
Signalling along the entire 66.5 mile / 107.1 km route has been updated, with all aspects now comprised of animated objects with ground night lighting.
")
All Automatic Warning System (AWS) magnets are now comprised of beacons simulating the permanent magnets and electro-magnets of the real life system, and sections are now aligned with track circuit breaks and axle counter head locations.
")
All Train Protection and Warning System (TPWS) induction loops are now simulated with beacons emulating the real life system in terms of induction loop spacing and frequencies.
")
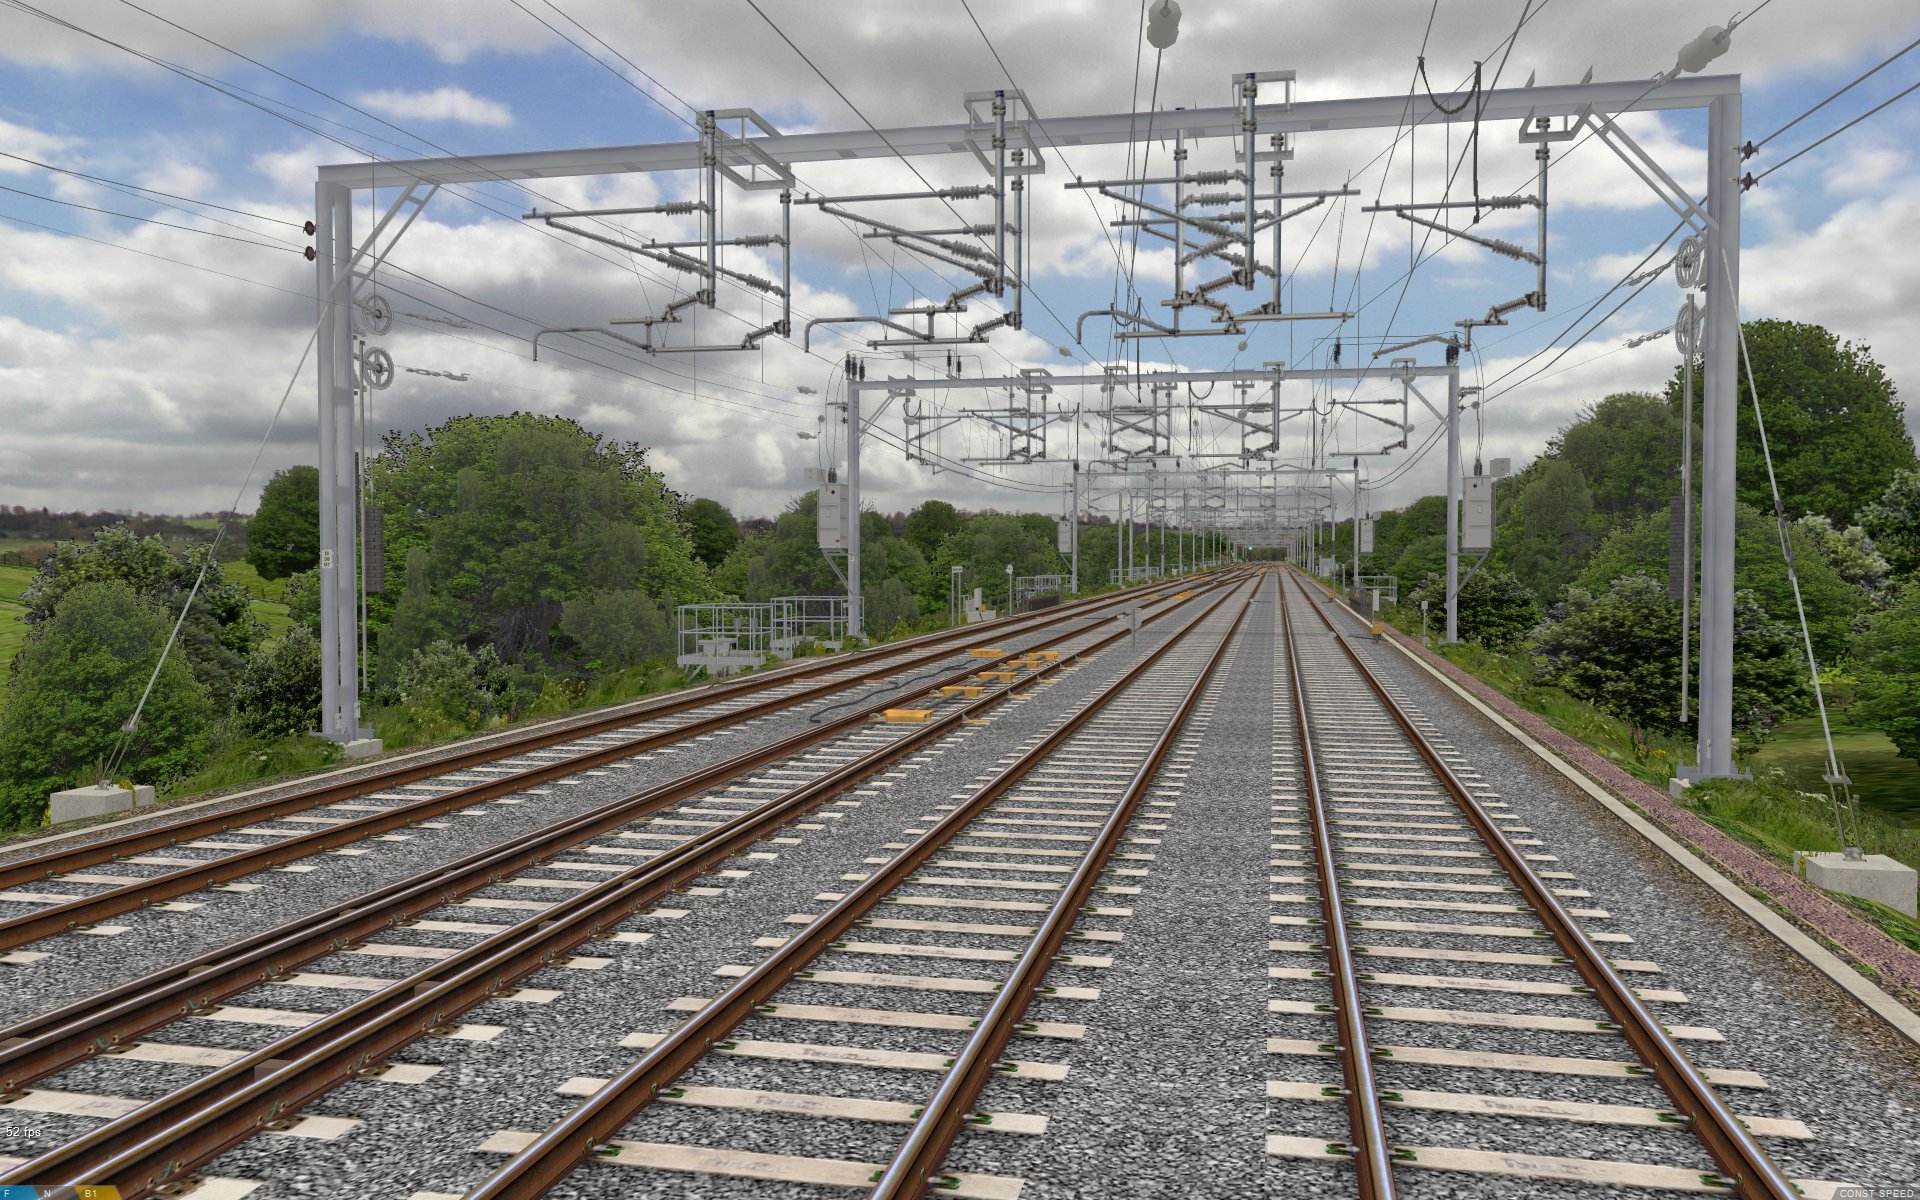
There are four OHLE neutral sections modelled on the route, and all of these are now updated with UkTrainSys compatible beacons for the Automatic Power Control (APC) permanent magnets both before and after the neutral section, as well as denoting the start and end of the dead section of contact wire itself.
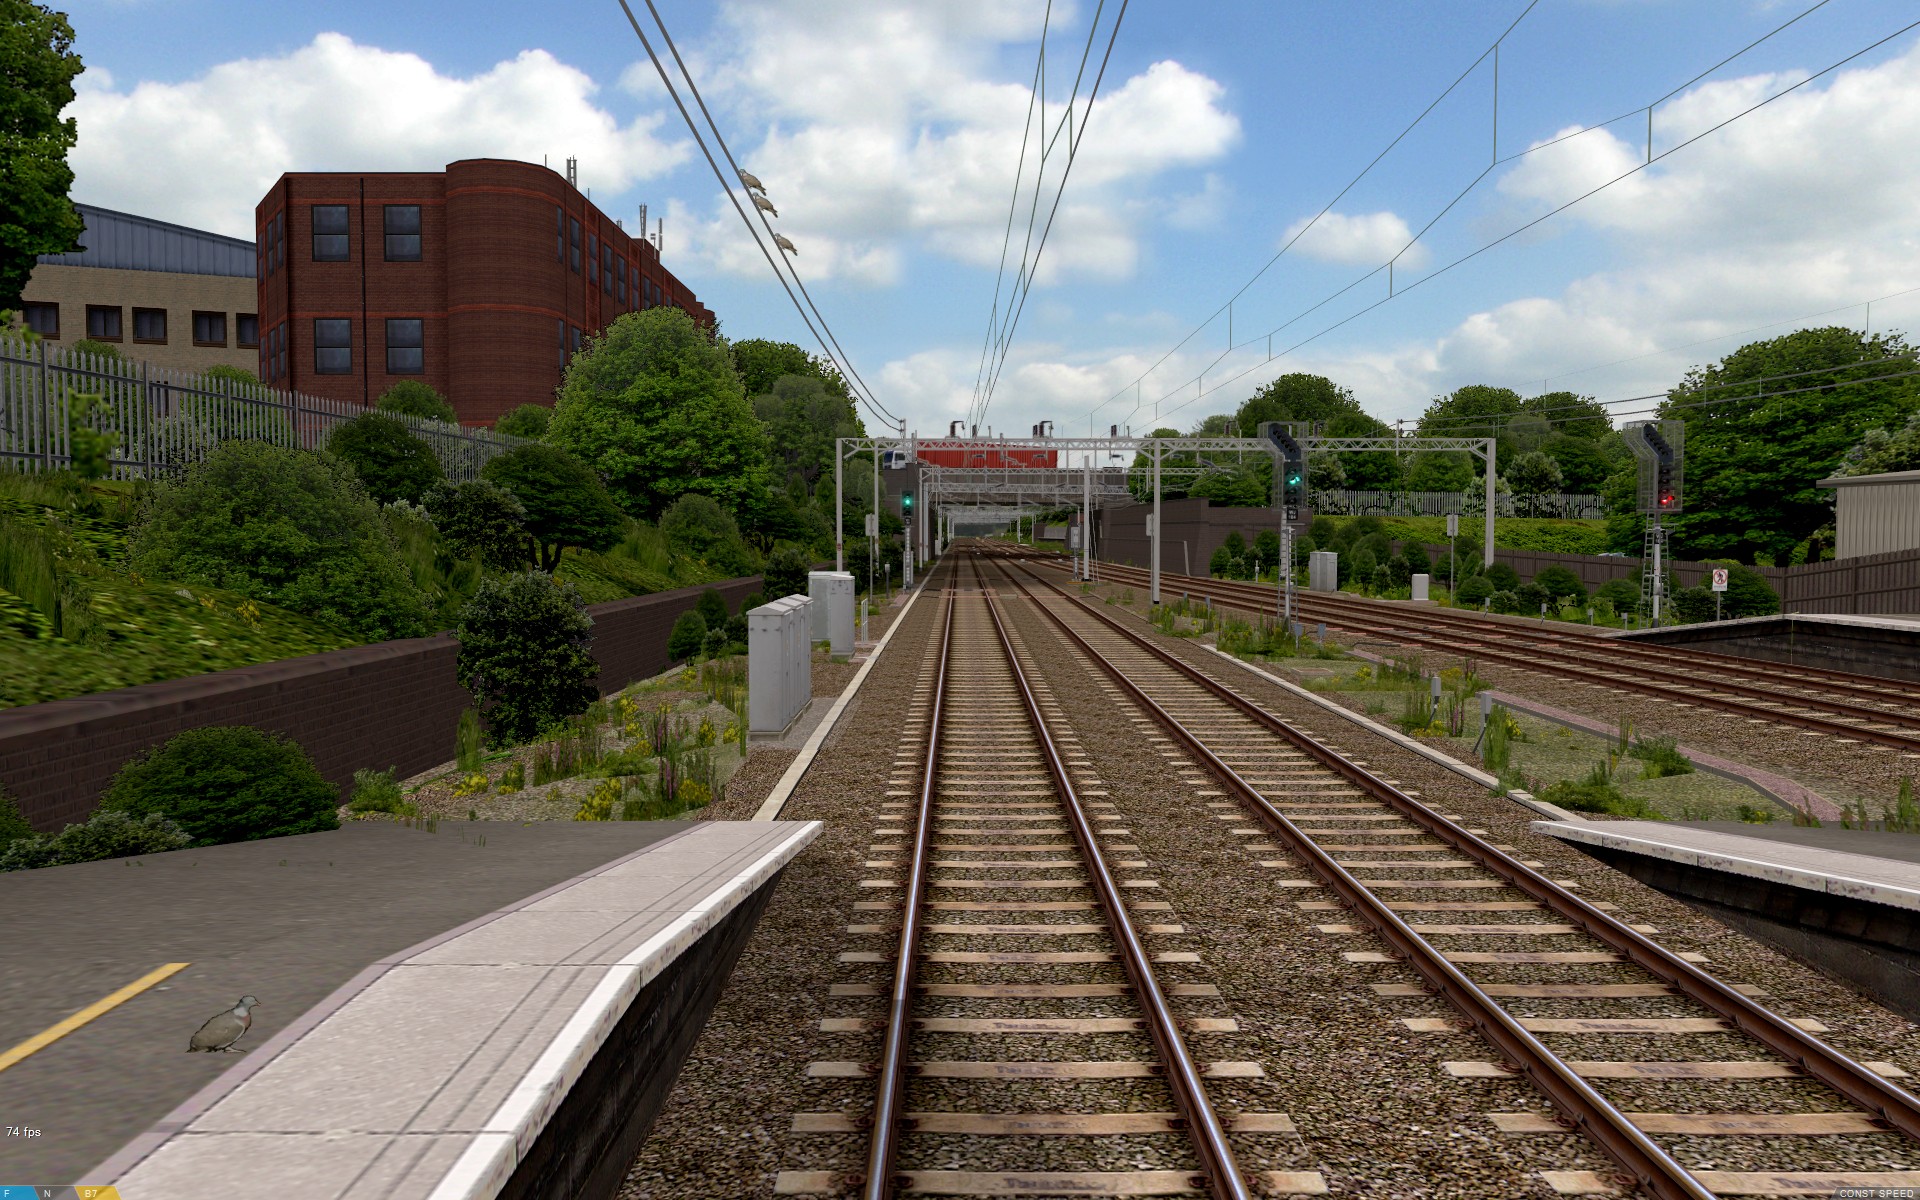
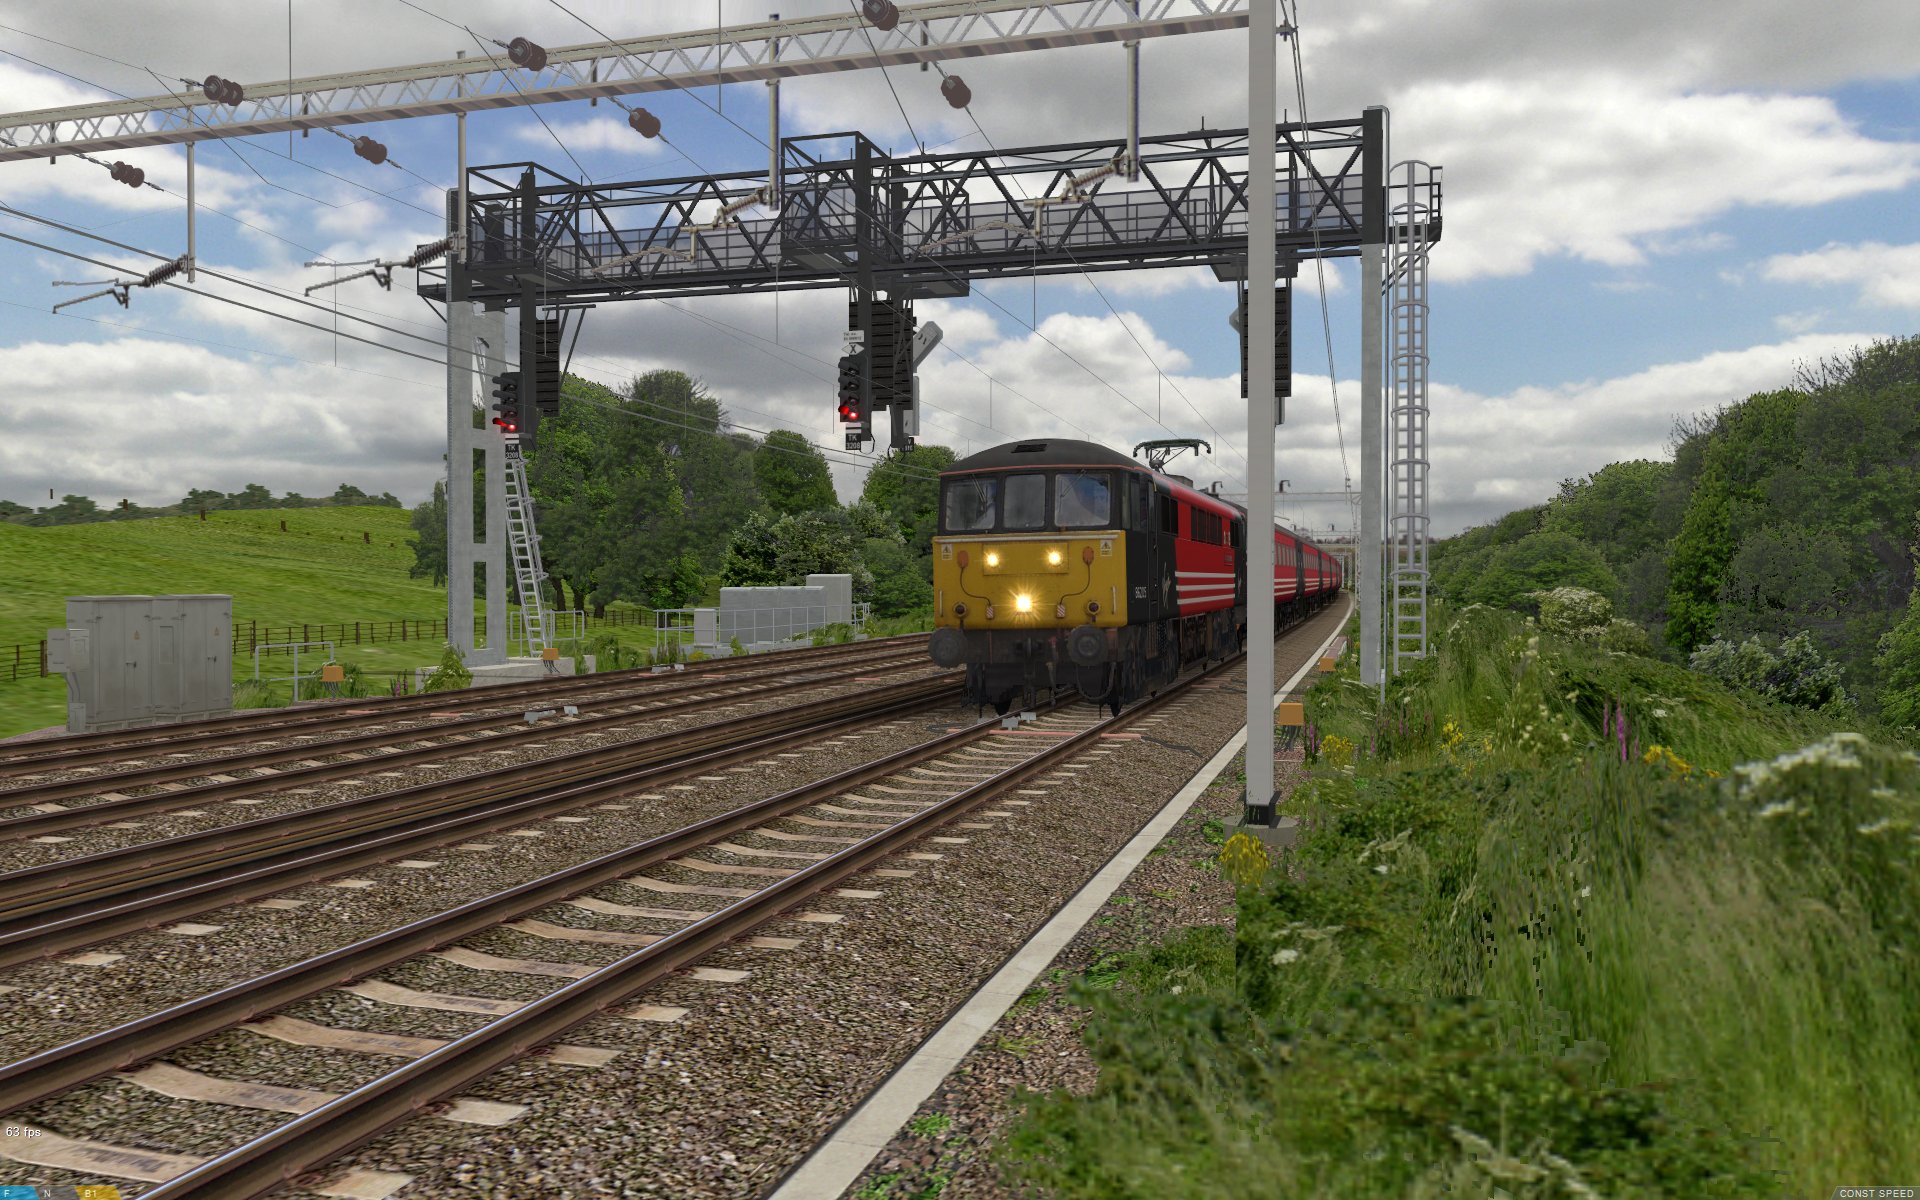
") New signals awaiting commissioning (note the out-of-use covers), and modular AWS magnet objects [Click to enlarge] |
Collaborative development
The other significant development, is that the project is now open to third party contributions, to speed up development and bring the release date closer. Ben Leahy is the first developer to contribute to the project by building objects, and I’d be more than happy to hear from you, if you think you’d be able to contribute some more high quality, efficiently coded 3D models for the route, leaving me free to concentrate on the systems and permanent way infrastructure.
Currently there’s a list of objects which need to be created and added to the route. These include:
- Station buildings from Kings Langley through to Rugby inclusive;
- A few lineside buildings, such as houses, warehouses and the like, to be positioned at various locations along the route, but especially at Roade, Weedon, and Rugby;
- A few road overbridges for the Weedon Line, as well as retaining walls at Weedon;
- Road vehicles for road bridges, and the section of M1 motorway at Watford Gap;
- Passing train objects.
If you think you can contribute any of the above, please get in touch and we can discuss options, and I’ll draw up an effective collaboration plan. Thanks 🙂
") Blisworth pointwork and REBs – can you help by creating a new overbridge object for the site? [Click to enlarge] |
![]() For more information about these ongoing projects:
For more information about these ongoing projects:
 Watford Junction to Rugby Project |
 UK Train System (UkTrainSys) Cross-platform .NET Plugin |
Tags: Animated Objects, Artwork, openBVE, openBVE 2, openBVE Community, Screenshots, Site News, Trackwork, Watford Jn to Rugby
Posted in openBVE, openBVE 2, Site News, Uncategorized | 12 Comments »
November 20, 2010
New cross-platform .NET plugin for UK trains released, class 323 3D cab and Cross-City South v1.31.09 update, openBVE v1.2.9 development branch, .NET plugins and AI support
Posted by admin on November 20, 2010 at 7:30 amNew cross-platform .NET plugin for UK trains (EMUs currently), 323 3D cab / X-City South v1.31.09 updates, and openBVE v1.2.9 AI support
![]() After the latest development branch of openBVE (v1.2.9 series) was released last month, I started work on a new open source, cross-platform plugin written in C#, which I wanted to be a suitable alternative to the plugin currently used by the class 323 EMU. Simon Gathercole’s UKMUt.dll has served me well since BVE Trainsim 4 was released, but after the latest openBVE developments, I knew the time had come to create a new plugin which could be developed to take advantage of the new possibilities which openBVE now provides. I also wanted to create a plugin which could be updated as openBVE develops, either by myself, or with help from other programmers and developers, so that the community doesn’t need to experience plugin-related problems for too long.
After the latest development branch of openBVE (v1.2.9 series) was released last month, I started work on a new open source, cross-platform plugin written in C#, which I wanted to be a suitable alternative to the plugin currently used by the class 323 EMU. Simon Gathercole’s UKMUt.dll has served me well since BVE Trainsim 4 was released, but after the latest openBVE developments, I knew the time had come to create a new plugin which could be developed to take advantage of the new possibilities which openBVE now provides. I also wanted to create a plugin which could be updated as openBVE develops, either by myself, or with help from other programmers and developers, so that the community doesn’t need to experience plugin-related problems for too long.
This new plugin is called UkTrainSys (short for UK Train System of course); it is modular in design, and aims to simulate a variety of systems that trains which run on the UK’s rail network may be equipped with. Initially, I’m working to recreate as much of the functionality found in Simon Gathercole’s range of BVE 4 plugins as necessary, although some new features are included as well. So far, the plugin features the following:
- Automatic Warning System (AWS);
- Train Protection and Warning System (TPWS);
- Driver Reminder Appliance (DRA);
- Vigilance Device;
- Traction and brake interlocks;
- Battery which can be discharged, recharged and overloaded;
- Overhead supply;
- Pantograph and vacuum circuit breaker;
- Automatic Power Control;
- Power supply and electrical system circuit breakers (more for future use);
- In-cab blower;
- Head and tail lights;
- AI guard for station stop monitoring and buzzer codes;
- AI Support which assists openBVE’s AI human driver in handling systems simulated by the plugin automatically
(including support for visible in-cab driver’s hands and arms).
Note: Wipers, windscreen rain effects and diesel engine simulation are yet to be started. I’m also planning for various other systems to be inlcuded in future, such as TPWS+ (TPWS Plus), RETB, ERTMS, random failures, and a tap changer.
Users of trains which include plugins developed for BVE 4, will likely know that when openBVE’s AI human driver is enabled, the AI driver may not always be able to operate a plugin enabled train correctly, simply because openBVE has no way of knowing what systems are simulated by a plugin, and even if openBVE did know what systems were simulated, it still wouldn’t know what to do with them. Hence, the new UkTrainSys plugin uses openBVE v1.2.9’s AI Support feature, which lets the plugin assist openBVE’s AI human driver with operating the systems which are simulated by the plugin.
When you start a route, and enable openBVE’s AI human driver by pressing Ctrl+A, while using the latest release of the class 323’s 3D cab in combination with the UkTrainSys plugin (see below for the download), you will see the AI driver’s arms and hands reach out for the controls, and interact with them whenever necessary. The AI human driver will run through the startup and self-test procedure for you, pressing the AWS reset button, raising the pantograph if required, and setting the taillights and headlights. The plugin takes the time-of-day into account, so the correct headlight setting is chosen based upon the in-game time (and updated as the day goes on). The AI driver will deactivate the DRA before departure, respond to the guard’s buzzer signal with a buzzer response, cancel AWS warnings as they occur, respond to TPWS brake demands, re-raise the pantograph if it is lowered mid-journey, and so-on. The UkTrainSys plugin’s AI Support will also respond to a new beacon type, which instructs the AI driver to blow the horn at certain locations.
Issues with TPWS Isolation, and the driver’s arms remaining visible after turning off openBVE’s AI driver, are hopefully resolved…

I’ve updated the class 323’s 3D cab with new animations which require the UkTrainSys plugin (now included in the download), and I’ve also equipped Cross-City South v1.31 with the aforementioned new beacon type, so the AI driver can sound the horn automatically.
- The updated 323 3D cab and pre-configured UkTrainSys plugin can be downloaded here [2.3 MiB]
(The unrefurbished class 323 from Trainsimcentral is required first – the 3D cab and plugin update should OVERWRITE any existing files in the “Cl323 Unrefurb_openbve” folder). - If you are already using Cross-City South v1.31.071, you can download a small update to v1.31.09 link out of date [95 KiB]
If you don’t already have the route, aren’t sure which release of Cross-City South v1.31 you already have, or want to see details about the latest changes, please download the full version and visit the Cross-City South v1.31 project page instead.
The UkTrainSys plugin also has it’s own project homepage, where just the plugin, source code, current and planned feature list, changelog and documentation can be found. Train developers with an interest is using the UkTrainSys plugin, now or in future, may wish to visit the following page and read the documentation.
Note: If you have downloaded the updated class 323’s 3D cab with the pre-configured UkTrainSys plugin, remember that you should not overwrite the UkTrainSys.cfg file included with the class 323 3D cab update!
UK Train System (UkTrainSys) Cross-platform .NET Plugin [Alpha release now available] |
I’ve also been working on some new backdrops for both Cross-City South v2.0 and Watford Junction to Rugby. I was happy with the daytime backdrops which you’ve all seen already, but the sky portions of the last set of sunset and sunrise backdrops were entirely hand-made (replacing low resolution BVE4-era images), and I wanted to replace these with photographic textures of a similar quality to the daytime backdrops instead. Fortunately, there as been some favourable weather during the past few days, so I was able to take some nice photographs. Here are the new sunrise and sunset scenes, shown with the 323’s latest 3D cab update, and the openBVE v1.2.9 / UkTrainSys plugin enabled AI support feature in use:
") ") ") ") |
Recent openBVE v1.2.9 development branch updates
![]() Towards the beginning of the November, openBVE v1.2.9.11 was released (now up to v1.2.9.15), and Michelle introduced a new set of experimental preprocessing directives. These take the form of $if(), $else() and $endif(), and obviously, these allow for conditional parsing of blocks of code within a route file. This can be an alternative means of achieving what can be accomplished with the $Include directive, which is handy when only a small block of code needs to be conditional.
Towards the beginning of the November, openBVE v1.2.9.11 was released (now up to v1.2.9.15), and Michelle introduced a new set of experimental preprocessing directives. These take the form of $if(), $else() and $endif(), and obviously, these allow for conditional parsing of blocks of code within a route file. This can be an alternative means of achieving what can be accomplished with the $Include directive, which is handy when only a small block of code needs to be conditional.
Personally, I’m finding this very handy for such features as temporary speed restrictions (TSRs). In this scenario, I can randomly introduce TSRs at different locations, so routes can be rather more fun to drive. At the start of the file, we can declare a variable $Sub(0), which has a random number assigned from within a certain range, and then use the value stored in $Sub(0) as a condition which is used by $if() directives. If the value held by $Sub(0) is zero, then the code within any $if() block which depends upon this variable is not used, but if the value is greater than zero, then it is. By using the $else() directive, we can show something else if the TSR is not to be included, such as discarded sections of old rail, left there by the track workers after they made their repairs and removed the TSR. Spate indicators could be handled in a similar way.
For example:
$Sub(100) = $Rnd(0;1)
With Structure
.FreeObj(0) tsr_warn_20mph.csv
.FreeObj(1) tsr_20mph.csv
.FreeObj(2) tsr_terminate.csv
.FreeObj(3) discarded_rail_sections.csv
.FreeObj(4) track_workers.csv
.Beacon(0) portable_aws_magnet.csv
With Route
; Enclose the route commands related to a TSR within $if()/$else()/$endif() directives…
$if($Sub(100))
3000, .Beacon 44001;0, ; portable AWS magnet
$endif()
$if($Sub(100))
3183, .Freeobj 0;0, ; 20 mph TSR advanced warning board
$endif()
$if($Sub(100))
4200, .Freeobj 0;1, .Limit 33;0, ; commencement of 20 mph TSR
$else()
4305, .Freeobj 0;3;5, ; no TSR so show discarded old rails instead
$endif()
$if($Sub(100))
4400, .Freeobj 0;2, .Limit 97;0, ; termination of TSR
$endif()
It’s also possible to use these new preprocessing directives elsewhere in the route file. For example, a different object could be assigned to a free object index, depending upon a condition being true. You can also nest these new preprocessing directives; i.e. place $if/$else()/$endif() selection statements within other selection statements, for example:
$if($Sub(100))
4200, .Freeobj 0;1, .Limit 33;0, ; commencement of 20 mph TSR
$if($Sub(101))
4205, .Freeobj 0;4;-4, ; track workers shown based upon another $Sub variable but only if the TSR is shown
$endif()
$else()
4305, .Freeobj 0;3;5, ; no TSR so show discarded old rails instead
$endif()
Support for these new preprocessor directives is still experimental, and not guaranteed to be included in the next stable release of openBVE, however I’ve not encountered a problem with the feature thus far, at least with regard to the things I’d like to use the feature for, and it’s really very easy to use. Some more testing would be beneficial, but I hope the feature stays, and I’ll certainly be making use of it if it does.
Other news – Chashinai .NET plugin updated with AI support, new Network West Midlands video, and FEVF railway updates
![]() In case you weren’t aware, the new cross-platform .NET plugin which is used by the trains which run on the Chashinai Railway, was updated earlier this month to include AI support, which is a lot of fun, especially with the Chashinai 9000 series train complete with ATS-Sn, ATS-P, ATC and TASC. As with the new UkTrainSys plugin, the updated Chashinai Railway plugin’s AI support assists openBVE’s AI human driver in operating the safety systems, so you can enable the AI human driver and even watch the startup procedures handled by the AI driver. The plugin source code is available as well, of course.
In case you weren’t aware, the new cross-platform .NET plugin which is used by the trains which run on the Chashinai Railway, was updated earlier this month to include AI support, which is a lot of fun, especially with the Chashinai 9000 series train complete with ATS-Sn, ATS-P, ATC and TASC. As with the new UkTrainSys plugin, the updated Chashinai Railway plugin’s AI support assists openBVE’s AI human driver in operating the safety systems, so you can enable the AI human driver and even watch the startup procedures handled by the AI driver. The plugin source code is available as well, of course.
") ") Chashinai Railway Takahagi Line (9000 series train, ATS-P, AI driver enabled) |
I also wanted to quickly mention that Steve Green has posted a short YouTube video of the upcoming Network West Midlands 2010 update, demonstrating animated level crossing barriers interlocked with the signalling, together with updated objects such as a new AWS magnet, which I thought looked really good:
Several other videos of the upcoming NWM release can also be found on Steve’s YouTube channel, and screenshots can be found on the Network West Midlands website.
Lastly, I wanted to show something a little bit different – Roberto Benini, developer of the FEVF (Ferrovia Elettrica Val di Fiemme) railway, has released an animated Mallet Henschel & Sohn 6036 steam loco for openBVE, which is well worth a look, and I noticed that the FEVF Railway itself now has some moving trains at Cavalese station too. The route and train can be downloaded here:
Roberto Benini has also posted a YouTube video of the new loco:
Tags: Animated Objects, Artwork, Cross-City South, Functions, openBVE, openBVE Community, Screenshots, Site News, Software, Watford Jn to Rugby
Posted in openBVE, Site News | 13 Comments »
October 14, 2010
openBVE v1.2.8 and increased rendering speed, openBVE v1.2.9 development branch with cross-platform .NET plugin support, Cross-City South v2.0 update, and openBVE performance with budget versus high-end CPUs, and discrete versus on-board graphics
Posted by admin on October 14, 2010 at 12:20 amopenBVE v1.2.8 released, with significant rendering speed improvements
![]() openBVE v1.2.8 was released recently, which includes a reorganised renderer which can provide significantly higher framerates than the old renderer found in v1.2.7.4. This is achieved by rendering opaque faces (i.e. faces without alpha), using OpenGL display lists. There are two ways to enjoy the performance increase; if you currently have low framerates, then the boost could make routes more enjoyable, however if you already have high framerates, then you can increase the viewing distance significantly so that you can see much further away from the train, whilst maintaining similar framerates to those you are already used to seeing. You can visit the Official openBVE Homepage for the download and to read the changelog, as well as read this thread on the openBVE forum for more information.
openBVE v1.2.8 was released recently, which includes a reorganised renderer which can provide significantly higher framerates than the old renderer found in v1.2.7.4. This is achieved by rendering opaque faces (i.e. faces without alpha), using OpenGL display lists. There are two ways to enjoy the performance increase; if you currently have low framerates, then the boost could make routes more enjoyable, however if you already have high framerates, then you can increase the viewing distance significantly so that you can see much further away from the train, whilst maintaining similar framerates to those you are already used to seeing. You can visit the Official openBVE Homepage for the download and to read the changelog, as well as read this thread on the openBVE forum for more information.
Here are some framerate and image quality comparisons which I conducted on my main development PC (Core 2 Quad Q9650 / GeForce GTX 260), showing some notable improvements:
| On the left is openBVE v1.2.7.4, and on the right, the new v1.2.8:
|
")
")
")
")
")
")
")
")
openBVE’s default viewing distance is 600 metres, however, here are some screenshots showing what the upcoming Watford Junction to Rugby route looks like with an increased viewing distance of 2000m. This particularly benefits the straight sections of this route, allowing you to see more than one upcoming signal at the same time. Thanks to the new renderer, it’ s possible to significantly increase the viewing distance, while still having very playable framerates on a good computer with reasonably detailed exterior car objects:
 , but still with good framerates, in openBVE v1.2.8") , but still with good framerates, in openBVE v1.2.8")    |
Most people are reporting better performance with the new renderer, however if you notice any previously unseen stuttering with the new renderer and detailed routes, I’d really appreciate it if you could contact me with some information about your computer’s specifications and the route being used, as it might be useful for me to know, when I draw up recommended system requirements and openBVE settings, particularly for the upcoming Watford Junction to Rugby project. Thanks.
openBVE v1.2.9 development branch released, enabling support for cross-platform .NET train plugins
![]() The latest version 1.2.9 development branch of openBVE, includes support for .NET assemblies (plugins), which enables cross-platform plugin compatibility, just as with openBVE itself. With previous versions of openBVE, and of course BVE Trainsim, only Win32 C++ plugins were supported, which limited their use to the Microsoft Windows platform, leaving Linux and Mac users to rely on openBVE’s built-in safety systems only, with a great deal of functionality found in plugin enabled trains unavailable. With .NET assemblies, these can be written in a variety of languages which target the .NET framework, such as C# or Visual Basic .NET, and users of non-Windows operating systems can also enjoy enhanced train functionality once new .NET plugins start to appear.
The latest version 1.2.9 development branch of openBVE, includes support for .NET assemblies (plugins), which enables cross-platform plugin compatibility, just as with openBVE itself. With previous versions of openBVE, and of course BVE Trainsim, only Win32 C++ plugins were supported, which limited their use to the Microsoft Windows platform, leaving Linux and Mac users to rely on openBVE’s built-in safety systems only, with a great deal of functionality found in plugin enabled trains unavailable. With .NET assemblies, these can be written in a variety of languages which target the .NET framework, such as C# or Visual Basic .NET, and users of non-Windows operating systems can also enjoy enhanced train functionality once new .NET plugins start to appear.
Anyone with at least some programming experience can visit the .NET assembly train plugin section on the official openBVE website, to download template projects to help you get started. If you’ve already developed a Win32 C++ plugin previously, you might prefer to look at the “C# project files (for updating from Win32 plugins)” download specifically. Anyone interested in making general comments can do so in this thread on the openBVE forum, while anyone wanting to help improve the design of the plugin API by making suggestions, can visit this thread instead.
I’ve started writing a replacement .NET plugin for the class 323, although I’ll design it such that it could be used with other trains too. I’ll release the new .NET assembly and publish the source code when there’s something worth showing, unless someone else writes a plugin which is sufficiently good enough, before me.
Of course, if you’re a more advanced non-Windows user and just want to enjoy driving trains, then you too can now experience some of the best in-cab system functionality available for openBVE. Here’s the openBVE v1.2.9.2 development release, with Chashinai Railway’s Misaki Line, and the 9000 series train with fully functional .NET plugin enabled safety systems, running in Ubuntu 10.04 32-bit Linux (itself running within a virtual machine under Windows 7 64-bit, in this case):
 Chashinai Railway Misaki Line, and 9000 series train with .NET plugin enabled safety systems, used with openBVE v1.2.9.2 in Linux |
Birmingham Cross-City South v2.0 update
![]() If you’ve been keeping an eye on the news infobox at the top left of the blog (or my Projects page), you’ll have noticed that I’ve been continuing work on the pointwork along the Cross-City South route, and I’ve also been working on updating the pointwork on the approach to Birmingham New Street as well. All pointwork between Alvechurch and Five Ways is now finished, and ready for animation to be applied prior to release. The pointwork on the approach to Birmingham New Street is a rather difficult task though. At this location, there are single and double slips, switched diamond crossings and three-way points, all crammed into a rather small space, and all located on quite a sharp curve. There are also a variety of point machines, including electric, hydraulic clamp-lock, and Westinghouse electro-pneumatic types, as well as cast manganese steel and conventional frogs. I like to model these kinds of details, so I’ve spent quite some time working on this area – I’m not finished yet, but will be shortly. Cross-City South was originally designed with a 25 metre block length in mind, however the pointwork doesn’t fit neatly, so much of the pointwork is contained in two large set-piece objects instead. I always felt that this task was going to be the hardest part of the Cross-City South v2.0 upgrade, as it’s rather tedious and difficult (and indeed I was right), however for me, the route wouldn’t be complete without it, as I want Cross-City South v2.0 to be of the same standard as Watford Junction to Rugby, so I’ll endure the pain.
If you’ve been keeping an eye on the news infobox at the top left of the blog (or my Projects page), you’ll have noticed that I’ve been continuing work on the pointwork along the Cross-City South route, and I’ve also been working on updating the pointwork on the approach to Birmingham New Street as well. All pointwork between Alvechurch and Five Ways is now finished, and ready for animation to be applied prior to release. The pointwork on the approach to Birmingham New Street is a rather difficult task though. At this location, there are single and double slips, switched diamond crossings and three-way points, all crammed into a rather small space, and all located on quite a sharp curve. There are also a variety of point machines, including electric, hydraulic clamp-lock, and Westinghouse electro-pneumatic types, as well as cast manganese steel and conventional frogs. I like to model these kinds of details, so I’ve spent quite some time working on this area – I’m not finished yet, but will be shortly. Cross-City South was originally designed with a 25 metre block length in mind, however the pointwork doesn’t fit neatly, so much of the pointwork is contained in two large set-piece objects instead. I always felt that this task was going to be the hardest part of the Cross-City South v2.0 upgrade, as it’s rather tedious and difficult (and indeed I was right), however for me, the route wouldn’t be complete without it, as I want Cross-City South v2.0 to be of the same standard as Watford Junction to Rugby, so I’ll endure the pain.
Here’s a screenshot of one of the Birmingham New Street pointwork objects:
 |
At first glance it doesn’t look like much, but on closer inspection, it’s actually rather detailed and intricate. This object features 4076 vertices, and loads 9 textures. Each rail is carefully texture mapped, to ensure that the Pandrol rail fasteners are as closely lined up with the underlying sleepers as possible, and that the inside of the railhead as depicted in the texture, matches the mapping on the object. Depending upon the location of a rail within the point assembly, different kinds of rail fasteners are depicted. If you examine the existing equivalent object in Cross-City South v1.31, you’ll notice that that old object is afflicted with z-fighting issues; I’ve taken special care to ensure that this doesn’t happen with the new version. In the case of the cast manganese steel frogs, these feature a combination of 3D geometry and use of a photographic texture of the prototype, to create the desired 3D effect:
   |
Each fishplate is also modelled in 3D, and these are also responsible for much of the vertex count, incidentally – this also means that they can be easily removed to create a lower detail object, however. Each point blade has a texture depicting baseplates beneath it, and where the tie bar assemblies will go, oil-stained ballast is featured. The object has also been designed in such a way, that animating any of the point blades is very easy to do in future. I’ll post a screenshot of the object within the route, once I’ve finished the second of these pointwork objects, improved the appearance of New Street station a bit, and finished some other things.
Prior to starting on the New Street pointwork updates, I also spent some time working on the Kings Norton area. In the existing Cross-City South v1.31, I didn’t lay any track in the sidings to the west of the station, and instead, I included a simple texture depicting a pair of tracks on a flat surface to the right of the loop siding. Cross-City South v1.31 was designed for BVE Trainsim 2 and 4 with their cab-only view and lower resolution, of course, so there wasn’t much point in modelling the extra tracks. With openBVE, it’s well worth adding them, however:
 |
Here are some screenshots of the updated pointwork and track geometry at Kings Norton (I’ll replace these points with the more recently installed concrete sleeper versions soon):
   |
You might have noticed that scenery has been improved a little in those previous three screenshots; I’m currrently adding the embankment/tree alpha shadow technique I developed for Watford Junction to Rugby, throughout the Cross-City South route as well. Here are a few more screenshots showing the latest scenery enhancements I’ve been working on, as well as little things like extended length sleepers beneath electric point machines, and disused trackbeds:
    |
Budget versus high-end CPUs, discrete graphics cards versus on-board graphics, and openBVE/Watford Junction to Rugby performance
![]() Sometimes I see people talking about poor framerates or image quality in 3D games which they use, such as openBVE, or others. Upon finding out about the system specifications in use, the cause of the low performance, in the case of Windows 7 and Vista, is often due to inferior graphics drivers being used (i.e. those bundled with Windows by default or obtained via Windows Update, rather than from the graphics card manufacturer). However, the other frequent cause of unsatisfactory performance, is a slow graphics card, and sometimes, a slow CPU.
Sometimes I see people talking about poor framerates or image quality in 3D games which they use, such as openBVE, or others. Upon finding out about the system specifications in use, the cause of the low performance, in the case of Windows 7 and Vista, is often due to inferior graphics drivers being used (i.e. those bundled with Windows by default or obtained via Windows Update, rather than from the graphics card manufacturer). However, the other frequent cause of unsatisfactory performance, is a slow graphics card, and sometimes, a slow CPU.
Personally, I’ve used less-than-stellar graphics cards in my desktop PCs for use with openBVE, but being a geek, I’ve never used on-board graphics solutions (integrated on the motherboard) in a desktop PC before, as I’ve always dismissed them as not being up to much. It occurred to me that perhaps I was being too hasty in writing integrated graphics off, as I’ve never actually tried to play games on such a solution in a desktop PC myself. The same goes for budget CPUs, such as those in Intel’s Celeron or AMD’s Sempron lines – I’ve never been interested in them as I’ve always viewed them as merely cut-down versions of “real” fully-featured CPUs, such as those in Intel’s Pentium and Core product lines, or AMD’s Athlon and Phenom lines.
So, I thought I’d test openBVE on a contemporary budget PC to find out what it was capable of, with the cheapest of Intel’s newer CPUs that I could find – a socket LGA 775 based Celeron E3300 with the Wolfdale-3M core (the same core used in Core 2 E7xxx and Pentium Dual Core E5/6xxx processors), which runs at 2.5 GHz with 1MB of Level 2 cache. This CPU is combined with the cheapest of all graphics solutions – on-board graphics integrated onto the motherboard – in the form of Intel’s “Graphics Media Accelerator” X4500, which is a part of the G41 Express “Eaglelake” chipset. I was also curious to find something out – if a choice has to be made between a better CPU or a better graphics card, which is the best to go for where openBVE is concerned?
I ran the hardware in a few configurations, and tested openBVE’s performance with my upcoming Watford Junction to Rugby route. Here are the results, and in all cases, the best image quality that each graphics solution is capable of was selected, and in all except the last test (number 4), the following constants apply:
CPU: Intel Celeron E3300 @ 2.5 GHz
RAM: 2 GB PC-6400 DDR2 SDRAM (dual-channel configuration)
Operating System: Windows XP Home Edition (32-bit)
openBVE version: 1.2.8 (Sharp transparency, 1920×1200 fullscreen, 600m viewing distance)
Two locations were used for measuring framerates: Watford Junction, and Bourne End Junction.
Test setup 1:
Graphics: Intel GMA X4500 (G41 Express Chipset, 128MB shared video memory) [Antialisasing: n/a, Anisotropic Filtering: 2x]
| Framerates (fps) |
| Watford Junction | 12 |
| Bourne End Junction | 9 |
Test setup 2:
Graphics: AMD/ATI Radeon HD 2600 Pro (256MB DDR2) [Antialisasing: 8x, Anisotropic Filtering: 16x]
| Framerates (fps) |
| Watford Junction | 34 |
| Bourne End Junction | 24 |
Test setup 3:
Graphics: NVIDIA GeForce GTX 260 (896 MB GDDR3) [Antialisasing: 16xQ, Anisotropic Filtering: 16x]
| Framerates (fps) |
| Watford Junction | 118 |
| Bourne End Junction | 101 |
Test setup 4:
Lastly for comparison purposes, here’s what we get when the GeForce GTX 260 is paired with a faster and more powerful quad-core CPU:
CPU: Intel Core 2 Quad Q9650 @ 3 GHz
Graphics: NVIDIA GeForce GTX 260 (896 MB GDDR3) [Antialisasing: 16xQ, Anisotropic Filtering: 16x]
RAM: 4 GB PC-6400 DDR2 SDRAM (dual-channel configuration)
| Framerates (fps) |
| Watford Junction | 179 |
| Bourne End Junction | 160 |
From these results, we can see that the budget Celeron E3300 is actually a rather nice CPU (which isn’t too surprising I suppose, given the architecture in use), and more than good enough for highly detailed routes such as Watford Junction to Rugby when paired with a decent graphics card. By comparing the two GeForce GTX 260 results, we can see that the speed of the CPU matters, however performance is also very clearly determined by the graphics hardware, and I would say that it’s the more important factor when it comes to openBVE performance. While I didn’t test the Core 2 Quad CPU with Intel’s GMA X4500 integrated graphics, I think it’s highly unlikely that framerates would have been much higher with this combination (overclocking the Celeron E3300 from 2.5GHz to 2.92GHz, made a difference of only around 1 fps when the integrated GMA X4500 was used). Intel’s on-board graphics is simply too slow, and the image quality is a bit poorer too, as there is no antialiasing, and the anistropic filtering level is rather limited (compare this screenshot using Intel’s GMA X4500, and a screenshot using the GeForce GTX 260). Intel’s driver control panel claims to support 16x anisotropic filtering, although openBVE/OpenGL reports that 2x is the maximum supported. The framerates don’t tell the entire story either though, as the much faster GeForce GTX 260 graphics card also gives more fluid and stutter-free performance than the budget Radeon HD 2600 Pro does. This is especially true when large textures, animated objects and higher levels of antialiasing and anisotropic filtering are used, as well.
So, if anyone is thinking of upgrading their computer soon and would like to run something like Watford Junction to Rugby, and money is tight, then my advice would be to bias your budget in favour of getting the best graphics card possible, while trying to keep some balance between the CPU and GPU in terms of what each is capable of. For the energy conscious amongst you, also bear in mind that newer generation graphics hardware tends to be more power efficient for a given level of performance. While quad core CPUs are nice to have, dual core CPUs are just fine, too. Indeed, running openBVE on only two of the four cores of the C2Q Q9650 CPU, by setting the affinity for the OpenBve.exe process accordingly, makes only a small difference to performance. Running openBVE on only a single core, even at 3 GHz, does result in performance being halved though, therefore I can’t recommend a single core CPU any more, when dual core CPUs are so common now. Of course, if you can live without the rich graphics or geometrical complexity of the latest openBVE routes, and only want to run less demanding examples, or those previously designed for BVE Trainsim, then even the cheapest contemporary hardware including on-board graphics, may suit your needs just fine where openBVE is concerned, if you don’t mind losing a little image quality and have realistic expectations.
For example: [ Uchibo – Intel GMA X4500 | X-City South v1.31 – Intel GMA X4500 | Saijou Line – Intel GMA X4500 ]
Tags: Artwork, Cross-City South, Hardware, openBVE, openBVE Community, Operating Systems, Screenshots, Software, Trackwork, Watford Jn to Rugby
Posted in openBVE | 4 Comments »
September 5, 2010
Transition curves and superelevated track created using the Object Bender tool, and Cross-City South v2.0 progress update
Posted by admin on September 5, 2010 at 7:30 am![]() I’ve been doing some more work on Cross-City South v2.0 during the past couple of weeks or so, and I’ve been making good use of odakyufan’s new Object Bender tool, where incidentally, the code was so well written and the functionality comprehensive enough, that Object Bender has been made into an official openBVE tool. Please see the new Object Bender section on the official openBVE homepage for more information: Developing for openBVE: Object Bender.
I’ve been doing some more work on Cross-City South v2.0 during the past couple of weeks or so, and I’ve been making good use of odakyufan’s new Object Bender tool, where incidentally, the code was so well written and the functionality comprehensive enough, that Object Bender has been made into an official openBVE tool. Please see the new Object Bender section on the official openBVE homepage for more information: Developing for openBVE: Object Bender.
The output from the tool is such, that I’ve decided to replace all the curved track objects used in the Cross-City South route with new objects generated by Object Bender (from a set of “template” objects which form the intial segment in each type of track – please see here for an example of what I mean), and later I’ll do the same with Watford Junction to Rugby, too. I had already manually created a full range of suitable UK style track objects incorporating cant, as well as objects to be used in transition curves, however these objects had one rail lowered and the other raised in height, to suit the cant model used in older versions of openBVE (therefore enabling the wheels to be visibly touching the rails at all times in earlier versions). openBVE v1.2.7.3 features an improved superelevation model however, where one rail is raised above the other (which remains at the same level), so the existing objects were no longer so suitable.
I had started to make some progress in manually modifying my existing objects, however Object Bender has now saved me many days of work, possibly weeks, thereby preserving my sanity and enabling me to easily generate a much more comprehensive range of superelevated track and transition curve objects to create some very nice results, even better than what I’ve shown in Watford Junction to Rugby for a long time now. The slight downside is that the generated objects have a larger filesize compared to the objects I’d entirely hand-written, however Object Bender’s command line arguments also let me automate and recreate many hundreds of track objects, from a handful of source objects, with great ease via shell scripts. This benefit is simply too good to pass up – if I decide that I want to improve or alter my depiction of track in future, all I have to do is edit the handful of template objects and I can recreate the entire library of track objects with just a double-click. An example batch file for Windows users, based on the one which I’ve written for myself, can be found below, along with a sample shell script for Linux users too.
Here’s a selection of screenshots to demonstrate what nice results can be gained quickly, thanks to Object Bender and a little object building skill:
     Birmingham Cross-City South v2.0 with superelevated track and transition curves, created via odakyufan’s Object Bender tool. Also note the embankment (dike) with curved cable trough in the last screenshot, with the vegetation handled via Object Bender’s /a command-line argument (please see the Object Bender documention for a tutorial). |
One problem I have encountered during the latest Cross-City South superlevated track upgrade so far, is how to accomodate pointwork (switches) on superelevated curves. There are examples of this at Longbridge, between Northfield and Kings Norton, and just after Kings Norton, too. On Watford Junction to Rugby, I took the easy option and handled such situations by transitioning back to uncanted track on either side of points (only with the visual representation of the track – the cant applied via the .Curve command remained constant throughout the points). With Cross-City South v2.0, I’ve decided to gradually alter the height of the other tracks leading towards and away from crossovers connecting superelevated tracks instead, while also rotating the point objects around the Z-axis. This way, the crossover itself is superelevated to the same degree as the tracks being crossed between, which looks better visually, and I presume it’s also more prototypically accurate. Here’s an example between Northfield and Kings Norton, with some new custom pointwork objects I’ve been working on for this location (amongst others):
   Birmingham Cross-City South v2.0 with superelevated track and custom-built crossovers. Note the clamp-lock point machines, too. |
Object Bender has most definitely made route building easier and more enjoyable for me, however one problem which needed to be solved, was that when a track object is superelevated, the terminating height of the ballast shoulders on either side of the sleepers is also altered. In a route, and depending upon the design of the track objects, this can lead to gaps appearing between tracks running side-by-side, and between the ballast portion of the track objects and dikes (i.e. the embankment beneath the track):
 Depending on the design of track objects, gaps can appear between the ballast shoulder and dike, or a parallel track, when superelevation is applied via Object Bender. |
I’ve solved this problem, by expanding the ballast shoulder in the track object to include two faces at increasing angles, such that at the maximum level of visible cant I’ll ever apply in my routes (160mm in my case), no gaps appear and the cable trough isn’t obscured, while I can continue to use only one template object for creating the full range of curved track pieces, at differing degrees of superelevation, via Object Bender. The ballast portions of the dike objects are also extended. This solution does lead to more faces being rendered, but hopefully it’s not too much of an issue, performance wise. Here’s a screenshot:
 Extended ballast shoulders in both the track and dike objects, to remove visible gaps when cant is applied via Object Bender. |
|
|


Object Bender supports some markup which can be applied to template objects before they’re processed, for example, to determine the desired texture coordinate shifting in generated segments (please see the Object Bender documention on the openBVE homepage for more information – I think the tutorial is clear enough that I don’t need to explain it further). I was originally going to suggest expanding the supported markup a little, so that Object Bender could be instructed to leave the X and/or Y coordinates of any vertex as it is in the original template object, which would for example, solve the ballast shoulder issue above in an easier way for the object creator. However, I quite like the appearance of the solution I came up with, so I don’t think such a change to Object Bender is too important, but might be nice to have, nevertheless.
Lastly, for more advanced users, or beginners feeling more adventurous, here’s a sample batch file for Windows users, and a bash script for Linux users, which you can adapt and expand if you want to automatically create a range of curved objects using Object Bender’s command line interface, rather than the GUI. There is a simple example of a suitable batch file included in the Object Bender documention, however rather more can be done with batch files/shell scripts. These following example scripts use variables to reduce the amount of duplicated text that you might otherwise need to type, and they also create a logfile which you can read, which is handy if you’re generating a large number of objects, to more easily check for any errors which might have occured during a lengthy object bending batch process.
For the Windows batch file, you need to give it a .bat extension. The text highlighted in red (including the less/greater than characters), should be replaced by any paths or filenames which are appropriate for your purposes. Where <Your_File_To_Append> is concerned, this object file could contain fishplates for example, or overhead wires, which are appended to the object generated in the previous line (please see here for more information). You can see fishplates added to my curved wooden sleeper based track objects in the above Cross-City South v2.0 screenshots – this is how they were appended to the files generated via Object Bender.
@echo off
rem Set variables (paths and extension for all files)
set objectbender_path=<Path_To_Folder_Containing_ObjectBender>\
set exe=ObjectBender.exe
set obj_source=<Path_To_Your_Source_Object_Folder>\
set obj_final=<Path_To_Your_Route_Object_Folder>\
rem Clear the screen and ask user for confirmation
cls
echo Proceed with object creation? This will overwrite any existing files.
echo Press Ctrl+C to cancel, or any other key to proceed . . .
pause > nul
echo.
echo.
echo Processing files and creating log. Please wait . . .
rem Create a new log file with time stamp
echo ___________________________________ > %objectbender_path%objectbender_log.txt
echo New log [%date% at %time%] >> %objectbender_path%objectbender_log.txt
echo. >> %objectbender_path%objectbender_log.txt
rem Use Object Bender to create finished objects from templates
rem 500m right curve
%objectbender_path%%exe% %obj_source%<Your_Source_File> %obj_final%<Your_500m_Right_Track_Object> /n=5 /s=5 /b=25 /r=500 /g=1435 /u=80 /v=80 >> %objectbender_path%objectbender_log.txt
%objectbender_path%%exe% %obj_source%<Your_File_To_Append> %obj_final%<Your_500m_Right_Track_Object> /a /n=1 /s=25 /b=25 /r=500 /g=1435 /u=80 /v=80 >> %objectbender_path%objectbender_log.txt
rem 600m right curve
%objectbender_path%%exe% %obj_source%<Your_Source_File> %obj_final%<Your_600m_Right_Track_Object> /n=5 /s=5 /b=25 /r=600 /g=1435 /u=80 /v=80 >> %objectbender_path%objectbender_log.txt
%objectbender_path%%exe% %obj_source%<Your_File_To_Append> %obj_final%<Your_600m_Right_Track_Object> /a /n=1 /s=25 /b=25 /r=600 /g=1435 /u=80 /v=80 >> %objectbender_path%objectbender_log.txt
rem 700m right curve, etc. . .
Linux users can adapt the following shell script to make use of Object Bender for automating the creation of multiple files. Your script should be given a .sh file extension, and be made executable (for example: chmod +x myscript.sh). The script can be executed from the Terminal prompt by typing, for example: ./myscript.sh). Don’t forget that Object Bender requires Mono to be installed, too.
#!/bin/bash
# Set variables (paths and extension for all files)
objectbender_path=<Path_To_Folder_Containing_ObjectBender>/
exe=ObjectBender.exe
obj_source=<Path_To_Your_Source_Object_Folder>
obj_final=<Path_To_Your_Route_Object_Folder>
# Clear the screen and ask user for confirmation
clear
echo "Proceed with object creation? This will overwrite any existing files."
read -s -n 1 -p "Press Ctrl+C to cancel, or any other key to continue . . ."
echo
echo
echo "Processing files and creating log. Please wait . . ."
# Create a new log file with time stamp
echo _____________________________________ > $objectbender_path/objectbender_log
echo New log [$(date)] >> $objectbender_path/objectbender_log
echo >> $objectbender_path/objectbender_log
# Use Object Bender to create finished objects from templates
# 500m right curve
mono $objectbender_path/$exe $obj_source/<Your_Source_File> $obj_final/<Your_500m_Right_Track_Object> -n=5 -s=5 -b=25 -r=500 -g=1435 -u=80 -v=80 >> $objectbender_path/objectbender_log
mono $objectbender_path/$exe $obj_source/<Your_File_To_Append> $obj_final/<Your_500m_Right_Track_Object> -a -n=1 -s=25 -b=25 -r=500 -g=1435 -u=80 -v=80 >> $objectbender_path/objectbender_log
# 600m right curve
mono $objectbender_path/$exe $obj_source/<Your_Source_File> $obj_final/<Your_600m_Right_Track_Object> -n=5 -s=5 -b=25 -r=600 -g=1435 -u=80 -v=80 >> $objectbender_path/objectbender_log
mono $objectbender_path/$exe $obj_source/<Your_File_To_Append> $obj_final/<Your_600m_Right_Track_Object> -a -n=1 -s=25 -b=25 -r=600 -g=1435 -u=80 -v=80 >> $objectbender_path/objectbender_log
# 700m right curve, etc. . .
exit 0
If you need any help with using Object Bender or writing scripts to automate curved object creation, please feel free to ask. 🙂
Tags: Cross-City South, openBVE, openBVE Community, Operating Systems, Screenshots, Software, Trackwork
Posted in openBVE | No Comments »
July 11, 2010
openBVE v1.2.7.0 released, new Railsimroutes.net site design, Cross-City South v1.31.07 and miscellaneous project updates, Watford Junction to Rugby screenshot featured in the UK’s PC Gamer Magazine, Genova Brignole – Recco route (as far as Genova Nervi) released
Posted by admin on July 11, 2010 at 6:00 amopenBVE v1.2.7.0 released
![]() Today sees the release of openBVE v1.2.7.0, and some interesting changes have taken place. To begin with, the handling of key and joystick buttons has been revised, and key repeat is now possible. This means that you can hold a key down, and after a short delay, the keypress will be repeated continuously until the key is released again. I’m glad that openBVE now supports this functionality, and this is great for quickly moving a power handle to the limit of it’s travel without having to keep tapping the key, or for sounding the horn in a long and loud fashion, for example. The fly-by camera has also been improved, and now, the leading vehicle (of the nearest train) is tracked by the camera, which is great for loco-hauled trains in particular. 🙂
Today sees the release of openBVE v1.2.7.0, and some interesting changes have taken place. To begin with, the handling of key and joystick buttons has been revised, and key repeat is now possible. This means that you can hold a key down, and after a short delay, the keypress will be repeated continuously until the key is released again. I’m glad that openBVE now supports this functionality, and this is great for quickly moving a power handle to the limit of it’s travel without having to keep tapping the key, or for sounding the horn in a long and loud fashion, for example. The fly-by camera has also been improved, and now, the leading vehicle (of the nearest train) is tracked by the camera, which is great for loco-hauled trains in particular. 🙂
Superelevation is now simulated differently as well; in previous versions, when cant was applied, the train would simply rotate around it’s z-axis, but now, the outer wheel is raised instead. Cant is also interpolated better now, leading to smoother transitions between differing levels of cant. I’m currently rebuilding the canted track objects used by my routes to make better use of these openBVE improvements, such that the wheels will remain on the rails when passing along superelevated track, and the cant transitions at either end of such sections:
  Screenshot showing superelevation in openBVE v1.2.7.0 and Cross-City South v2.0. Note the wheels touching the rails throughout the transition curve (scenery is not finished yet). |
Cant behaviour can also be adjusted now, via the new 'Options.CantBehavior' command. Previously, cant was always applied towards the curve centre, i.e. banking inwards, and this couldn’t be overidden. Also, it wasn’t possible to have cant on straight track. Now though, cant be in either direction, regardless of the direction of the curve, and cant can be applied on straight track too. How might this be useful for simulating a real railway? Well, on the 11th July last year (exactly a year ago as it happens), I was unexpectedly invited for a visit to the preserved Gloucestershire and Warwickshire Railway, and this line has a curve known as Chicken curve, and one peculiar feature was that the cant at this location leaned outward from the curve rather than inwards. So, openBVE can simulate this too, now. Class 20 “chopper” (20154) was our traction on the day, and here’s a photo for fans of the class 20, which I took before we departed from Toddington:
 In the cab of a class 20 loco at Toddington, on the preserved Gloucestershire and Warwickshire Railway. |
The simulation of track inaccuracy has been overhauled, too. Previously, the familiar cab and vehicle sway was achieved with horizontal and vertical movement, but now, cant inaccuracy and bounce is also modelled, and cars rock from side to side as well as moving vertically and horizontally. While we were testing the new inaccuracy model, I found that this was an interesting way to represent the effect of travelling over more poorly maintained jointed rails. I’ve made some adjustments to the track accuracy in the newly udpated Cross-City South v1.31.07 (see below for download), and travelling over pointwork or on the jointed rail sections of the Cross-City South, should be a little more interesting now, especially when the class 323’s 3D cab is used. 🙂
Essentially, I think .Accuracy values of 0 to 2.0 are suitable for continuous welded rail, and values of 2.1 to 4 are suitable for jointed rails. I’m aware that not everyone may be sure about the new inaccuracy model, however I think it works well when used sensibly, and I would also point out that the development release has been publicly available for testing for at least three weeks, so if you don’t like it, you’ve missed your chance to give feedback prior to the latest stable release. Nevertheless, if you have any comments, please let us know. Personally I prefer the new algorithm and enjoy the representation it can give when accompanied by the sounds of jointed rails, but some may prefer the old; please give it a try with the updated Cross-City South v1.31.07 and class 323 3D cab though (see below), as this update shows what the new inaccuracy model can do. Also bear in mind that you may only prefer the old algorithm because you’re used to it, not because it was more realistic; the old algorithm had it’s limitations.
Also, BVE4 style timetable textures can now be displayed when 3D cabs are used, and not just with legacy 2D panels, although this is considered an experimental feature. The timetable texture can be shown as part of the in-game user interface overlay, or as part of a 3D cab (animated object); if the latter is not specifically catered for within the 3D cab, then the former is the default behaviour. Adding BVE4 style timetables to a 3D cab is easy to do; I would recommend simply creating an object with a four-vertex mesh and default texture applied (which is shown if there is no timetable image to display), and add this object to your panel.animated file. Then, make use of the new 'TextureOverride =' command:
CreateMeshBuilder
AddVertex,-0.35,2.9,11.52
AddVertex,-0.06,2.9,11.52
AddVertex,-0.06,2.6,11.52
AddVertex,-0.35,2.6,11.52
AddFace,0,1,2,3
LoadTexture,some_suitable_default_texture.png
SetTextureCoordinates,0, 0, 0
SetTextureCoordinates,1, 1, 0
SetTextureCoordinates,2, 1, 1
SetTextureCoordinates,3, 0, 1
[Object]
States = 3d_cab\timetable.csv
TextureOverride = timetable
I’ve added the aforementioned timetable functionality to the class 323’s 3D cab, but it’s commented out by default, as displaying the timetable images via openBVE’s UI overlay makes more sense where the Cross-City South and class 323 are concerned, plus the feature is still experimental.
You can download the update here, and if you want to experiment with the 'TextureOverride =' command, please see the included ‘Readme_3DCab.txt’ file:
→ 3D cab for unrefurbished class 323 – July 2010 [1.7 MiB]
For more detailed information about the new cant behaviour, and timetable support in .animated objects, please read the official openBVE documentation. For details of all the changes introduced with the v1.2.7.0 release of openBVE, including those not mentioned here, please see the changelog.
Cross-City South v1.31.07 update
![]() As openBVE v1.2.7.0 has been released, I’ve updated Cross-City South v1.31 to remove an obsolete timetable texture, changed some of the timetable images to make them suitable for both openBVE and BVE4, and made adjustments to track inaccuracy to take better advantage of openBVE v1.2.7.0’s new track inaccuracy model. I’ve renamed the route folders to more clearly indicate which sets of routes should be used with openBVE, BVE 4 or BVE 2, as well. I’ve also decided to finally split the openBVE routes away from the BVE 4 routes, as testing every openBVE improvement across numerous route files for 100% backwards compatibility with BVE 4 is somewhat inconvenient, and this also lets me get rid of all those pesky "detail levels" in the openBVE route folder, as these simply aren’t needed with openBVE. The new naming convention is as follows, and should be much clearer (the BVE 2 foldername is as it is, so it’ll fit within the size constraints of BVE 2’s small file selection list):
As openBVE v1.2.7.0 has been released, I’ve updated Cross-City South v1.31 to remove an obsolete timetable texture, changed some of the timetable images to make them suitable for both openBVE and BVE4, and made adjustments to track inaccuracy to take better advantage of openBVE v1.2.7.0’s new track inaccuracy model. I’ve renamed the route folders to more clearly indicate which sets of routes should be used with openBVE, BVE 4 or BVE 2, as well. I’ve also decided to finally split the openBVE routes away from the BVE 4 routes, as testing every openBVE improvement across numerous route files for 100% backwards compatibility with BVE 4 is somewhat inconvenient, and this also lets me get rid of all those pesky "detail levels" in the openBVE route folder, as these simply aren’t needed with openBVE. The new naming convention is as follows, and should be much clearer (the BVE 2 foldername is as it is, so it’ll fit within the size constraints of BVE 2’s small file selection list):
- <YourPath>\Railway\Route\Bham_XCitySouth_BVE2\
- <YourPath>\Railway\Route\Birmingham_Cross-City_South_BVE4\
- <YourPath>\Railway\Route\Birmingham_Cross-City_South_openBVE\
Cross-City South v1.31.05 users can download a smaller update here, which updates v1.31.05 to v1.31.07:
→ v1.31.07 update for existing Cross-City South v1.31.05 users [1.03 MiB]
If you have an earlier version of Cross-City South installed, or you’re not sure which version you already have, please download the full version instead.
Genova Brignole – Recco route (as far as Genova Nervi thus far) for openBVE released
![]() I wanted to mention that a fantastic new route has been released for openBVE, the Italian Genova Brignole – Recco route (as far as Genova Nervi thus far, and 8.1 Km in length). This is one of the most graphically excellent routes I’ve seen to date, with superb textures, and I’m impressed; the route is beautiful. There are some animated objects to enjoy, and staggered catenary as well, which is great to see; pedantic people like me will note that some registration arms pull in the wrong direction, though. 😉
I wanted to mention that a fantastic new route has been released for openBVE, the Italian Genova Brignole – Recco route (as far as Genova Nervi thus far, and 8.1 Km in length). This is one of the most graphically excellent routes I’ve seen to date, with superb textures, and I’m impressed; the route is beautiful. There are some animated objects to enjoy, and staggered catenary as well, which is great to see; pedantic people like me will note that some registration arms pull in the wrong direction, though. 😉
You’ll likely need to read the included PDF instructions before operating the newly released ALn501 – Minuetto v2 train, but it’s well worth the effort. Incidentally, the train comes with some very detailed exterior car objects. These look very nice, although they would benefit from the addition of custom normals to smoothly shade some of the surfaces. Please note that these exterior car objects may have quite an impact on your framerate; even on my Core 2 Quad Q9650 / GeForce GTX 260 system, I get around 30fps in the external view, which is down from anywhere between 80 – 300 fps in the cab view. If you have a slow PC, you may want to stay in the cab. I’m looking forward to seeing this route develop further. 🙂
 in openBVE")  in openBVE")  in openBVE")  in openBVE") The Italian Genova Brignole – Recco route (as far as Genova Nervi thus far), available from BVEMania (Trenomania) (see the Download section) |
Miscellaneous news
![]() I’m officially announcing the Railsimroutes.net UK Railway Infrastructure Object Library today, which will contain all the objects and textures which are shared between my two upcoming openBVE route projects, Birmingham Cross-City South v2.0, and Watford Junction to Rugby v1.0. This library will be maintained by me, and all developers will be welcome to install and use this library with their own projects, without any conditions or requirement to seek permission.
I’m officially announcing the Railsimroutes.net UK Railway Infrastructure Object Library today, which will contain all the objects and textures which are shared between my two upcoming openBVE route projects, Birmingham Cross-City South v2.0, and Watford Junction to Rugby v1.0. This library will be maintained by me, and all developers will be welcome to install and use this library with their own projects, without any conditions or requirement to seek permission.
The library will contain all sorts of objects, including track, catenary, signals, lineside objects, some basic scenery, and so-on, which might help to make new routes easier to develop. It will also have the advantage, that whenever I update the library, perhaps with higher quality textures or better objects, any routes which call upon the library, will also get updated. I’ll plan it carefully, to ensure that changes remain backwards compatible. I anticipate that the library will be released along with Cross-City South v2.0 initially, and then it’ll receive it’s first update when Watford Junction to Rugby is ready.
 UK Railway Infrastructure Object Library [Now in development] |
Next, as you may have noticed, I’ve decided to increase the version number of my upcoming Cross-City South upgrade for openBVE, from version 1.4, to version 2.0. I think I’m making enough changes and enhancements to the route, to justify a version 2.0 release instead. 🙂
I’ve also updated the openBVE Help and Information section to cover the installation of openBVE in Ubuntu 10.04 (Lucid Lynx). It’s hard to imagine how installing openBVE via the Ubuntu Software Centre could be any easier, and installing openBVE via this method, also makes installing and running the latest official openBVE release with Mono, easier too. I’ve decided to remove the instructions explaining how to run openBVE with Wine, as I’m experiencing problems with the version of Wine available for install with Ubuntu 10.04, relating to GDI+ (and the problem isn’t just occurring with openBVE, either). Perhaps something to do with a Beta release of Wine being supplied rather than a stable release, I don’t know. Running with Mono is much easier though, if you can live without plugin DLLs.
  openBVE Help and Information updated for Ubuntu 10.04 users |
I was lucky enough to have one of my screenshots published in the July issue of the UK edition of PC Gamer magazine, where I also gave a brief overview of the work being undertaken on openBVE 2. I will admit that it was nice to handle such a press enquiry! Here’s the screenshot which was chosen for the article, shown amongst screenshots of various simulators, such as Railworks, X-Plane, Sail Simulator, Space Shuttle Mission Simulator, and others:
 The Watford Junction to Rugby screenshot chosen to appear in simulation article “The Realists”, in the July 2010 issue of the UK edition of the best selling PC Gamer magazine. |
Incidentally, I also want to apologise for the lack of progress with my routes, and for posting so many screenshots and not delivering anything, which I feel that some of you are not impressed by. This is mainly due to me working on openBVE 2, which means that I don’t have much time to devote to the routes at the moment. openBVE 2 is a priority though, and a fantastic experience for me, so I hope fans of my routes will understand. Besides, both routes will run even better in openBVE 2, anyway. I know that the routes look more-or-less finished already, but they’re not – there are such issues as missing track in places, performance optimisations which still to be carried out, and an entire missing station to deal with at Rugby, to name but a few examples. I don’t make a habit of releasing junk and expecting people to be happy with it, so the projects won’t be released until I’m satisfied that a decent standard of quality has been achieved; that doesn’t mean they have to be perfect in every way, just not a disappointment.
New Railsimroutes.net site design
![]() As regular visitors will have hopefully noticed, I’ve redesigned the website, as I felt it needed an update, and I also wanted to put some updated website design skills into practice. The site was last redesigned in 2007 with a theme called “Modern”, characterised by a metallic grey colour scheme and smoothly shaded backgrounds, where Windows users would have been greeted with the Tahoma font throughout, and it was designed to be XHTML 1.0 and CSS Level 2 compliant. However, the content of the site wasn’t reorganised very much since the time of the previous “Retro Blue” design, and over time it became somewhat cluttered and untidy in my view.
As regular visitors will have hopefully noticed, I’ve redesigned the website, as I felt it needed an update, and I also wanted to put some updated website design skills into practice. The site was last redesigned in 2007 with a theme called “Modern”, characterised by a metallic grey colour scheme and smoothly shaded backgrounds, where Windows users would have been greeted with the Tahoma font throughout, and it was designed to be XHTML 1.0 and CSS Level 2 compliant. However, the content of the site wasn’t reorganised very much since the time of the previous “Retro Blue” design, and over time it became somewhat cluttered and untidy in my view.
This latest redesign is the fourth incarnation of the site, with a new theme called “Clarity” (hopefully it might live up to it’s name ;)). The new design is meant to be clearer, better organised, and easier to read. The site has been completely rebuilt from scratch; PHP is now used as well as HTML, and much of the site is XHTML 1.1 and CSS Level 3 compliant. I’ve tested the new site using Firefox 3, Internet Explorer 8, Opera 10, Chrome 5, and Safari 5, and everything works well. The site also works just fine in Internet Explorer 7 and earlier too (tested as far back as IE 5.5), but if you use one of those older Microsoft browsers, you might notice a minor rendering issue around the style selector dropdown box in the footer of each page. Essentially, I’m not happy having to devote much time to dealing with the quirks of browsers which aren’t properly compliant with more recent web standards, partly because it’s just annoying, but also because catering for them can lead to such browsers outliving their welcome (IE 6 springs to mind!). So, if you use Internet Explorer 7 or earlier and want perfect rendering, I would recommend upgrading to Internet Explorer 8 if possible, which is just fine.
I’ve also decided to reorganise the content of the site somewhat. The navigation bar has been expanded with the addition of Gallery and Help links, and the Projects and Downloads section has been overhauled to place emphasis on active projects, and non-help related information. Much more background information and history concerning my route projects is provided now, and information and downloads should be easier to find when they’re ready for release. You’ll also find a "What I’m currently working on" infobox at the top right of this page, which you can check to see what I’m up to, between blog posts. 🙂
I’ve taken the decision to remove some old sections of the site which never received much of my attention, and I’ve moved my old BVE 2 and 4 add-ons into their own de-emphasised legacy add-ons section, as they’re not really reflective of the quality of work I’m now producing; the emphasis is now placed on my upcoming openBVE projects instead. I’ve also introduced a sitemap, as a couple of people have indicated that some information was harder to find, previously.
I’ve also used a different selection of fonts this time:
- Windows 7 and Vista users will get the Segoe UI font throughout (along with the rather nice Consolas for code snippets), giving the best appearance.
- Windows XP users will also get the Segoe UI font, if Windows Live Essentials applications have been installed (for example, Messenger, Mail, Photo Gallery or Writer), or if Office 2007/2010 has been installed. XP users will also get the Consolas font with Office 2007/2010, or this can be downloaded free from Microsoft’s website. If neither Windows Live Essentials or Office 2007/2010 have been installed, but the free Microsoft Powerpoint Viewer 2007 is installed, then Candara (along with Consolas) will be seen instead. If none of these have been installed, then Trebuchet MS (along with Courier New for code snippets) will be seen, which are fonts included with Windows XP.
- Others will likely see generic sans serif and monospace fonts (although these look very nice in Ubuntu Linux, for example).
Incidentally, I experimented with CSS3’s @font-face declaration for embedding fonts, so that a consistent text style would be seen regardless of which fonts are installed locally on someone’s computer. This does indeed work fine, but I haven’t yet decided upon a set of fonts which I like, and which are also released with acceptable non-restrictive licencing terms, so that I can host the fonts on my own server without issues. I’ll explore this again in future, however.
More observant visitors will have noticed that I’ve also renamed the site slightly. I’ve dropped the “UK” part of “Rail Sim Routes UK”, and the site is now called “Railsimroutes.net” instead. The site is still available via two domain names, railsimroutes.net and railsimroutes.co.uk; I have no plans to retire the .co.uk domain, although you might want to update your bookmarks if you still use it.
Anyway, I hope you like the new Railsimroutes.net design. 🙂
Tags: Animated Objects, Artwork, Cross-City South, Functions, openBVE, openBVE 2, openBVE Community, Screenshots, Site News, Watford Jn to Rugby
Posted in openBVE, openBVE 2, Site News | 25 Comments »
May 14, 2010
Animated digital station clocks for openBVE, and 3D cab for 1992 stock released at BVE Routes & Trains
Posted by admin on May 14, 2010 at 6:50 amAnimated digital station clocks
![]()
 I’m not sure if any other openBVE developers have attempted this yet, but a feature I’ve been wanting to add to my routes for some time now, is animated digital station clocks which show the actual in-game time. Of course, we’ve seen a very nice working analogue station clock featured in » DemoRoute1 « (see right), but a digital clock would be useful, too.
I studied the functions in DemoRoute1’s analogue clock .animated file, along with openBVE 1’s source code to see how the display of in-game time is handled, and eventually opted to use multiplication rather than division in my functions as per the animated object in DemoRoute1. You can find some details of the finished set of files below.
 Animated 24-hour digital clock shown in the openBVE Object Viewer utility. Sample files can be downloaded here. |
Please feel free to download and use the above files if you’d like to adapt them for your own route, all you need to do is create an enclosure for the digits, and translate or resize the digits, to suit your own needs. The digital clock consists of an object which shows a single digit from a texture containing a strip of digits from 0-9, a separator, and a black background. The .animated file is as follows:
[Object]
States = back.csv
Position = 0, 0, 0
; Hours
[Object]
States = digit.csv
Position = -0.51, 0, 0
TextureShiftYFunction = 0.1 * floor[mod[time * 0.000277777777777778, 24] * 0.1]
[Object]
States = digit.csv
Position = -0.33, 0, 0
TextureShiftYFunction = 0.1 * floor[mod[time * 0.000277777777777778, 24]]
[Object]
States = digit_separator.csv
Position = -0.21, 0, 0
; Minutes
[Object]
States = digit.csv
Position = -0.09, 0, 0
TextureShiftYFunction = 0.1 * floor[mod[time * 0.0166666666666667, 60] * 0.1]
[Object]
States = digit.csv
Position = 0.09, 0, 0
TextureShiftYFunction = 0.1 * floor[time * 0.0166666666666667]
[Object]
States = digit_separator.csv
Position = 0.21, 0, 0
StateFunction = value == 0
RefreshRate = 0.5
; Seconds
[Object]
States = digit.csv
Position = 0.33, 0, 0
TextureShiftYFunction = 0.1 * floor[mod[time, 60] * 0.1]
[Object]
States = digit.csv
Position = 0.51, 0, 0
TextureShiftYFunction = 0.1 * floor[time]
Note: The purpose of the mod[] function used in displaying the hour digits, is to ensure that the displayed time wraps around back to 00 when passing midnight, rather than 24 or higher being displayed.
Here’s a screenshot of the above working digital clock, adapted for use in a prototypical structure at Kings Langley on the Watford Junction to Rugby route; note the displayed time on the clock, matching the in-game time shown at the bottom left of the screen:
 openBVE / Watford Junction to Rugby screenshot showing animated digital clock — click to enlarge Note: Station nameboard textures created using » Station Nameboard Generator v2 « |
3D cab for 1992 stock released
![]() I also just wanted to briefly mention that a new openBVE 3D cab has been released for the London Underground 1992 stock, with animated features including a traction/brake controller, speedometer, and working in-cab CCTV monitor. Night-illuminated cab indicators and screens are also included, and the overall effect created by the cab is very nice, despite a couple of initial teething problems. The 3D cab is an add-on for the BVE4 1992TS, which needs to be installed first; both downloads can be found at » http://bveroutes-trains.co.uk «. A note on installing the 3D cab — at the time of writing, I noticed that the 3D cab download contains an incorrect folder structure, i.e. there’s no “1992TS” subfolder included, and the files could easily end up accidentally being placed in your Train folder directly instead, which won’t work, of course. You will need to be careful as to where you choose to extract the files. For further information, you might like to monitor » this thread « on the BVE Exchange forum.
I also just wanted to briefly mention that a new openBVE 3D cab has been released for the London Underground 1992 stock, with animated features including a traction/brake controller, speedometer, and working in-cab CCTV monitor. Night-illuminated cab indicators and screens are also included, and the overall effect created by the cab is very nice, despite a couple of initial teething problems. The 3D cab is an add-on for the BVE4 1992TS, which needs to be installed first; both downloads can be found at » http://bveroutes-trains.co.uk «. A note on installing the 3D cab — at the time of writing, I noticed that the 3D cab download contains an incorrect folder structure, i.e. there’s no “1992TS” subfolder included, and the files could easily end up accidentally being placed in your Train folder directly instead, which won’t work, of course. You will need to be careful as to where you choose to extract the files. For further information, you might like to monitor » this thread « on the BVE Exchange forum.
 openBVE / 1992 Stock screenshot » Download from http://bveroutes-trains.co.uk « |
Tags: Animated Objects, Functions, openBVE, openBVE Community, Screenshots, Watford Jn to Rugby
Posted in openBVE | 8 Comments »
April 14, 2010
Chashinai Railway April updates
Posted by admin on April 14, 2010 at 12:30 am![]() What I would consider to be one of the flagship routes for openBVE due to it’s innovation, and one of the most varied and enjoyable, namely » odakyufan’s Chashinai Railway «, has been updated. The Misaki Line from Tawaramoto to Hitachiomiya can now be driven back and forth in both directions (via seperate route files), which is fun. The ATC system has also been redesigned, such that a gradual, smooth brake curve is now implemented, along with a Rapid Mode which removes the smoothening for use in the rush hour where trains are more frequent and adhering to the timetable is harder. Driving the Chashinai 9000 Series train with ATC, TASC and ATO activated is one of the most enjoyable things which can be done with openBVE, so I’d strongly recommend that you give this a try — it’s well worth it. Instructions can be found » here «. Please also note that the source code for the plugins used by the Chashinai Railway’s trains is included within the train download, and I’d recommend that anyone considering plugin development in future, study the cleanly written, concise source code as well, of course bearing in mind that a move to cross-platform .NET plugins will occur in future. Incidentally, publishing the source code for plugins is something I would like to see more train developers doing in future, and certainly something I will be doing in future (I’ll be writing a new cross-platform .NET plugin for the new class 323 of course), once » openBVE 2 « is in a more advanced stage of development.
What I would consider to be one of the flagship routes for openBVE due to it’s innovation, and one of the most varied and enjoyable, namely » odakyufan’s Chashinai Railway «, has been updated. The Misaki Line from Tawaramoto to Hitachiomiya can now be driven back and forth in both directions (via seperate route files), which is fun. The ATC system has also been redesigned, such that a gradual, smooth brake curve is now implemented, along with a Rapid Mode which removes the smoothening for use in the rush hour where trains are more frequent and adhering to the timetable is harder. Driving the Chashinai 9000 Series train with ATC, TASC and ATO activated is one of the most enjoyable things which can be done with openBVE, so I’d strongly recommend that you give this a try — it’s well worth it. Instructions can be found » here «. Please also note that the source code for the plugins used by the Chashinai Railway’s trains is included within the train download, and I’d recommend that anyone considering plugin development in future, study the cleanly written, concise source code as well, of course bearing in mind that a move to cross-platform .NET plugins will occur in future. Incidentally, publishing the source code for plugins is something I would like to see more train developers doing in future, and certainly something I will be doing in future (I’ll be writing a new cross-platform .NET plugin for the new class 323 of course), once » openBVE 2 « is in a more advanced stage of development.
Moving road vehicles have also been added together with traffic sounds, shown to best visual effect on overbridges, I think particularly on the Koriyama Line (also bi-directional), Takahagi and Ishinden Lines, and vehicles can be seen travelling parallel to the railway between Shirosato and Motegi on the Misaki Line as well. The use of texture shifting functions here, enables vehicles to appear as though they’re travelling along the road, despite it’s apparent gradient and directional changes. I’ll be doing something similar at Watford Gap and other locations on the Watford Junction to Rugby route, using a technique developed for 3D vehicles by odakyufan, » details of which can be found here «. Other details, such as beacons correctly aligned with sleepers and track are taken care of too, as I’ve tried to do with AWS magnets in my routes. You’ll also find far more variation in the numbers of passengers waiting to board your train, which makes stations pleasing and fun to approach as there’s far more to see now; the recent changes to openBVE regarding the weight of the train increasing with passenger load and the effect this has on performance, can be used to good effect here (don’t forget to download the most recent version 1.2.6.1 of » openBVE « for this to work). Watch out for wheelslip depending on location, environmental or meteorological conditions too!
Developers might also be interested in taking a look at how the Chashinai Railway’s route files have been prepared. openBVE’s $Include directive has been used extensively, with much greater efficiency and flexibility now possible.
Please visit » The Web Presence of Odakyufan « to download the latest release of Chashinai Railway, and also » this thread on the openBVE forum «, where additional screenshots, information, details and benefts of $Include can be found. This is sophisticated, high quality and beautiful work, and I look forward to seeing more in future.
| Images captured at 1680×1050, with smooth transparency and 16xQ anti-aliasing and 16x anisotropic filtering (Please hover over any thumbnail image for a description) ![About to pick up additional passengers waiting to join the train at Izumozaki North on the Misaki Line, with ATC indicating a clear line ahead. [Click to enlarge]](/images/hi-res/openbve_chashinai_17.jpg "About to pick up additional passengers waiting to join the train at Izumozaki North on the Misaki Line, with ATC indicating a clear line ahead. [Click to enlarge]") ![Animated road vehicles crossing the overbridge at Kawarada station where the Ishinden and Uchiike Lines join together, as the warmth of the rising sun adds ambience the scene. [Click to enlarge]](/images/hi-res/openbve_chashinai_18.jpg "Animated road vehicles crossing the overbridge at Kawarada station where the Ishinden and Uchiike Lines join together, as the warmth of the rising sun adds ambience to the scene. [Click to enlarge]") openBVE / Chashinai Railway screenshots Download from » The Web Presence of Odakyufan « |
Railsimroutes Projects
![]() I know haven’t posted any updates regarding my own projects for some time, about which I can only apologise. I have a couple of features which I want to be working on for » openBVE 2 « first, however when I have time spare I’m also working on implementing another feature for both of my routes, and I’ll post some screenshots of this once I’m happy with how it all looks. More to follow fairly soon…
I know haven’t posted any updates regarding my own projects for some time, about which I can only apologise. I have a couple of features which I want to be working on for » openBVE 2 « first, however when I have time spare I’m also working on implementing another feature for both of my routes, and I’ll post some screenshots of this once I’m happy with how it all looks. More to follow fairly soon…
Tags: Animated Objects, Artwork, openBVE, openBVE Community, Screenshots, Site News, Trackwork, Watford Jn to Rugby
Posted in openBVE, Site News | 1 Comment »
April 7, 2010
Updated openBVE developer tools and openBVE v1.2.6.1, upcoming Network West Midlands updates, upcoming Taipei Metro route for openBVE, and server upgrade
Posted by admin on April 7, 2010 at 6:00 amopenBVE v1.2.6.1 and updated openBVE developer tools
![]() openBVE v1.2.6.1 has been released, which includes a bugfix relating to the Options.UnitOfSpeed command, which could for example, involve an incorrect speed limit being determined when the Route.Limit command is used. Please » download the latest release « if this issue affects you.
openBVE v1.2.6.1 has been released, which includes a bugfix relating to the Options.UnitOfSpeed command, which could for example, involve an incorrect speed limit being determined when the Route.Limit command is used. Please » download the latest release « if this issue affects you.
Also, when I posted my last blog entry, I forgot to mention that the » openBVE Route Viewer « has been updated. When your route is loaded, you can now simply type in a distance via the main number keys (not the numberpad keys), and hit Enter — the camera will then be moved directly to the location you just entered. This is an immensely useful time-saver.
 openBVE Route Viewer screenshot — click to enlarge |
Also, when you pass a CSV format route or object file as a command line parameter to either Route Viewer or Object Viewer, the tools will now auto-detect whether the CSV file is a route or an object, and load the appropriate tool automatically. Please see the Tools section within the » Developing for openBVE « pages for more information. For developers who haven’t used the command line for opening routes or objects before, it can be done as follows (obviously replace the path and file names according to your own setup):
| RouteViewer.exe “<YourDrive>:\YourPath\FileName.ext” |
Network West Midlands openBVE updates
![]() The » Network West Midlands « (NWM) team have announced some promising updates for the first 2010 release of the route network, which should make some good use of openBVE’s capabilities and features. We can look forward to such delights as random moving traffic on overbridges, moving passing trains similar to what I’ve demonstrated in one of my early YouTube videos, various points of interest, multiple eras, random routing/weather conditions/other features thanks to openBVE’s » $Include directives «, 3D signals, trees and lamp posts similar to those I’ve shown previously, along with the addition of catenary based on my own high detailed Cross-City South OHLE objects throughout the routes, where a very nice job has been done with their implementation. Some excellent new track textures have also been prepared for the route.
The » Network West Midlands « (NWM) team have announced some promising updates for the first 2010 release of the route network, which should make some good use of openBVE’s capabilities and features. We can look forward to such delights as random moving traffic on overbridges, moving passing trains similar to what I’ve demonstrated in one of my early YouTube videos, various points of interest, multiple eras, random routing/weather conditions/other features thanks to openBVE’s » $Include directives «, 3D signals, trees and lamp posts similar to those I’ve shown previously, along with the addition of catenary based on my own high detailed Cross-City South OHLE objects throughout the routes, where a very nice job has been done with their implementation. Some excellent new track textures have also been prepared for the route.
  openBVE / Network West Midlands screenshots — click to visit the NWM news page |
Please visit the » NWM website « for more information and screenshots.
Upcoming Taipei Metro route for openBVE
![]() I noticed some new screenshots of the Taipei Metro Xinbeitou Branch Line, being developed for openBVE by » BVETRT «, and I wanted to mention them as I think they look superb. There’s richly coloured scenery, the detailing of the stations and near-track areas looks fantastic, and the railway infrastructure is very well modelled and convincing. Also take a look at this » YouTube video « of the line as well.
I noticed some new screenshots of the Taipei Metro Xinbeitou Branch Line, being developed for openBVE by » BVETRT «, and I wanted to mention them as I think they look superb. There’s richly coloured scenery, the detailing of the stations and near-track areas looks fantastic, and the railway infrastructure is very well modelled and convincing. Also take a look at this » YouTube video « of the line as well.
  Taipei Metro Xinbeitou Branch Line for openBVE — click to read developer’s blog entry |
Server upgrade
![]() Lastly, my webhost kindly migrated Railsimroutes to a new, high performance shared server recently, and they also installed the Nginx reverse proxy webserver in conjunction with Apache, which I’ve noticed has increased the responsiveness of the site along with page loading times. The migration went smoothly, but if anyone has had any issues with the site during the last three weeks, please let me know.
Lastly, my webhost kindly migrated Railsimroutes to a new, high performance shared server recently, and they also installed the Nginx reverse proxy webserver in conjunction with Apache, which I’ve noticed has increased the responsiveness of the site along with page loading times. The migration went smoothly, but if anyone has had any issues with the site during the last three weeks, please let me know.
Tags: Hardware, openBVE, openBVE Community, Site News, Software
Posted in openBVE, Site News | 5 Comments »