- [WJ-R]: 1980s object removal (Castlethorpe/Hanslope area)
- [XCS]: Pending
- [UkTrainSys]: v0.3.2.0 released
- [Object Library]: Preparing...
- [Website]: Fifth version of website launched
 My openBVE videos and other comments from users and
myself can also be found via my YouTube
channel.
My openBVE videos and other comments from users and
myself can also be found via my YouTube
channel.Blog and Progress Updates
19th April 2009
Cross-City South 7-Zip trial
Posted by Anthony Bowden on 19th April 2009 at 7:55 amIn what may or may not prove to be a popular move, I’ve replaced my beloved NSIS executable installer within which the Cross-City South route was previously distributed, with a 7-Zip archive instead (and the other Cross-City add-ons have also been repackaged). I’m doing this as a trial to see how users cope with installing the route using a compressed archive manager instead of an installation program. I’m not willing to package the route using the more popular but less effective .zip format, as the resulting filesize is much larger than the .7z equivalent–the Cross-City South .zip version comes to a massive 32 MiB, while the 7-Zip archive comes in at 13.5 MiB, which is a little smaller than the installer it replaces (which figures, as both were compressed using the same LZMA compression method). All archives by default, have either the ‘Railway’ or ‘Train’ folder as the root folder within the archives, so you can always choose the same destination path when extracting the contents, and so there’s little doubt as to which folder the contents are supposed to be extracted to.
Okay, so I’ll miss using NSIS to package my add-ons as it was a very flexible installer creation tool, but more seriously, openBVE is intended as a cross-platform program, and executable (.exe) installers only work natively on Windows and not on other operating systems, which is unfair to non-Windows users wanting to use the route, or indeed those who have their add-ons installed in a non-default location. openBVE’s developer has also stated that add-ons released in installers aren’t considered to be openBVE content at all (and I can’t be happy if X-City isn’t considered to be openBVE content), so one way or another, distribution via compressed archive is the way of the future for openBVE, and I hope you’ll all be able to adjust to this change. If absolutely necessary I may reintroduce the executable installer alongside the .7z archive, but I’d prefer not to if possible.
There are no changes to the route itself (with v1.4 on it’s way, updating the old version isn’t really a good use of my time), however to prepare yourself for Cross-City South v1.4 and other openBVE add-ons in future, you can head over to the » Cross-City South download page « and try out the compressed archive installation method instead. I’ve also added new content to the » openBVE Help and Information « section of the site, which includes a couple of screenshots of what we can all look forward to with openBVE in the near future, along with step-by-step instructions to help with the downloading and installation of the Cross-City South .7z package for use with openBVE, along with recommended settings, and so-on. I’ve also slightly updated the » BVE 4 Help Section «, and you can also view an updated version of the » Cross-City South/Class 323 Tutorial « tailored for openBVE.
|
![]() Edit: I’ve made a couple of amendments to the openBVE Help page and the Cross-City South download page, as they contained some unclear instructions and mistakes–sorry! I’ll continue to update them if necessary.
Edit: I’ve made a couple of amendments to the openBVE Help page and the Cross-City South download page, as they contained some unclear instructions and mistakes–sorry! I’ll continue to update them if necessary.
If you have problems installing the Cross-City South via the compressed archive method instead, I’d really like to hear about your installation experiences. Please feel free to add comments to this blog entry if you have any problems (no registration required, just click the ‘x Comments’ link below), or e-mail me. If there’s no feedback, I’ll assume you’re all managing just fine. 🙂
Tags: Cross-City South, openBVE, Site News
Posted in openBVE, Site News | 8 Comments »
Platform Generator utility released
Posted by Anthony Bowden on 19th April 2009 at 7:45 amAlan Wheeler’s new Platform Generator (Plat Gen) tool was released recently; head over to » eezypeazy.co.uk « to download this handy utility. The program creates a variety of photo-realistic customised platform segments, allowing route developers to choose the surface and side textures, create platform ramps, curved platform lengths at various radii, and more. The generated objects are placed via the .Freeobj command rather than the .Form commands. Here’s a screenshot of one of the resulting platforms at University station on the Cross-City South v1.4 route:
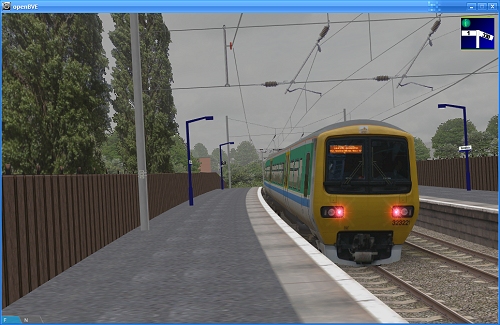 openBVE / Cross-City South v1.4 plus 323 screenshot |
Tags: Cross-City South, openBVE, openBVE Community, Screenshots, Software
Posted in openBVE | 2 Comments »
24th March 2009
Cross-City South v1.4 Progress
Posted by Anthony Bowden on 24th March 2009 at 12:22 amI am sorry for the lack of updates during the past few weeks. This is partly because more of my time has been taken up by non-railsim related stuff during the past month, but also because I’ve completed most of the experimentation as far as XCS v1.4’s animated objects are concerned now (I have to stop somewhere otherwise I’ll never finish it), and what remains to be done isn’t especially newsworthy in comparison–mainly adding what I’ve already shown throughout the route. I also can’t imagine that any of you would be particularly interested in reading about that sub-folder I renamed two days ago, those trees I added to a set of ground objects, or that exciting search through my archives to find a photo of a class 323’s seating?! ![]() However, the project is going well, and I should have some more news soon.
However, the project is going well, and I should have some more news soon.
Tags: Cross-City South, openBVE
Posted in openBVE | 4 Comments »
26th February 2009
Animated Exterior Car Objects
Posted by Anthony Bowden on 26th February 2009 at 10:00 pm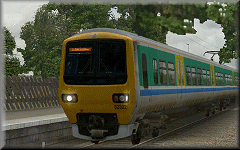 As most of you will likely know already, » openBVE « now enables developers to use animated exterior car objects. I was pleasantly surprised by all the positive feedback and comments regarding my last video which I uploaded to YouTube (thank you!), but one criticism which was pointed out several times was the disparity between the quality of the scenic visuals, and the rather simplistic objects used to represent the class 323 EMU–the objects were fine for BVE’s passing trains, but less so when you can move the camera up close and look at the details, or lack thereof. I didn’t think it was worth spending much time on this latter aspect until animation could be applied to the exterior car objects, but now this is possible, I’ve been working on some far better 3D models for the class 323. I had hoped to get this task finished sooner, but it’s taken longer than I originally expected unfortunately–the main difficulty was getting the rounded cab looking right, and texturing it correctly. However, I’m now happy with the appearance, and so I present the work-in-progress fully 3D exterior car objects for openBVE and Cross-City South v1.4. Incidentally, as with all my openBVE/BVE objects, these models are entirely hand coded, with no “help” from 3D modelling software.
Currently the objects are rather more complex than I originally intended (so far, the entire three coach EMU contains around 8200 vertices/4900 faces), and there is a performance penalty that comes with using them; on a fairly typical BVE route, framerates should be okay, but when paired with a very highly detailed and intensively animated route such as Cross-City South v1.4, a fast PC will likely be required to enjoy both extensively detailed animated scenery and detailed external car objects with reasonable framerates. What I intend to do, for those of you with slower hardware, is release alternative versions of the exterior car objects with lower polygon counts, and because of the way I’ve created the textures, the end result should still look good despite less complex geometry. Even these lower detail versions will be rather better than the previous objects though. ![]() So ultimately, if framerates are a problem, you can simply choose either richly detailed scenery, or richly detailed train objects, depending on which is more important to you.
So ultimately, if framerates are a problem, you can simply choose either richly detailed scenery, or richly detailed train objects, depending on which is more important to you.
Currently, the models include the following standard animated features:
- Rotating wheelsets including wheelslip effects (with provision for animated suspension, and bogie rotation should such functionality be possible in future)
- Bi-parting, sliding plug doors (some issues with door open/close sound synchronisation–see below)
- Moving window reflections (twin-layered with transparency, to create a parallax effect)
The models also include the following animated features linked to plugin (UKMUt.dll) variables:
- Windscreen wipers (left/right sweep, plus arc motion; the wipers aren’t perfect–see below)
- Head and tail lights (both ends of train)
- Interior lights (on or off via pantograph up/down button)
- LED destination display with flicker (on or off via pantograph up/down button)
- Working pantograph (all illuminated features also extinguish when pantograph is lowered)
I’ve also prepared another video to show these features. Please note, the 3D objects aren’t finished yet; some textures need updating, and I’ve yet to add interior fittings. Developers might want to continue reading on, as I’ll explain how some of these animations have been implemented, and share some sample code from the .ANIMATED objects.
Video: Demonstration of class 323 animated exterior car objects (work-in-progress) » Link to YouTube page (HD – best quality) «
|
I also thought you might like to see a high resolution image of Cross-City South v1.4 and the new high detail class 323; in this screenshot, I’m running openBVE fullscreen at a resolution of 1280×1024, with 8x anti-aliasing and 16x anisotropic filtering enabled (on a Radeon HD 2600 Pro graphics card). Bilinear interpolation was enabled in openBVE’s settings, with the Transparency mode set to Sharp. I was getting around 16-19 fps at the time; the framerates in the next version of openBVE will hopefully be a little higher due to performance optimisations where animated object normals are concerned, although this gain may be offset by the addition of more animated scenery objects to the route:
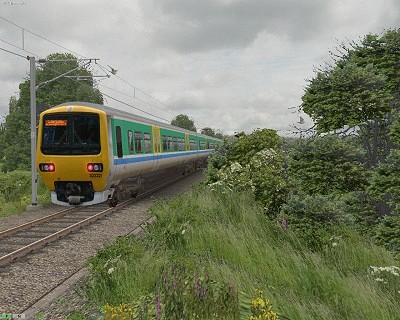 openBVE / Cross-City South v1.4 plus 323 screenshot–click to enlarge |
![]()
Rotating Wheelsets 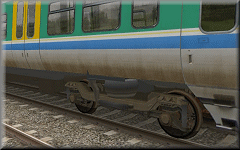 |
The first things I tried to animate were the wheelsets. Initially I had difficulty getting this to work as anticipated, and observed unexpected results while using the Speedometer variable, i.e. the resulting wheelset rotation appeared as though it were based upon acceleration rate rather than an actual velocity value (and » Ron « found the same when he first tried to animate wheelsets, it would seem). I usually like to try and figure out solutions to such problems myself, but sadly I’m not the reincarnation of Pierre de Fermat, and as such, my mathematical knowledge was insufficient. Fortunately, a way forward could be found over at the » openBVE Japanese « site, which includes some helpful material covering animated objects and functions. The following function can be used to rotate each wheelset:
Incidentally, 2.765 is the circumference of the wheel. The above formula works perfectly, but initially I wondered if it was more complicated than it needed to be, so I attempted to find a more simple alternative, and somehow arrived at the following formula, where the value 0.05949986086344 results from (pi / 0.88) / 60, where 0.88 is the diameter of the wheel:
Initially this seemed to work well, but on closer examination, the end result wasn’t as good as the more complex formula because the rate of rotation varies with the framerate, and I observed no difference in performance between the two anyway.
![]() Update
Update
Thanks to a certain mathematically adept someone, I now have a new formula which is better in terms of performance and ease of use:
|
|
Animated Doors 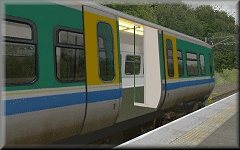 |
The bi-parting sliding plug doors are comprised of a pair of 3D door objects, which slide forwards and backwards via a translation along the Z axis, with values supplied via the left/rightdoors[i] variables, e.g:
[Object]
Position = 0.002, 0, -5.552
States = Class323_Door_2_R_Dark.csv, Class323_Door_2_R.csv
TranslateZFunction = rightdoors[0] + 0.864
TranslateXFunction = min[power[10 * (rightdoors[0] – 0.1), 3] + 1, 1] * 0.05
StateFunction = pluginstate[31]
[Object]
Position = 0.002, 0, -6.417
States = Class323_Door_2a_R_Dark.csv, Class323_Door_2a_R.csv
TranslateZFunction = -rightdoors[0] + 0.864
TranslateXFunction = min[power[10 * (rightdoors[0] – 0.1), 3] + 1, 1] * 0.05
StateFunction = pluginstate[31]
Left door animation:
[Object]
Position = -0.002, 0, -5.552
States = Class323_Door_2_L_Dark.csv, Class323_Door_2_L.csv
TranslateZFunction = leftdoors[0] + 0.864
TranslateXFunction = -min[power[10 * (leftdoors[0] – 0.1), 3] + 1, 1] * 0.05
StateFunction = pluginstate[31]
[Object]
Position = -0.002, 0, -6.417
States = Class323_Door_2a_L_Dark.csv, Class323_Door_2a_L.csv
TranslateZFunction = -leftdoors[0] + 0.864
TranslateXFunction = -min[power[10 * (leftdoors[0] – 0.1), 3] + 1, 1] * 0.05
StateFunction = pluginstate[31]
The StateFunction command is there to switch between illuminated and non-illuminated versions of the door objects, and pluginstate[31] is equivalent to the ats31 subject in the class 323’s panel2.cfg file (when used with Simon Gathercole’s UKMUt.dll), i.e. the Line Light indicator (so the lights appear to go out when the pantograph is lowered). The objects are also translated along the X axis so they “plug” into the bodyside when fully closed. Unfortunately the door open and close sounds aren’t fully synchronised with the door motion; with UK trains, warning beeps are heard before the doors actually start to close, but the beeps are contained within the door closing audio file, and of course the visible doors start to close as soon as the beeping starts. The duration of the door opening motion is also shorter than the duration of the door opening audio files. I haven’t tried having door animation controlled via plugin variables yet; when I have time I’ll look into this further.
Animated Window Reflections 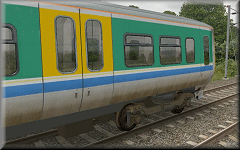 |
The window reflections are made from two semi-transparent surfaces, which have texture shifting functions applied, based upon the current speed of the train, e.g:
[Object]
Position = 0, 0, 0
States = ..\Class323_DMSO_1_WindowReflections.csv
TextureShiftXFunction = value + speed * 0.001
[Object]
Position = 0, 0, 0
States = ..\Class323_DMSO_1_WindowReflections_bg.csv
TextureShiftXFunction = value + speed * 0.0001
There’s a foreground reflection texture with transparency, showing near-track bushes, and there’s also a background reflection texture, showing a low resolution version of the backdrop (ground and sky) texture, and this surface’s texture is shifted more slowly than the foreground texture, creating a rather nice parallax effect when the train is in motion. The overall effect looks rather good in my opinion, but of course, if the reflection textures depict a Summer scene, but the train is used on a Winter route with snow, it looks a little silly…
Interior Illumination 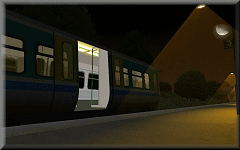 |
Interior lighting strips, along with interior fittings and additional semi-transparent yellow surfaces to lighten the windows when viewed from outside at night (allowing adequate night-lighting effects while still being able to have daytime window reflections), are displayed when the pantograph is raised, and swapped for non-emissive versions when the pan is lowered, so it’s possible to turn the carriage lights on and off. When the pantograph is lowered, all exterior lights are also state-changed or translated so they appear to extinguish, and won’t illuminate until the pantograph is raised again. This is achieved using if[pluginstate[31] ... ] commands, as demonstrated in the next section.
Animated Pantograph 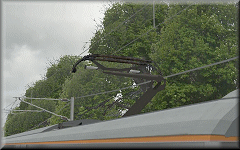 |
The pantograph itself can be visibly raised and lowered, with the head having a Y axis translation applied, and the upper and lower arms having X axis rotation, along with Y and Z axis translation applied. The pantograph animation is conditional upon the state of the value of plugin variable 31, or the ats31 subject in the class 323’s panel2.cfg. The code I’ve written which enables this is as follows (since updated on the 5th July 2009, thanks to a post by michelle herself):
[Object]
Position = 0, 4.24, 9.071
States = ..\Pantograph_BWHS_Head.csv
TranslateYFunction = if[pluginstate[31] == 0, if[value > -0.97, value – delta * 0.49, -0.97], if[value < 0, value + delta * 0.49, 0]]
[Object]
Position = 0, 4.24, 9.071
States = ..\Pantograph_BWHS_UpperArm.csv
TranslateYFunction = if[pluginstate[31] == 0, if[value > -0.45, value – delta * 0.225, -0.45], if[value < 0, value + delta * 0.225, 0]]
RotateXFunction = if[pluginstate[31] == 0, if[value > -0.29, value – delta * 0.145, -0.29], if[value < 0, value + delta * 0.145, 0]]
TranslateZFunction = if[pluginstate[31] == 0, if[value < 0.06, value + delta * 0.03, 0.06], if[value > 0, value – delta * 0.03, 0]]
[Object]
Position = 0, 4.24, 9.071
States = ..\Pantograph_BWHS_LowerArm.csv
TranslateYFunction = if[pluginstate[31] == 0, if[value > -0.45, value – delta * 0.225, -0.45], if[value < 0, value + delta * 0.225, 0]]
RotateXFunction = if[pluginstate[31] == 0, if[value < 0.27, value + delta * 0.135, 0.27], if[value > 0, value – delta * 0.135, 0]]
TranslateZFunction = if[pluginstate[31] == 0, if[value < 0.06, value + delta * 0.03, 0.06], if[value > 0, value – delta * 0.03, 0]]
Animated Wipers and Working Headlights 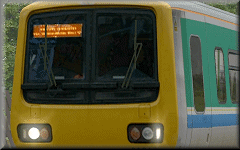 |
The windscreen wipers aren’t as good as I’d like them to be yet; when the if[pluginstate[i] ... ] conditions are satisfied and the truevalue formulae are executed, the wipers can jump to a position mid-sweep rather than starting to move from their currently held position. The same problem can happen when switching the wipers off as well, although the way I’ve implemented it, the wipers will stop in whatever position they are in when the wipers are turned off. More work needed here… Each wiper is comprised of two arms, and a wiper blade. The code so far, is as follows:
[Object]
States = ..\Class323_DMSO_Wiper_L_1.csv
Position = -0.56, 2.27, 0
RotateZFunction = if[pluginstate[198] > 0, power[1 – abs[cos[time]], 0.5] * 1.3, value]
[Object]
States = ..\Class323_DMSO_Wiper_L_1a.csv
Position = -0.5, 2.27, 0
RotateZFunction = if[pluginstate[198] > 0, power[1 – abs[cos[time]], 0.5] * 1.3, value]
[Object]
States = ..\Class323_DMSO_Wiper_L_1b.csv
Position = -0.55, 2.28, 0
TranslateXFunction = if[pluginstate[198] > 0, -power[1 – abs[cos[time]], 0.5] * 0.73, value]
TranslateYFunction = if[pluginstate[198] > 0, power[sin[time * 2], 2] * 0.13, value]
The last TranslateYFunction command moves the wiper blade up and down at the correct speed, which when combined with the X axis translation, creates the overall effect of an arc movement rather than a simple left-right motion.
The head (and tail) lights are linked to the proving lights in the cab (the ats20 and ats21 subjects in the class 323’s panel2.cfg). Each headlight configuration has it’s own csv object. The headlights will only be illuminated when the pantograph is also raised (dependent on the state of plugin variable 31, or the ats31 subject in panel2.cfg). When the tail lights at one end of the train are on, they automatically turn off at the other end of the train. For the rear of the train, the headlights can only illuminate if the tail lights are also off. The code which enables all of this is as follows (please note, I’m presenting two alternative ways of implementing the lights on the leading vehicle, the reason why can be found below):
Class323_DMSO_1.animated (lead vehicle) OPTION 1
[Object]
States = ..\null.csv, ..\Class323_Headlights_0.csv, ..\Class323_Headlights_1.csv, ..\Class323_Headlights_2.csv
Position = 0, 0, 0
RotateYFunction = 3.1416
StateFunction = if[pluginstate[31] == 1, pluginstate[20], 0]
[Object]
States = ..\null.csv, ..\Class323_Taillights_1.csv
Position = 0, 0, 0
RotateYFunction = 3.1416
StateFunction = if[pluginstate[31] == 1, pluginstate[21], 0]
Class323_DMSO_1.animated (lead vehicle) OPTION 2
[Object]
States = ..\Class323_Headlights_0.csv
Position = 0, 0, 0
RotateYFunction = 3.1416
TranslateYFunction = if[pluginstate[31] == 1, if[pluginstate[20] == 1, 0, -600], -600]
[Object]
States = ..\Class323_Headlights_1.csv
Position = 0, 0, 0
RotateYFunction = 3.1416
TranslateYFunction = if[pluginstate[31] == 1, if[pluginstate[20] == 2, 0, -600], -600]
[Object]
States = ..\Class323_Headlights_2.csv
Position = 0, 0, 0
RotateYFunction = 3.1416
TranslateYFunction = if[pluginstate[31] == 1, if[pluginstate[20] == 3, 0, -600], -600]
[Object] States = ..\Class323_Taillights_1.csv
Position = 0, 0, 0
RotateYFunction = 3.1416
TranslateYFunction = if[pluginstate[31] == 1, if[pluginstate[21] == 1, 0, -600], -600]
Class323_DMSO_3.animated (rear vehicle)
[Object]
States = ..\null.csv, ..\Class323_Headlights_0.csv, ..\Class323_Headlights_1.csv, ..\Class323_Headlights_2.csv
Position = 0, 0, 0
StateFunction = if[pluginstate[31] == 1, if[pluginstate[21] == 1, pluginstate[20], 0], 0]
[Object]
States = ..\Class323_Taillights_1.csv, ..\null.csv
Position = 0, 0, 0
StateFunction = if[pluginstate[31] == 1, if[pluginstate[31] == 1, pluginstate[21], 0], 1]
In Option 1 above, the lead vehicle’s headlights are changed using StateFunction commands alone. This method works fine, but the first time each state is changed to, you’ll see the object’s texture isn’t loaded until a fraction of a second after the object is displayed, leading to a flash of colour which is a little distracting. Using Option 2 gets around this issue however, because the headlight objects and textures are always loaded upon swtiching to an external view, and are displayed by translating the relevant object along the Y axis instead, conditional upon the value read via the pluginstate[i] variable. As these textures are always loaded in an external view, StateFunction commands alone can be used in the rear vehicle.
Incidentally, the RotateYFunction = 3.1416 lines simply rotate the relevant objects 180° around the Y axis (the value is in radians, rather than degrees).
What I need to do next, is add interior fittings such as seats, luggage racks, LCD TV screens, and so-on. I might make some more progress with the route itself instead though, as to be honest I could do with a break from modelling the minutiae of train objects for a while. ![]()
Tags: Animated Objects, Artwork, Cross-City South, Functions, openBVE, Screenshots, Videos
Posted in openBVE | 72 Comments »
25th January 2009
Pantograph sparking
Posted by Anthony Bowden on 25th January 2009 at 10:00 pm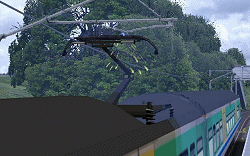 The latest additions to Cross-City South v1.4’s collection of animated objects include sparking effects between the pantograph head and the contact wire. These spark objects aren’t just small points of blue with emissive properties, but they flicker and flash, and through the use of a large surface with a mainly translucent blue sunburst gradient texture with emissive properties applied to it’s mesh, appear to illuminate anything behind the surface, creating quite a nice effect, especially in low light or at night. Through the use of texture shifting, yellow sparks also appear to fly off the pantograph head.
I originally wondered if this effect should be included in an animated car object along with the animated doors, wheels and so-on which are already planned, where the meshes with spark textures are positioned at the centre of the pantograph head, and perhaps flash depending on the speed of the train. However, my routes feature overhead lines which are registered and staggered (i.e. they zig-zag from left to right where appropriate), which could render the sparking effect less effective if the spark itself doesn’t appear near enough to where the contact wire is touching the pantograph head at a particular location in the route. Including the spark objects in the route itself rather than the car object allows me to overcome this little problem and align the spark with the contact wire, even if it takes longer to add the objects to the route. The animations are controlled using the Distance[i] variable, but with a very low distance specified, so the sparking is only visible for a short time as the centre of the referenced car is within around a metre of the animated object’s insertion point. The spark csv objects themselves are offset along the z-axis, so as the referenced car’s centre passes the animated object’s insertion location, the spark is displayed where the pantograph is located instead. As with the animated vegetation, I’ll include this effect at station areas, and points of interest.
A new video is available below to demonstrate the effect; I’ve included it as part of a compilation of my previous videos and uploaded the full video to YouTube this time. It’s available in YouTube’s High Definition format (embedded below), and a link to the high quality version on YouTube can also be found below, if you don’t have the downstream bandwidth or a fast enough CPU/graphics card to watch the higher resolution content smoothly.
|
Video: Demonstration of animated object based sparking effects, along with a compilation of previous openBVE videos:
|
Tags: Animated Objects, Cross-City South, openBVE, Videos, Watford Jn to Rugby
Posted in openBVE | 10 Comments »
Fewer updates and unseen work…
Posted by Anthony Bowden on 25th January 2009 at 9:00 pmThere aren’t as many progress updates at the moment, partly due to hardware upgrades and operating system re-installations, etc, but that doesn’t mean I haven’t been busy; rather there’s just been quite a bit of work which is either “under the hood”, or merely a continuation of features I’ve already talked about. For example, I’m still implementing transition curves throughout the Cross-City South, however I’ve also updated most of the curve radii after determining the likely values from aerial photographs of the route (thanks to » this thread « at the Trainsimcentral forum). Quite a number of curve radii were too large previously, and the route is looking more accurate now as a result of the changes, but it’s taking time, as changing the curve radii also means the overhead wire object rotations are no longer correct and don’t join up with each other any more, and all these objects need to be re-aligned, which is rather tedious and time consuming.
I’ve also been editing the route file as I proceed through it, re-arranging the code and commands to make the file easier to read and navigate through; not just to make the work tidier and weed out bad code, but also for the benefit of anyone wanting to more easily edit the route after it’s released, create new diagrams/scenarios/activities if so desired, etc. Previously I simply placed all commands at a particular line number on the same line; this meant that scrolling vertically through the route file in a text editor is easier and quicker for me (which I spend more time doing as a rule), however when numerous commands are placed on the same line, despite me usually making some effort to group and order them, this can make it harder to find a command and edit it, and also I gather, makes it harder for others to feel comfortable editing it too, as it seems too complicated. This time, I’ve compromised and placed groups of related commands on their own lines, so for example, catenary related commands are placed together on their own line; scenery, curve and railtype, or pointwork related commands are all placed on their own seperate lines, etc, making it easier to locate a command, without the route file becoming excessively long.
I’ve also now re-introduced the marker images which used to feature in the BVE 2 versions of the route, and it’s nice to have them back again in » openBVE «. One of the main tasks in the immediate future will be taking the animated features I’ve demonstrated so far, and extending them throughout the length of the route, rather than just the test locations which are featured in the videos, along with creating more detailed geometry for the 323’s exterior car objects, and preparing animated components like wheels, wipers, doors, and perhaps other things too.
Tags: Animated Objects, Cross-City South, openBVE, Trackwork
Posted in openBVE | No Comments »
7th January 2009
3D lineside vegetation with wind and turbulence effects, animated butterflies, new Autumn textures and leaf fall
Posted by Anthony Bowden on 7th January 2009 at 10:00 pmI’ve been working on some more animated objects for Cross-City South v1.4 and » openBVE «; this time, I’ve tried something I’d wished I could have achieved ever since I created the grassy embankments for the Watford Junction to Rugby route, and hence even long before the openBVE project was started; namely animated lineside vegetation which sways in the wind, and responds to the turbulence created by the passage of the player’s train. One criticism pointed out to me in my routes is the use of 2D lineside trees, which becomes a problem when viewed side-on as is now possible with openBVE’s camera views. Rotating the trees appropriately is one way to reduce this problem and is ideal where performance is important, but I wanted to try using 3D trees just to see how well they worked; so I’ve now created largely 3D trees, which include trunks and branches, as well as foliage clusters, with each component animated appropriately to create quite a nice effect, hopefully bringing some of the beauty of nature to life in the route.
I was originally planning to release the new scenery as part of the Watford Junction to Rugby project, however I’ve now decided to include this in Cross-City South v1.4 instead, which will be released sooner than the aforementioned route. The Cross-City update is proving to be a far more significant upgrade than I originally planned, which does mean Watford to Rugby will be delayed again (I had said privately, that by April I might be closer to finishing it, but this is unlikely now–sorry), so I thought it might be better to have some of it’s features brought forward and included as part of the next Cross-City release instead.
The newest preview video includes photo-realistic Summer and Autumn objects, textures, and higher resolution backdrops, and features grass, foliage, flowers and bushes which sway gently in the breeze, but which as mentioned above, also appear to be disturbed by turbulence caused by the passage of the player’s train, achieved easily by using the Distance variable (which currently provides the distance from the player’s train to the animated object), along with an additional rotation function with associated damping. I’ve also created some animated butterflies (which are simply adapted from the flashing level crossing light available in Michelle’s » DemoRoute1 «, with different objects, a faster refresh rate and extra translation functions applied), which complement the new plant life and animated birds in the Summer routes. The Autumn trees also include falling leaves which gently sway back and forth in the breeze as they float to the ground, which adds a little more fun to wheelslip scenarios. ![]()
These animated vegetation objects are loaded via Ground and Dike commands so can be cycled and repeated respectively, and a reasonably fast PC will likely be needed for full enjoyment; however to keep framerates higher, the use of animated vegetation will probably be limited to maybe 300m lengths of route at locations like station areas, signals which could be held at red whilst enroute, and various points of interest (see below for more information). Waiting for departure at a station, or for a signal to clear from red, needn’t be so dull in future. ![]() In between these selected locations, static, but nevertheless 3D trees will be used, probably along with static versions of the grassy embankments although using animated versions may be possible performance wise; I’m not sure about this yet. You can’t easily appreciate the animation from the cab when travelling at speed anyway, so it’s not really a problem. Further away from the track, simple, non-animated 2D trees will be retained (but rotated and placed carefully to minimise the 2D appearance), as openBVE is primarily a cab-view simulator of course.
In between these selected locations, static, but nevertheless 3D trees will be used, probably along with static versions of the grassy embankments although using animated versions may be possible performance wise; I’m not sure about this yet. You can’t easily appreciate the animation from the cab when travelling at speed anyway, so it’s not really a problem. Further away from the track, simple, non-animated 2D trees will be retained (but rotated and placed carefully to minimise the 2D appearance), as openBVE is primarily a cab-view simulator of course.
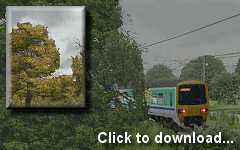
Video: Demonstration of 3D animated vegetation and turbulence on passage of player’s train, animated butterflies, new Summer and Autumn textures, and Autumn leaf fall effects. Also includes the swinging cables and flying birds » previously demonstrated «.
Note: This video is now included as part of a compilation on YouTube.
« [YouTube “High Quality” version] | [YouTube “High Definition” version]
Tags: Animated Objects, Cross-City South, openBVE, Videos
Posted in openBVE | 1 Comment »
23rd December 2008
Superelevation, Flashing Aspects, Animated Points, and Station Signs
Posted by Anthony Bowden on 23rd December 2008 at 10:00 pmI’ve been continuing with some more cosmetic updates for Cross-City South v1.4, and I’m in the process of adding superelevated track, transition curves and lead-in/lead-out track objects to enable smooth changes from level to canted track. With » Watford Junction to Rugby «, which already includes superelevated track objects and lead in/out objects, I’d adopted a system where curved track objects with 35mm, 70mm and 125mm cants were modelled, with a set of lead-in/out transition objects going from 0-35mm, 35-70mm and 70-125mm at varying curve radii, which enabled a nice, gradual increase or decrease in cant within a curve. These lead in/out objects are placed not as .Rail objects, but as .FreeObjects, and are used in conjunction with one of several invisible null rails which each have a different run sound, such that I don’t need to add too many new railtypes to cover all the possible combinations of run sound and required canted transition curve objects. This technique still results in quite a number of FreeObjects however.
While looking at the » ATS-Sn/P Test Route «, I was impressed by the appearance of the superelevated track and transition curves, which I felt were better than my attempts, and while looking at how the author achieved such a good result, I was pleasantly surprised to find that the technique used is actually more straightforward and efficient than that which I’d adopted, with just a simple pair of straight, left/right lead-in and lead-out objects used. I’ve trialled this on the Cross-City South, and I’m pleased with the results on the sharper curves, although for larger radius, higher speed curves, I’ll retain graduated 0-70mm and 70-125mm canted transition curve objects:
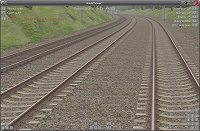
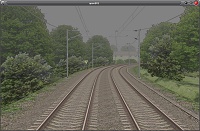
– Please note that the grass and terrain textures are only temporary
I’ve also been experimenting with the signalling functionality recently introduced into openBVE’s » animated object format «. I’ve now implemented flashing aspects which are used on the approaches to the 60 mph and 70 mph crossovers between the fast and slow lines on the WCML’s New Ledburn and Hanslope Junctions, respectively. I’ve also incorporated lens hoods which become illuminated according to the aspect displayed by these new signal objects, and these look better than the standard flat bitmaps usually used to represent signal aspects in BVE.
Jason Morgan, one of the people we can thank for introducing BVE to Western railsim users several years ago, asked me whether or not it would be possible to have animated points linked to a signal, such that the blades moved to the correct position prior to the signal clearing, for example, while the player’s train is waiting in a passing loop before being cleared to rejoin the main line. Indeed this is possible, either by making the point blade position depend upon the state of a section, or by making the animation functions conditional, for example, by basing them upon the distance from the set of points to the player’s train. When basing the point blade position upon a section state, this can be done simply with the aid of a .Pretrain command, such that the point blades move as the signal changes from red. However, by using a .Section 0;2;3;4;5 command (UK routes with 4 aspect signals usually use .Section 0;2;3;4), and a specially modified animated signal object which displays an aspect sequence of Red > Red > Yellow > Double Yellow > Green, the point blades can move prior to the signal aspect appearing to change from red, which looks more prototypical. This is only suitable when the player arrives at the signal while it’s associated section state is still 0 (red), however.
As part of the experiment, I created some fully animated point objects, which include moving point blades, stretcher bars, backdrive assemblies, linkages and levers. » openBVE’s « rotation damping functions also enable a rather nice motion of the point blades, which looks quite realistic. Both conventional and High Performance Switch System (HPSS) points are modelled.
Important note: Currently, trains in openBVE follow a single path throughout a route as with BVE Trainsim (based on Rail 0), with this one path coded in the route file which cannot be changed en-route. Therefore, these points are cosmetic only!
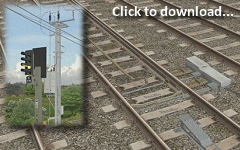 Video: Demonstration of working 3D bulb and LED signals, flashing apects, and animated pointwork
Note: this video is now included as part of a compilation on YouTube.
« [YouTube “High Quality” version] | [YouTube “High Definition” version]
Stephen Cross has also kindly created a set of station sign textures for use in Cross-City South v1.4, so I’ll be creating a new set of objects allowing the actual station names to be displayed on signs at each station on the route:
I’ll also create some new lampost objects for the stations, as the existing ones look, well lets be honest, terrible. ![]() If I have time, I’ll update the route to include London Midland textures as well, although this isn’t a priority for me at the moment.
If I have time, I’ll update the route to include London Midland textures as well, although this isn’t a priority for me at the moment.
Finally, I’d like to wish visitors to Rail Sim Routes UK a very Happy Christmas! ![]()
Tags: Animated Objects, Cross-City South, openBVE, Screenshots, Trackwork, Videos, Watford Jn to Rugby
Posted in openBVE | 16 Comments »
