
- [WJ-R]: 1980s object removal (Castlethorpe/Hanslope area)
- [XCS]: Pending
- [UkTrainSys]: v0.3.2.0 released
- [Object Library]: Preparing...
- [Website]: Fifth version of website launched
 My openBVE videos and other comments from users and
myself can also be found via my YouTube
channel.
My openBVE videos and other comments from users and
myself can also be found via my YouTube
channel.Blog and Progress Updates
October 14, 2010
openBVE v1.2.8 and increased rendering speed, openBVE v1.2.9 development branch with cross-platform .NET plugin support, Cross-City South v2.0 update, and openBVE performance with budget versus high-end CPUs, and discrete versus on-board graphics
Posted by admin on October 14, 2010 at 12:20 amopenBVE v1.2.8 released, with significant rendering speed improvements
![]() openBVE v1.2.8 was released recently, which includes a reorganised renderer which can provide significantly higher framerates than the old renderer found in v1.2.7.4. This is achieved by rendering opaque faces (i.e. faces without alpha), using OpenGL display lists. There are two ways to enjoy the performance increase; if you currently have low framerates, then the boost could make routes more enjoyable, however if you already have high framerates, then you can increase the viewing distance significantly so that you can see much further away from the train, whilst maintaining similar framerates to those you are already used to seeing. You can visit the Official openBVE Homepage for the download and to read the changelog, as well as read this thread on the openBVE forum for more information.
openBVE v1.2.8 was released recently, which includes a reorganised renderer which can provide significantly higher framerates than the old renderer found in v1.2.7.4. This is achieved by rendering opaque faces (i.e. faces without alpha), using OpenGL display lists. There are two ways to enjoy the performance increase; if you currently have low framerates, then the boost could make routes more enjoyable, however if you already have high framerates, then you can increase the viewing distance significantly so that you can see much further away from the train, whilst maintaining similar framerates to those you are already used to seeing. You can visit the Official openBVE Homepage for the download and to read the changelog, as well as read this thread on the openBVE forum for more information.
Here are some framerate and image quality comparisons which I conducted on my main development PC (Core 2 Quad Q9650 / GeForce GTX 260), showing some notable improvements:
| On the left is openBVE v1.2.7.4, and on the right, the new v1.2.8:
|
")
")
")
")
")
")
")
")
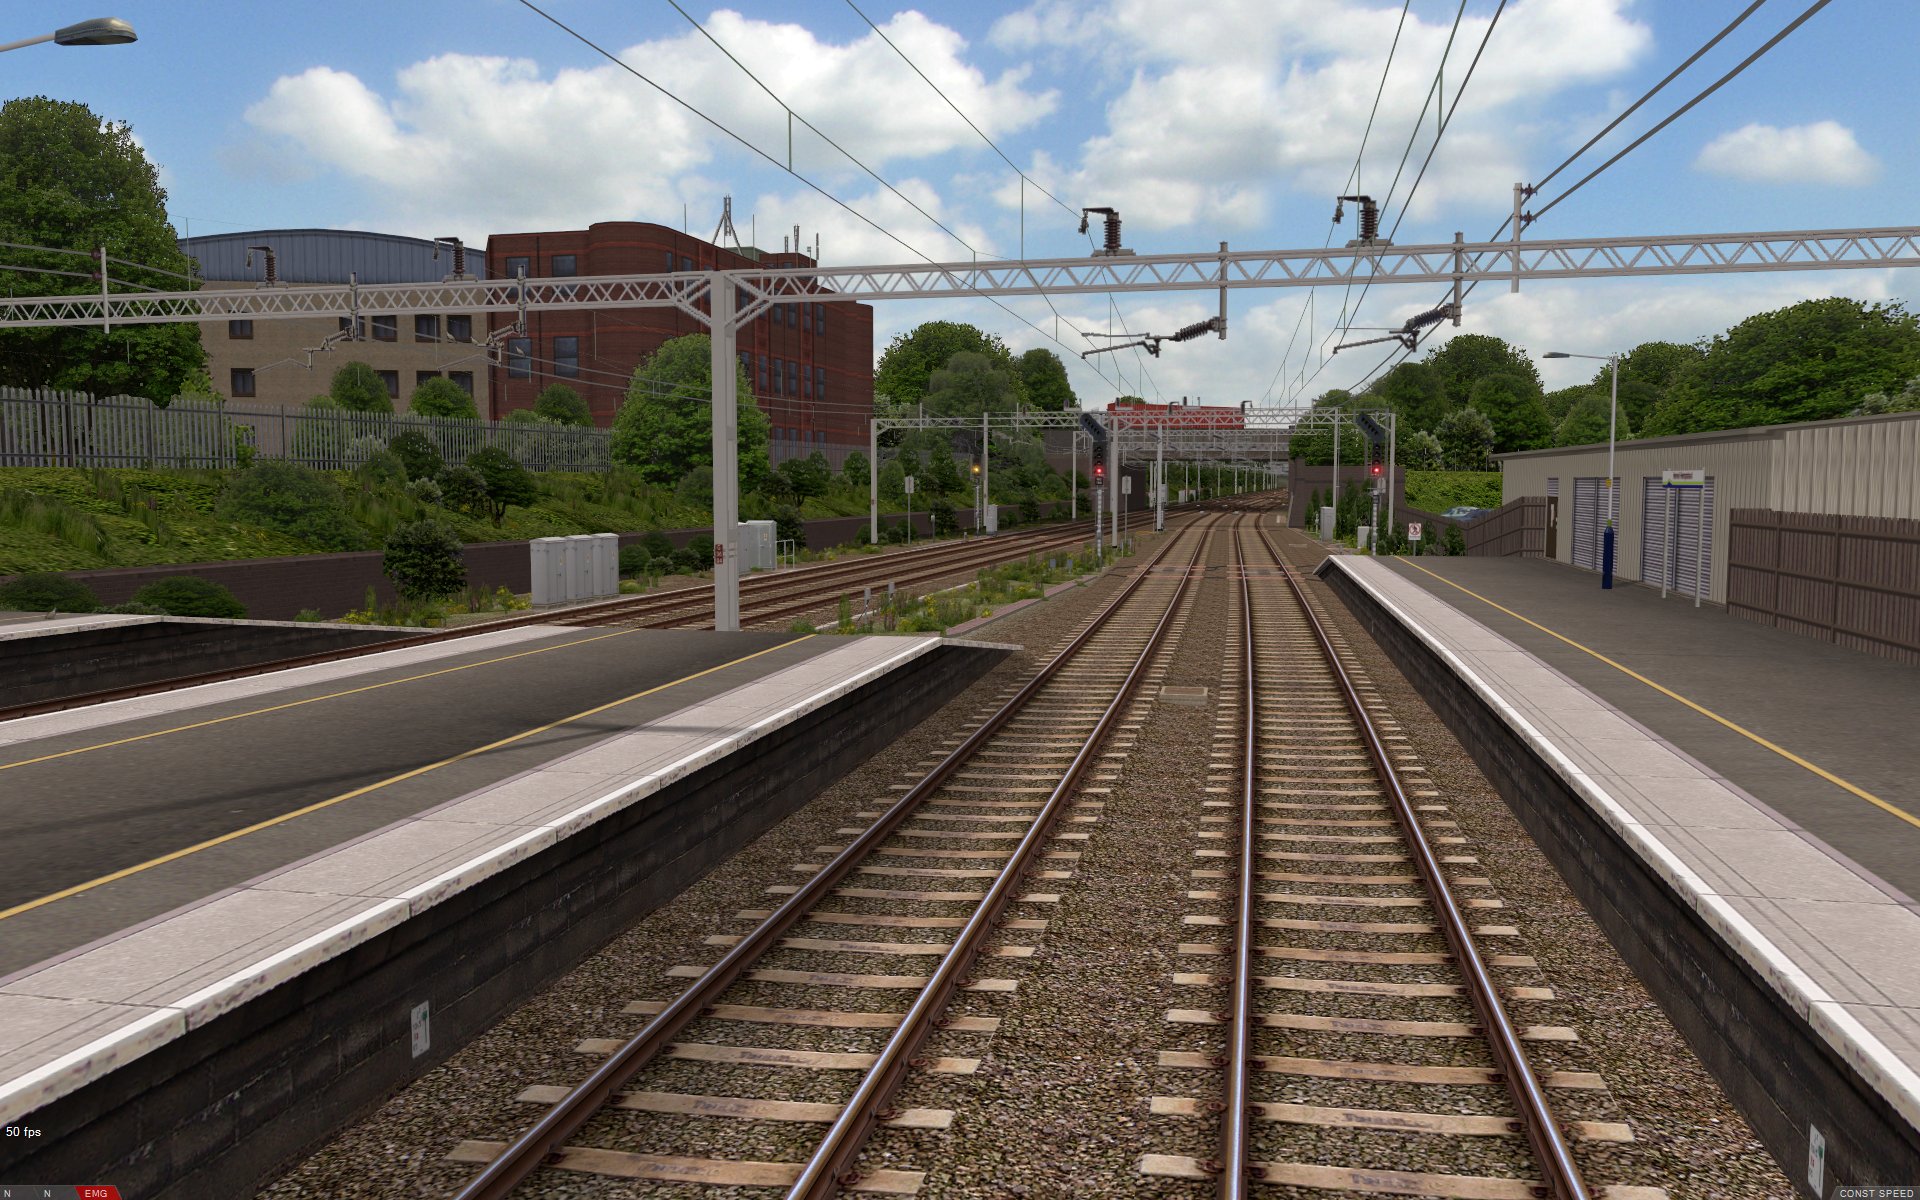
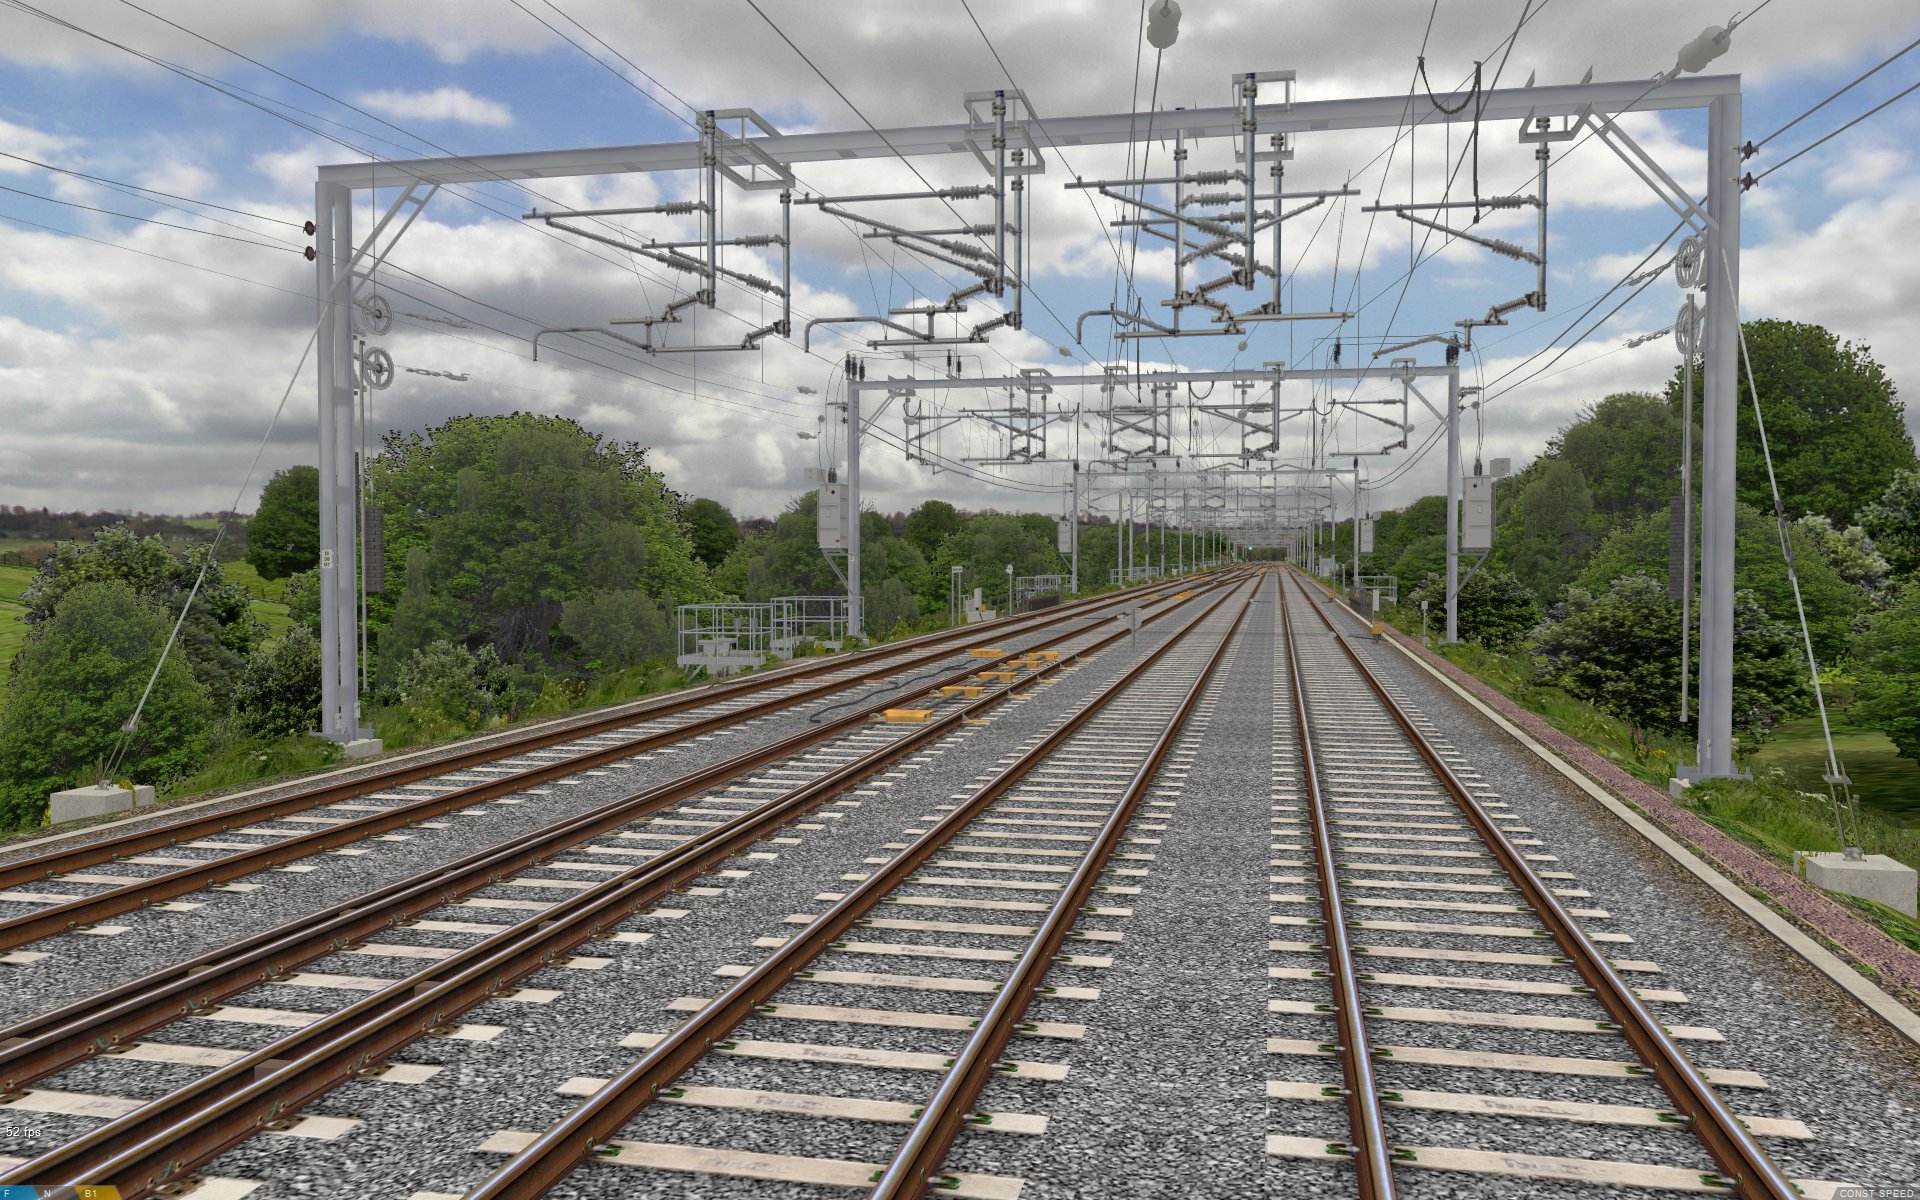
openBVE’s default viewing distance is 600 metres, however, here are some screenshots showing what the upcoming Watford Junction to Rugby route looks like with an increased viewing distance of 2000m. This particularly benefits the straight sections of this route, allowing you to see more than one upcoming signal at the same time. Thanks to the new renderer, it’ s possible to significantly increase the viewing distance, while still having very playable framerates on a good computer with reasonably detailed exterior car objects:
 , but still with good framerates, in openBVE v1.2.8") , but still with good framerates, in openBVE v1.2.8")    |
Most people are reporting better performance with the new renderer, however if you notice any previously unseen stuttering with the new renderer and detailed routes, I’d really appreciate it if you could contact me with some information about your computer’s specifications and the route being used, as it might be useful for me to know, when I draw up recommended system requirements and openBVE settings, particularly for the upcoming Watford Junction to Rugby project. Thanks.
openBVE v1.2.9 development branch released, enabling support for cross-platform .NET train plugins
![]() The latest version 1.2.9 development branch of openBVE, includes support for .NET assemblies (plugins), which enables cross-platform plugin compatibility, just as with openBVE itself. With previous versions of openBVE, and of course BVE Trainsim, only Win32 C++ plugins were supported, which limited their use to the Microsoft Windows platform, leaving Linux and Mac users to rely on openBVE’s built-in safety systems only, with a great deal of functionality found in plugin enabled trains unavailable. With .NET assemblies, these can be written in a variety of languages which target the .NET framework, such as C# or Visual Basic .NET, and users of non-Windows operating systems can also enjoy enhanced train functionality once new .NET plugins start to appear.
The latest version 1.2.9 development branch of openBVE, includes support for .NET assemblies (plugins), which enables cross-platform plugin compatibility, just as with openBVE itself. With previous versions of openBVE, and of course BVE Trainsim, only Win32 C++ plugins were supported, which limited their use to the Microsoft Windows platform, leaving Linux and Mac users to rely on openBVE’s built-in safety systems only, with a great deal of functionality found in plugin enabled trains unavailable. With .NET assemblies, these can be written in a variety of languages which target the .NET framework, such as C# or Visual Basic .NET, and users of non-Windows operating systems can also enjoy enhanced train functionality once new .NET plugins start to appear.
Anyone with at least some programming experience can visit the .NET assembly train plugin section on the official openBVE website, to download template projects to help you get started. If you’ve already developed a Win32 C++ plugin previously, you might prefer to look at the “C# project files (for updating from Win32 plugins)” download specifically. Anyone interested in making general comments can do so in this thread on the openBVE forum, while anyone wanting to help improve the design of the plugin API by making suggestions, can visit this thread instead.
I’ve started writing a replacement .NET plugin for the class 323, although I’ll design it such that it could be used with other trains too. I’ll release the new .NET assembly and publish the source code when there’s something worth showing, unless someone else writes a plugin which is sufficiently good enough, before me.
Of course, if you’re a more advanced non-Windows user and just want to enjoy driving trains, then you too can now experience some of the best in-cab system functionality available for openBVE. Here’s the openBVE v1.2.9.2 development release, with Chashinai Railway’s Misaki Line, and the 9000 series train with fully functional .NET plugin enabled safety systems, running in Ubuntu 10.04 32-bit Linux (itself running within a virtual machine under Windows 7 64-bit, in this case):
 Chashinai Railway Misaki Line, and 9000 series train with .NET plugin enabled safety systems, used with openBVE v1.2.9.2 in Linux |
Birmingham Cross-City South v2.0 update
![]() If you’ve been keeping an eye on the news infobox at the top left of the blog (or my Projects page), you’ll have noticed that I’ve been continuing work on the pointwork along the Cross-City South route, and I’ve also been working on updating the pointwork on the approach to Birmingham New Street as well. All pointwork between Alvechurch and Five Ways is now finished, and ready for animation to be applied prior to release. The pointwork on the approach to Birmingham New Street is a rather difficult task though. At this location, there are single and double slips, switched diamond crossings and three-way points, all crammed into a rather small space, and all located on quite a sharp curve. There are also a variety of point machines, including electric, hydraulic clamp-lock, and Westinghouse electro-pneumatic types, as well as cast manganese steel and conventional frogs. I like to model these kinds of details, so I’ve spent quite some time working on this area – I’m not finished yet, but will be shortly. Cross-City South was originally designed with a 25 metre block length in mind, however the pointwork doesn’t fit neatly, so much of the pointwork is contained in two large set-piece objects instead. I always felt that this task was going to be the hardest part of the Cross-City South v2.0 upgrade, as it’s rather tedious and difficult (and indeed I was right), however for me, the route wouldn’t be complete without it, as I want Cross-City South v2.0 to be of the same standard as Watford Junction to Rugby, so I’ll endure the pain.
If you’ve been keeping an eye on the news infobox at the top left of the blog (or my Projects page), you’ll have noticed that I’ve been continuing work on the pointwork along the Cross-City South route, and I’ve also been working on updating the pointwork on the approach to Birmingham New Street as well. All pointwork between Alvechurch and Five Ways is now finished, and ready for animation to be applied prior to release. The pointwork on the approach to Birmingham New Street is a rather difficult task though. At this location, there are single and double slips, switched diamond crossings and three-way points, all crammed into a rather small space, and all located on quite a sharp curve. There are also a variety of point machines, including electric, hydraulic clamp-lock, and Westinghouse electro-pneumatic types, as well as cast manganese steel and conventional frogs. I like to model these kinds of details, so I’ve spent quite some time working on this area – I’m not finished yet, but will be shortly. Cross-City South was originally designed with a 25 metre block length in mind, however the pointwork doesn’t fit neatly, so much of the pointwork is contained in two large set-piece objects instead. I always felt that this task was going to be the hardest part of the Cross-City South v2.0 upgrade, as it’s rather tedious and difficult (and indeed I was right), however for me, the route wouldn’t be complete without it, as I want Cross-City South v2.0 to be of the same standard as Watford Junction to Rugby, so I’ll endure the pain.
Here’s a screenshot of one of the Birmingham New Street pointwork objects:
 |
At first glance it doesn’t look like much, but on closer inspection, it’s actually rather detailed and intricate. This object features 4076 vertices, and loads 9 textures. Each rail is carefully texture mapped, to ensure that the Pandrol rail fasteners are as closely lined up with the underlying sleepers as possible, and that the inside of the railhead as depicted in the texture, matches the mapping on the object. Depending upon the location of a rail within the point assembly, different kinds of rail fasteners are depicted. If you examine the existing equivalent object in Cross-City South v1.31, you’ll notice that that old object is afflicted with z-fighting issues; I’ve taken special care to ensure that this doesn’t happen with the new version. In the case of the cast manganese steel frogs, these feature a combination of 3D geometry and use of a photographic texture of the prototype, to create the desired 3D effect:
   |
Each fishplate is also modelled in 3D, and these are also responsible for much of the vertex count, incidentally – this also means that they can be easily removed to create a lower detail object, however. Each point blade has a texture depicting baseplates beneath it, and where the tie bar assemblies will go, oil-stained ballast is featured. The object has also been designed in such a way, that animating any of the point blades is very easy to do in future. I’ll post a screenshot of the object within the route, once I’ve finished the second of these pointwork objects, improved the appearance of New Street station a bit, and finished some other things.
Prior to starting on the New Street pointwork updates, I also spent some time working on the Kings Norton area. In the existing Cross-City South v1.31, I didn’t lay any track in the sidings to the west of the station, and instead, I included a simple texture depicting a pair of tracks on a flat surface to the right of the loop siding. Cross-City South v1.31 was designed for BVE Trainsim 2 and 4 with their cab-only view and lower resolution, of course, so there wasn’t much point in modelling the extra tracks. With openBVE, it’s well worth adding them, however:
 |
Here are some screenshots of the updated pointwork and track geometry at Kings Norton (I’ll replace these points with the more recently installed concrete sleeper versions soon):
   |
You might have noticed that scenery has been improved a little in those previous three screenshots; I’m currrently adding the embankment/tree alpha shadow technique I developed for Watford Junction to Rugby, throughout the Cross-City South route as well. Here are a few more screenshots showing the latest scenery enhancements I’ve been working on, as well as little things like extended length sleepers beneath electric point machines, and disused trackbeds:
    |
Budget versus high-end CPUs, discrete graphics cards versus on-board graphics, and openBVE/Watford Junction to Rugby performance
![]() Sometimes I see people talking about poor framerates or image quality in 3D games which they use, such as openBVE, or others. Upon finding out about the system specifications in use, the cause of the low performance, in the case of Windows 7 and Vista, is often due to inferior graphics drivers being used (i.e. those bundled with Windows by default or obtained via Windows Update, rather than from the graphics card manufacturer). However, the other frequent cause of unsatisfactory performance, is a slow graphics card, and sometimes, a slow CPU.
Sometimes I see people talking about poor framerates or image quality in 3D games which they use, such as openBVE, or others. Upon finding out about the system specifications in use, the cause of the low performance, in the case of Windows 7 and Vista, is often due to inferior graphics drivers being used (i.e. those bundled with Windows by default or obtained via Windows Update, rather than from the graphics card manufacturer). However, the other frequent cause of unsatisfactory performance, is a slow graphics card, and sometimes, a slow CPU.
Personally, I’ve used less-than-stellar graphics cards in my desktop PCs for use with openBVE, but being a geek, I’ve never used on-board graphics solutions (integrated on the motherboard) in a desktop PC before, as I’ve always dismissed them as not being up to much. It occurred to me that perhaps I was being too hasty in writing integrated graphics off, as I’ve never actually tried to play games on such a solution in a desktop PC myself. The same goes for budget CPUs, such as those in Intel’s Celeron or AMD’s Sempron lines – I’ve never been interested in them as I’ve always viewed them as merely cut-down versions of “real” fully-featured CPUs, such as those in Intel’s Pentium and Core product lines, or AMD’s Athlon and Phenom lines.
So, I thought I’d test openBVE on a contemporary budget PC to find out what it was capable of, with the cheapest of Intel’s newer CPUs that I could find – a socket LGA 775 based Celeron E3300 with the Wolfdale-3M core (the same core used in Core 2 E7xxx and Pentium Dual Core E5/6xxx processors), which runs at 2.5 GHz with 1MB of Level 2 cache. This CPU is combined with the cheapest of all graphics solutions – on-board graphics integrated onto the motherboard – in the form of Intel’s “Graphics Media Accelerator” X4500, which is a part of the G41 Express “Eaglelake” chipset. I was also curious to find something out – if a choice has to be made between a better CPU or a better graphics card, which is the best to go for where openBVE is concerned?
I ran the hardware in a few configurations, and tested openBVE’s performance with my upcoming Watford Junction to Rugby route. Here are the results, and in all cases, the best image quality that each graphics solution is capable of was selected, and in all except the last test (number 4), the following constants apply:
CPU: Intel Celeron E3300 @ 2.5 GHz
RAM: 2 GB PC-6400 DDR2 SDRAM (dual-channel configuration)
Operating System: Windows XP Home Edition (32-bit)
openBVE version: 1.2.8 (Sharp transparency, 1920×1200 fullscreen, 600m viewing distance)
Two locations were used for measuring framerates: Watford Junction, and Bourne End Junction.
Test setup 1:
Graphics: Intel GMA X4500 (G41 Express Chipset, 128MB shared video memory) [Antialisasing: n/a, Anisotropic Filtering: 2x]
| Framerates (fps) |
| Watford Junction | 12 |
| Bourne End Junction | 9 |
Test setup 2:
Graphics: AMD/ATI Radeon HD 2600 Pro (256MB DDR2) [Antialisasing: 8x, Anisotropic Filtering: 16x]
| Framerates (fps) |
| Watford Junction | 34 |
| Bourne End Junction | 24 |
Test setup 3:
Graphics: NVIDIA GeForce GTX 260 (896 MB GDDR3) [Antialisasing: 16xQ, Anisotropic Filtering: 16x]
| Framerates (fps) |
| Watford Junction | 118 |
| Bourne End Junction | 101 |
Test setup 4:
Lastly for comparison purposes, here’s what we get when the GeForce GTX 260 is paired with a faster and more powerful quad-core CPU:
CPU: Intel Core 2 Quad Q9650 @ 3 GHz
Graphics: NVIDIA GeForce GTX 260 (896 MB GDDR3) [Antialisasing: 16xQ, Anisotropic Filtering: 16x]
RAM: 4 GB PC-6400 DDR2 SDRAM (dual-channel configuration)
| Framerates (fps) |
| Watford Junction | 179 |
| Bourne End Junction | 160 |
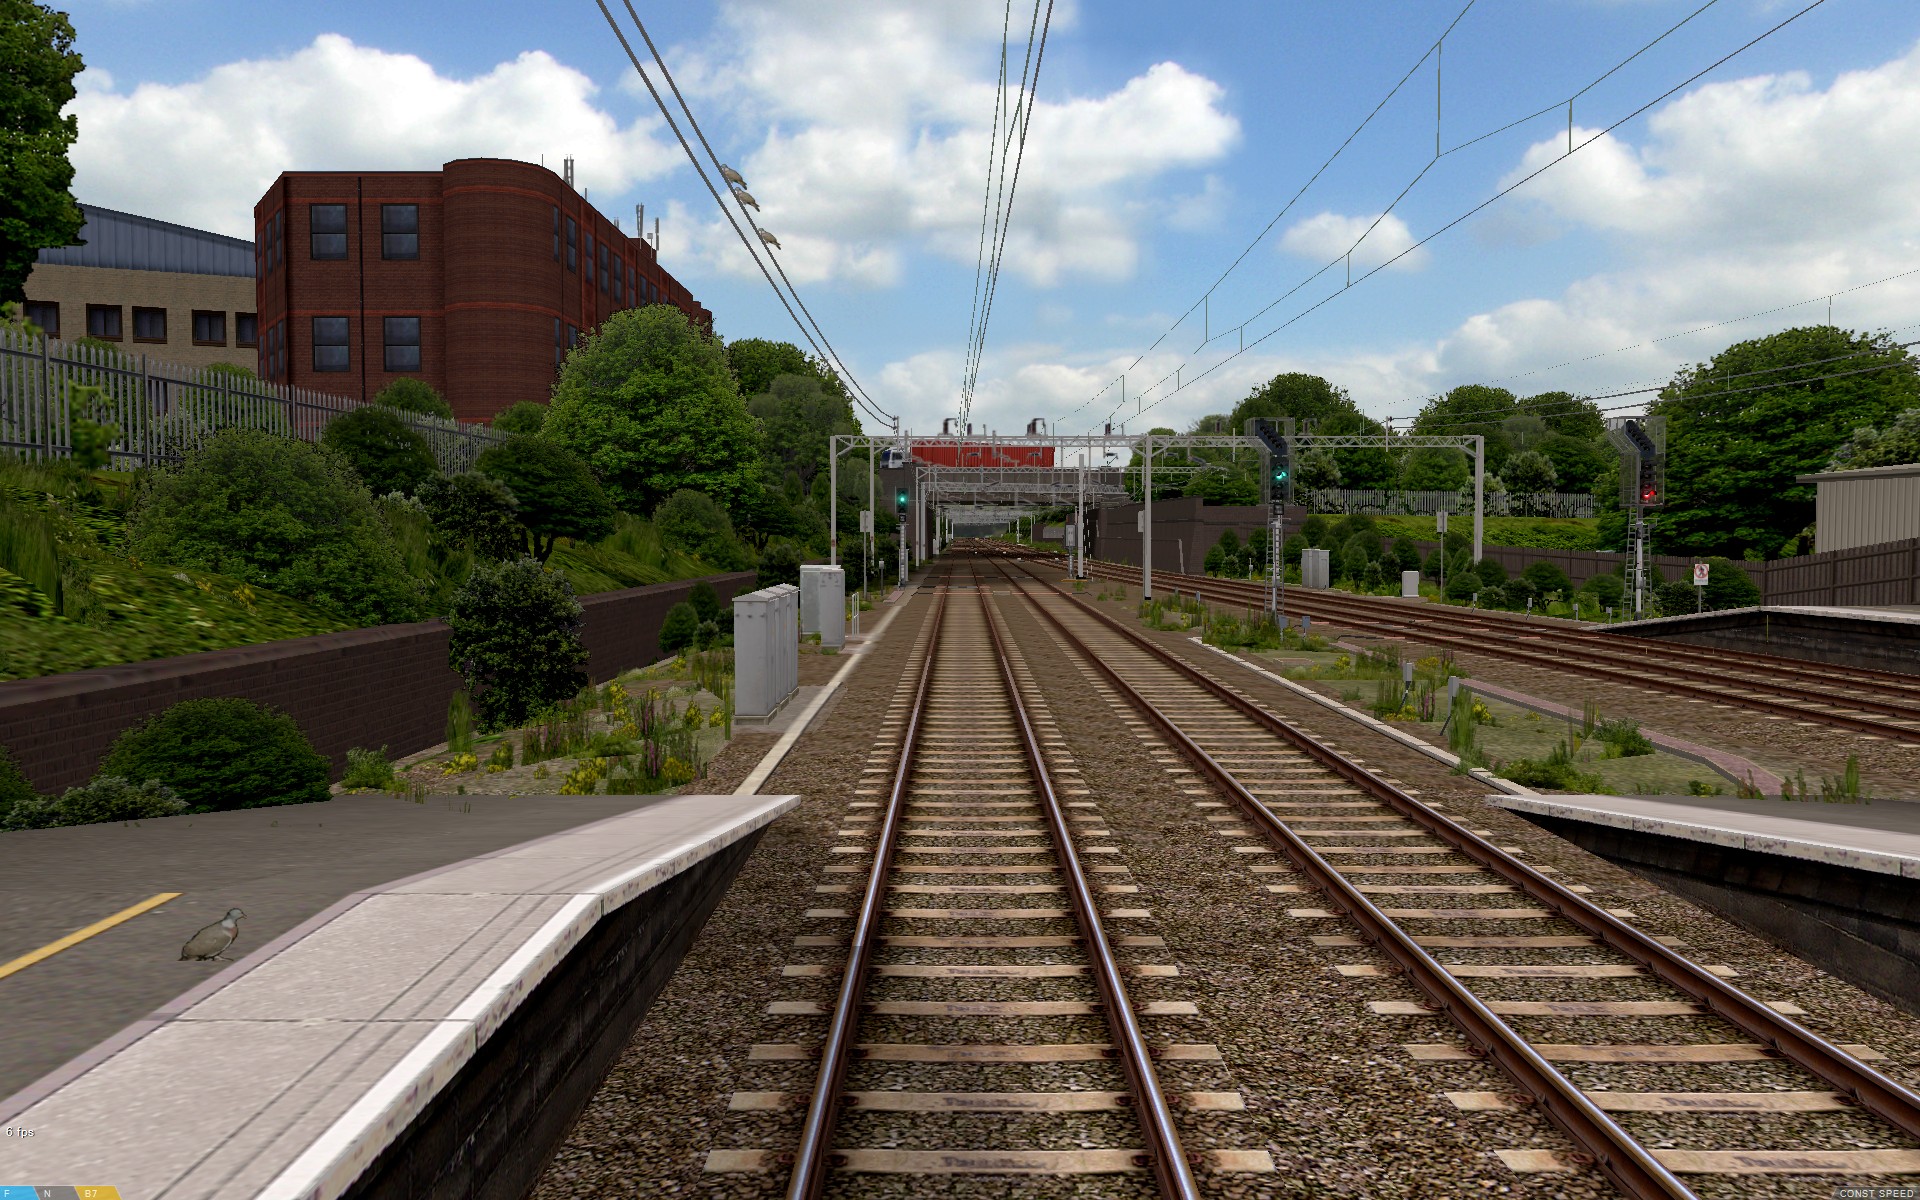
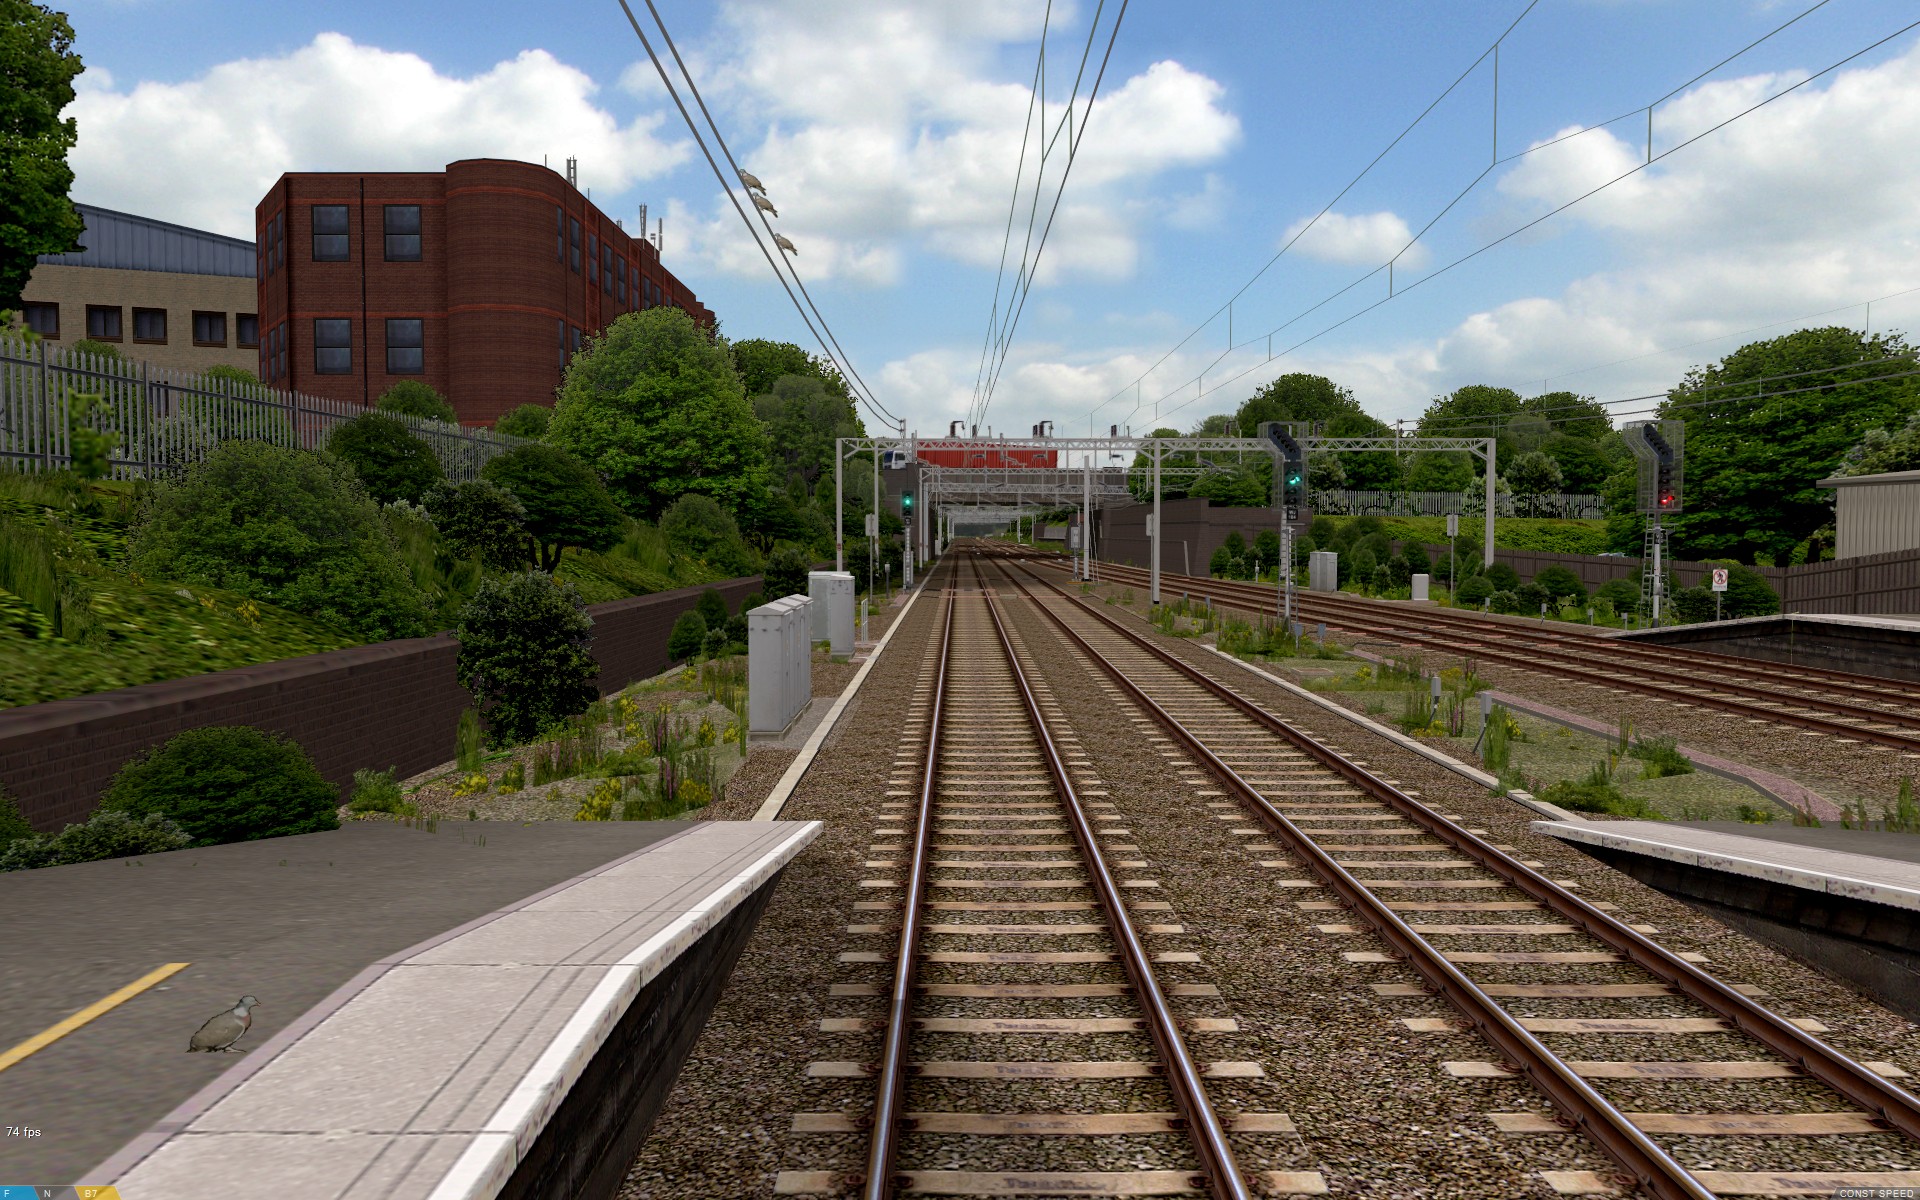
From these results, we can see that the budget Celeron E3300 is actually a rather nice CPU (which isn’t too surprising I suppose, given the architecture in use), and more than good enough for highly detailed routes such as Watford Junction to Rugby when paired with a decent graphics card. By comparing the two GeForce GTX 260 results, we can see that the speed of the CPU matters, however performance is also very clearly determined by the graphics hardware, and I would say that it’s the more important factor when it comes to openBVE performance. While I didn’t test the Core 2 Quad CPU with Intel’s GMA X4500 integrated graphics, I think it’s highly unlikely that framerates would have been much higher with this combination (overclocking the Celeron E3300 from 2.5GHz to 2.92GHz, made a difference of only around 1 fps when the integrated GMA X4500 was used). Intel’s on-board graphics is simply too slow, and the image quality is a bit poorer too, as there is no antialiasing, and the anistropic filtering level is rather limited (compare this screenshot using Intel’s GMA X4500, and a screenshot using the GeForce GTX 260). Intel’s driver control panel claims to support 16x anisotropic filtering, although openBVE/OpenGL reports that 2x is the maximum supported. The framerates don’t tell the entire story either though, as the much faster GeForce GTX 260 graphics card also gives more fluid and stutter-free performance than the budget Radeon HD 2600 Pro does. This is especially true when large textures, animated objects and higher levels of antialiasing and anisotropic filtering are used, as well.
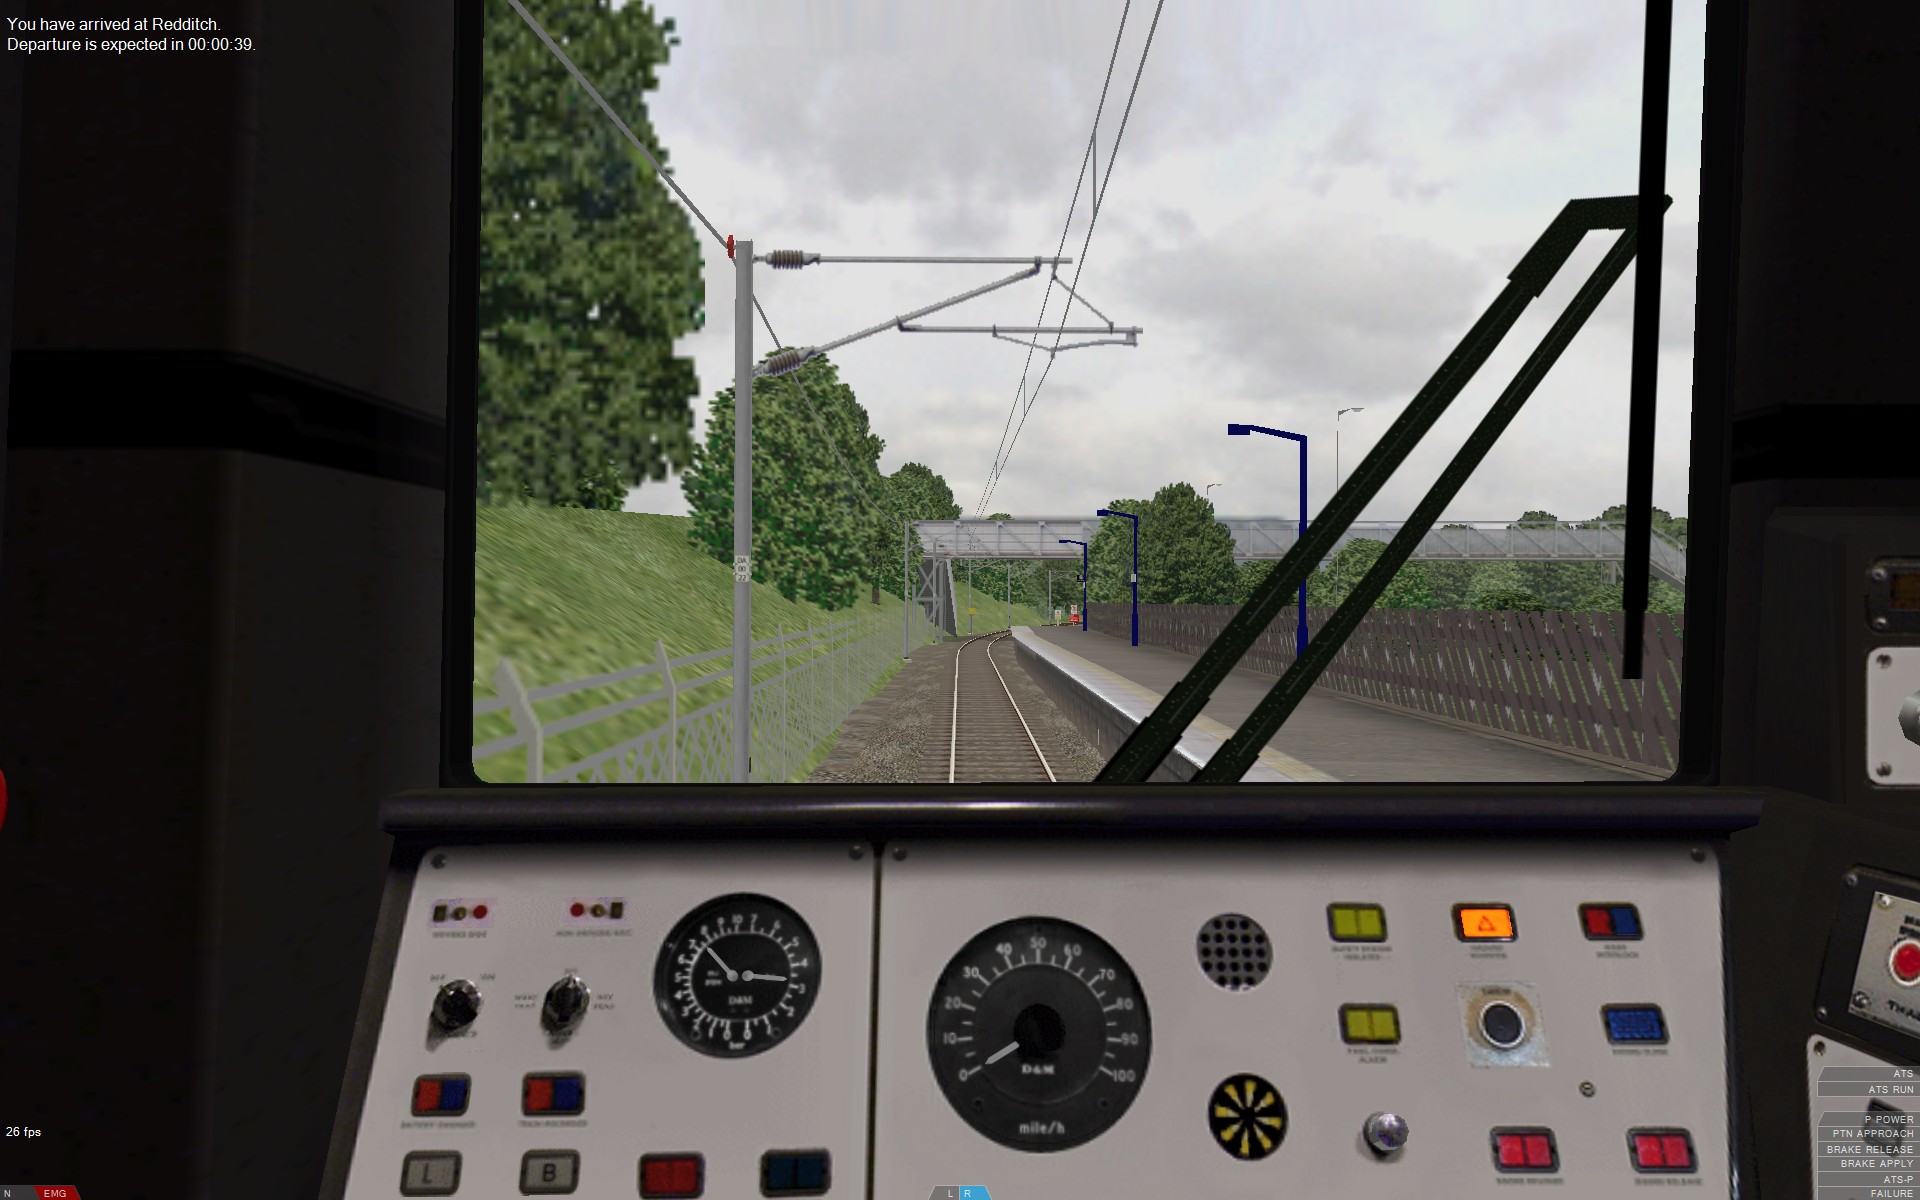
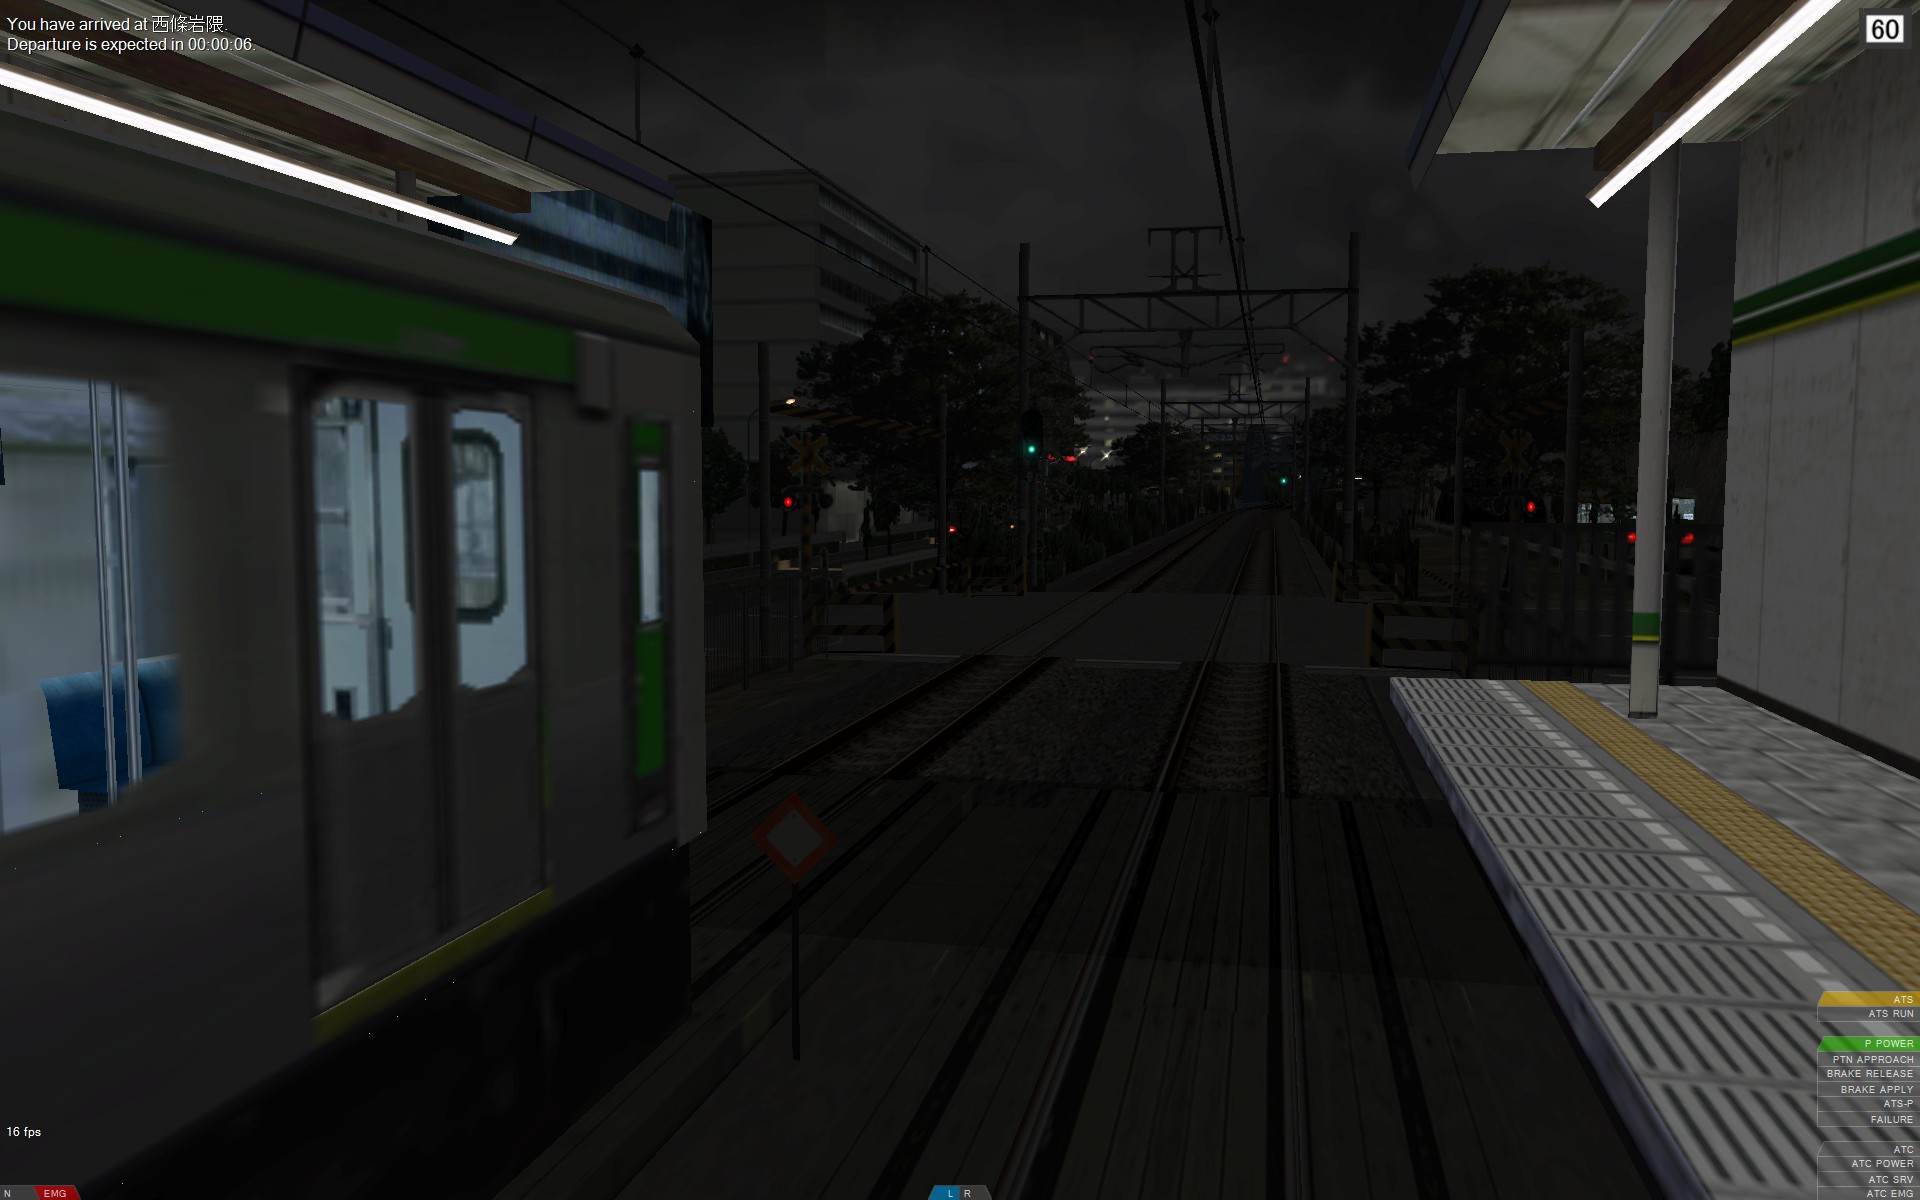
So, if anyone is thinking of upgrading their computer soon and would like to run something like Watford Junction to Rugby, and money is tight, then my advice would be to bias your budget in favour of getting the best graphics card possible, while trying to keep some balance between the CPU and GPU in terms of what each is capable of. For the energy conscious amongst you, also bear in mind that newer generation graphics hardware tends to be more power efficient for a given level of performance. While quad core CPUs are nice to have, dual core CPUs are just fine, too. Indeed, running openBVE on only two of the four cores of the C2Q Q9650 CPU, by setting the affinity for the OpenBve.exe process accordingly, makes only a small difference to performance. Running openBVE on only a single core, even at 3 GHz, does result in performance being halved though, therefore I can’t recommend a single core CPU any more, when dual core CPUs are so common now. Of course, if you can live without the rich graphics or geometrical complexity of the latest openBVE routes, and only want to run less demanding examples, or those previously designed for BVE Trainsim, then even the cheapest contemporary hardware including on-board graphics, may suit your needs just fine where openBVE is concerned, if you don’t mind losing a little image quality and have realistic expectations.
For example: [ Uchibo – Intel GMA X4500 | X-City South v1.31 – Intel GMA X4500 | Saijou Line – Intel GMA X4500 ]
Tags: Artwork, Cross-City South, Hardware, openBVE, openBVE Community, Operating Systems, Screenshots, Software, Trackwork, Watford Jn to Rugby
Posted in openBVE | 4 Comments »